Spring is in the air. The birds have returned, the trees have sprouted buds, the flowers have bloomed and most importantly, the spring downpours have washed away all of the gravel and salt from the winter, which means it’s time to get your bike out. But before you can go for a ride, there are some important steps you must take to ensure you will return safely.
- Check the tire pressure.
You can do this by squeezing the sides of the tires. They should feel firm and move less than 1 cm (3/8 inch). If they have low pressure, and most will after being stored away all winter, you can fill them with a bicycle pump or take your bike to a gas station that provides air. If you look hard enough you might be able to find a gas station that has free air.
- Check the tire for cracks.
- Check the brakes.
- Check the bike chain.
- Lubricate the bike chain
- Make any necessary adjustments to the seat and handlebars.
- Check to see that the bike can shift through all gears.
- Make sure all reflectors are in place.
- Check over your helmet.
Visually inspect the tires for cracks anywhere on the tire, including the treads. If you find a crack, the tire will most likely not be able to hold air properly and you will need to by a new tire. Anything you need for your bike can be bought at a local bike shop or any of the large chain stores that sell bikes, like Canadian Tire or Wal-Mart, for example.
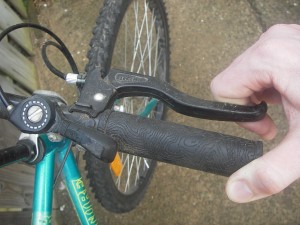
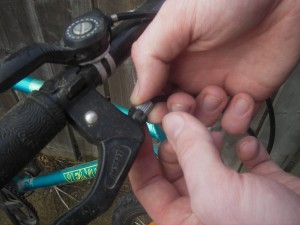
When you squeeze the brake handle it should come to half way between its original position and the handlebar. If it comes to far or not far enough, you can adjust the brake cable by turning the knob on the handle where the cable enters, this is called the adjustment barrel . Turn it until the brake handle comes to the proper position, there is no harm in first turning it in the wrong direction. If you find any larger problems with the brakes, it is time to take your bike to a professional.
You are looking for rust and stiff links. If you find rust you can remove it with a stiff brush. If you find a portion of stiff links you can message that area while you are lubricating the chain.
Find a bike chain lubricant that says it is for wet conditions. Again you can find this product at any bike shop or large chain store that sells bikes. To apply the lubricant, flip the bike up-side-down so that it is balanced on its seat and handlebars. While rotating the tire and chain by peddling with your hand, dribble the lubricant onto the chain until the chain looks uniformly wet. Let this sit for 10 or so minutes before moving on to the next step.
The seat is in the right position when you can reach the ground with both feet, comfortably and safely, without excessive bending of the knee. The handlebars are in the right position when you can hold them comfortably without your knees touching them while you peddle.
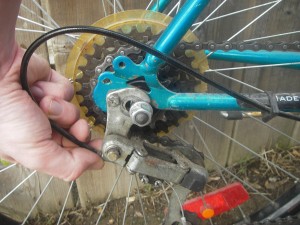
By this point it is safe to do this test while riding the bike. Or, if you would rather, you can lift the back tire and peddle with your hand. To check the gear shifting, you just peddle through all of the gears. If any of them are sticking considerably or jumping to the wrong gear, you need to adjust the cable tension so that the chain is in line with the cog. If this all sounds a bit too complex it may be time to take your bike in for a professional tune up.
If any of the reflectors are broken or missing you can by a new one, which are quite inexpensive at any large chain store, to replace them. They simply screw on to the bike.
Before you take your first ride, you need to make sure your helmet will do its job when called upon. Look over the helmet for any cracks or breaks. If the helmet is not 100 percent up to par, you should buy a new one.


