How I Roll: 1940s Waves

How I Roll: 1940s Waves | Sophster-Toaster Blog

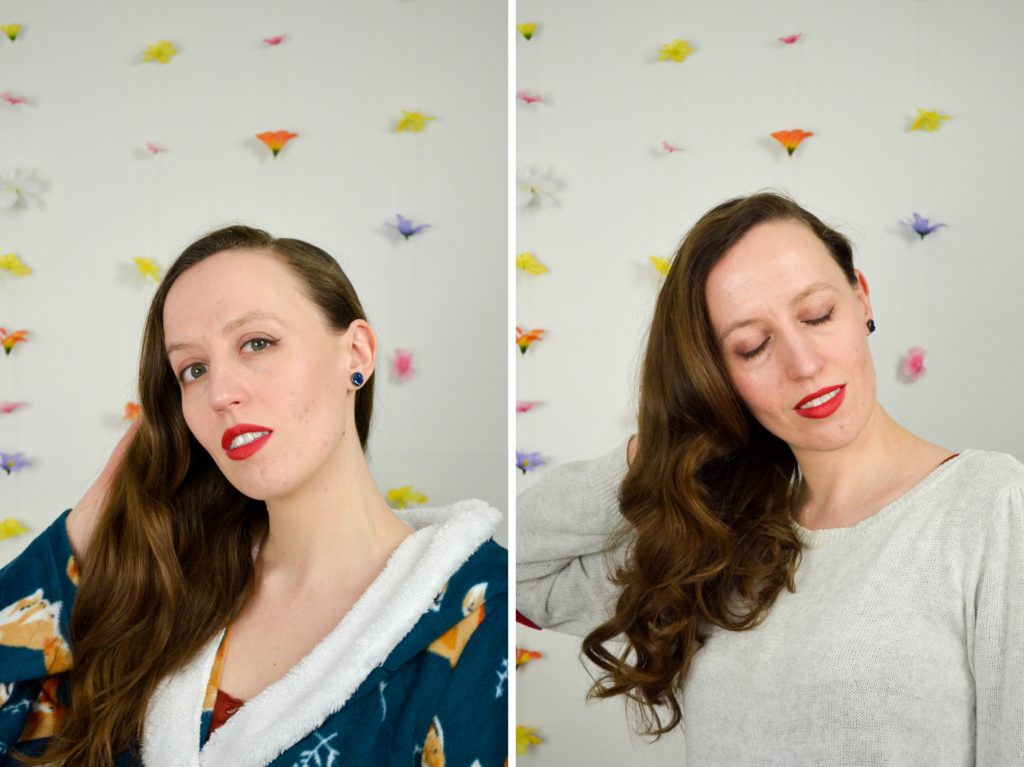
My hair is naturally not quite straight, not quite curly. I let it air dry 99% of the time after applying some moisturizing oil. If I don’t brush it out after drying, and let the curls do their thing, I sometimes get a nice bunch of neat and tidy loose curls, but more often than not, what I get is some lovely toddler curls underneath with a frizzy mess on top. So I usually end up brushing them out into waves with a boar hair paddle brush and applying more moisture oil to keep everything in check. I’ve been growing my hair out, recently, into a sort-of Veronica Lake inspired style. To keep it healthy, I’ve cut back to only two washes a week and I’ve been saving heat styling for special occasions. To get my hair from mind-of-its-own waves to movie-star glamour waves without the damaging heat, I’ve been letting my hair dry in pin curls after most washes. Here’s the rolling pattern I use:

How I Roll: 1940s Waves | Sophster-Toaster Blog

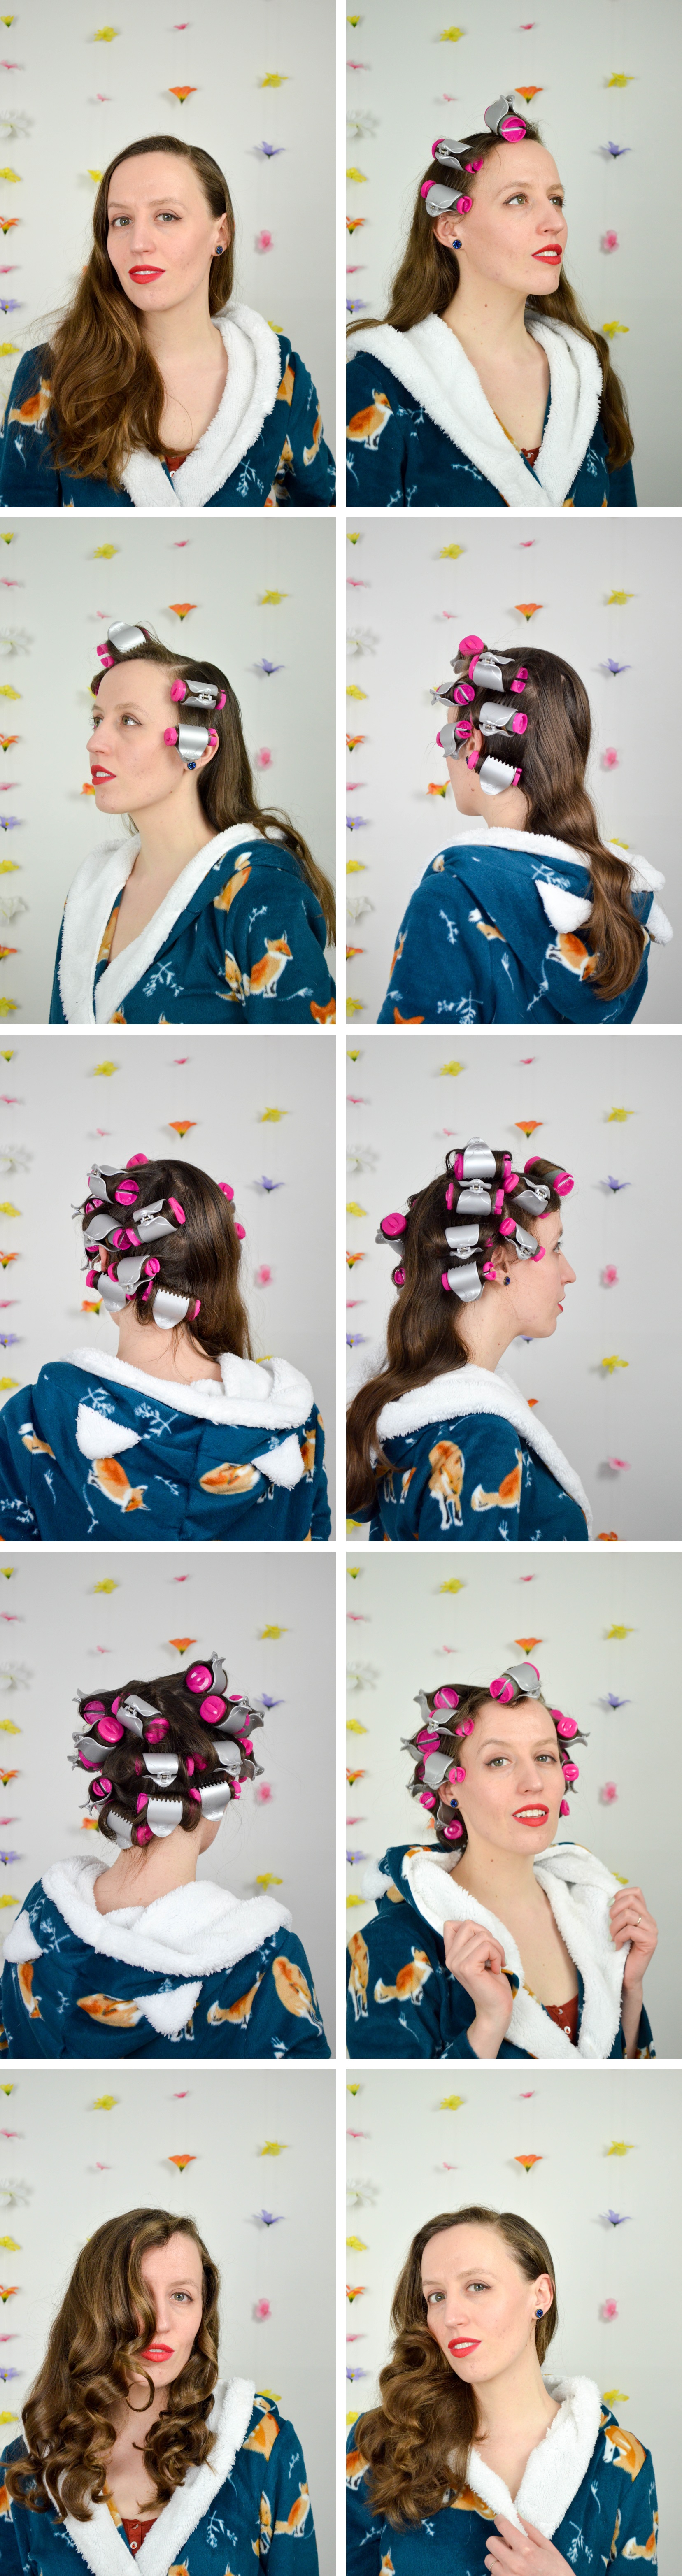
I usually use this same roll pattern with pin-curl clips on damp, lightly moussed hair. Today I’m using hot rollers on second day hair that was simply combed and air dried for the sake of speed (aka tutorial magic).

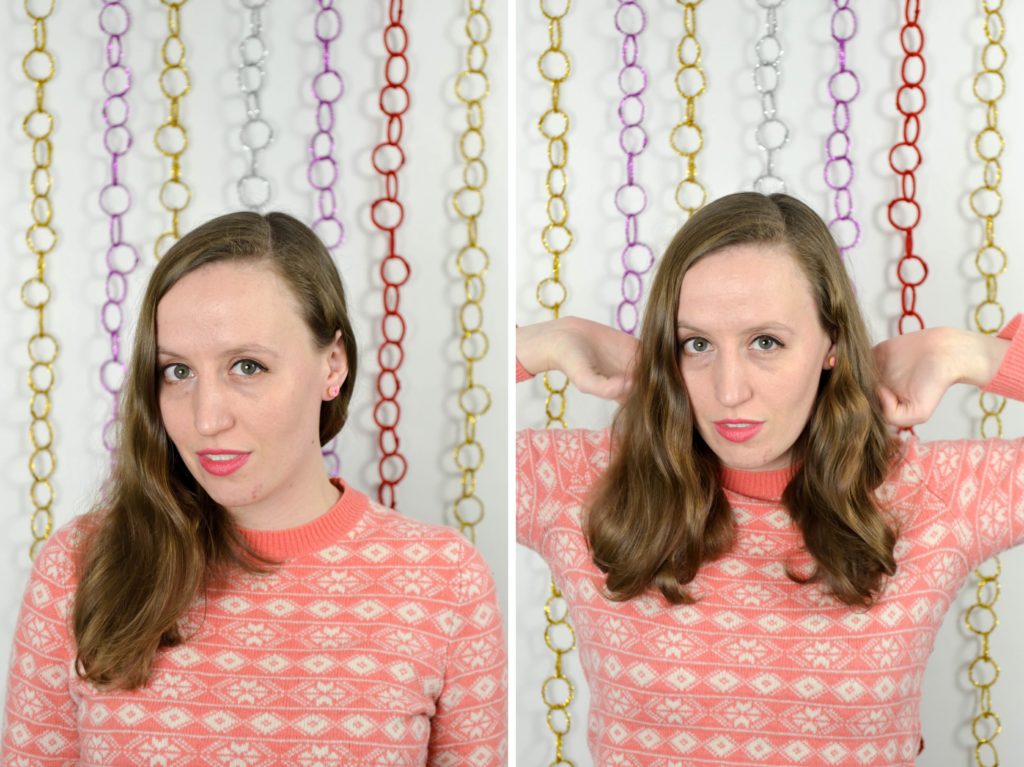
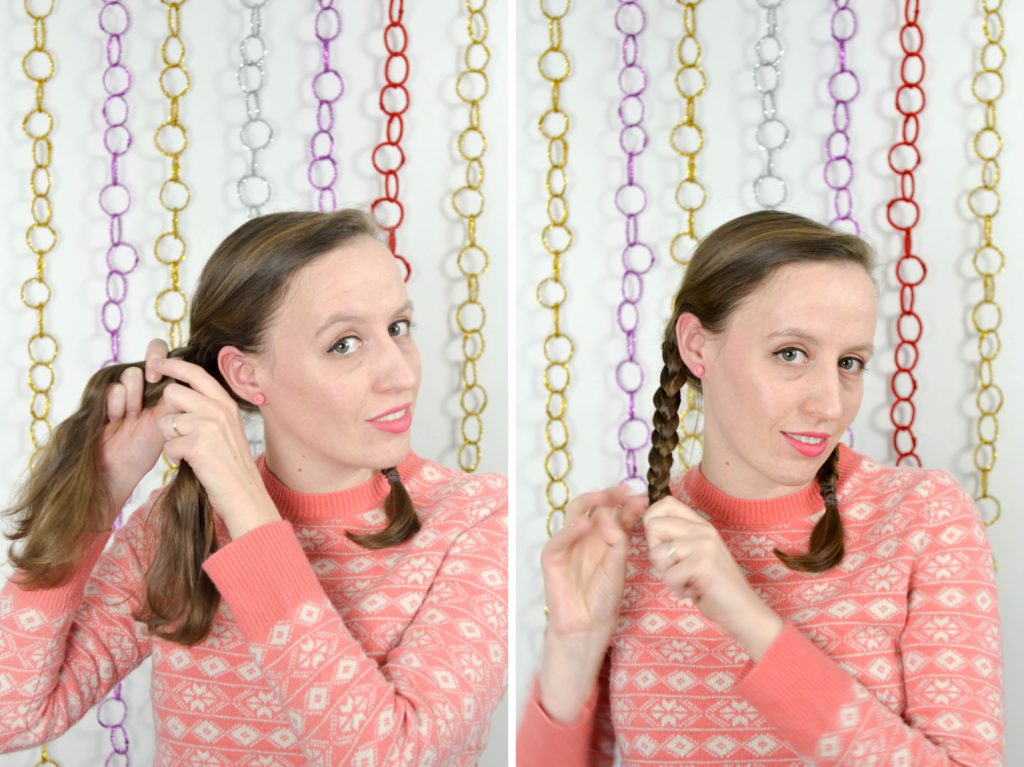
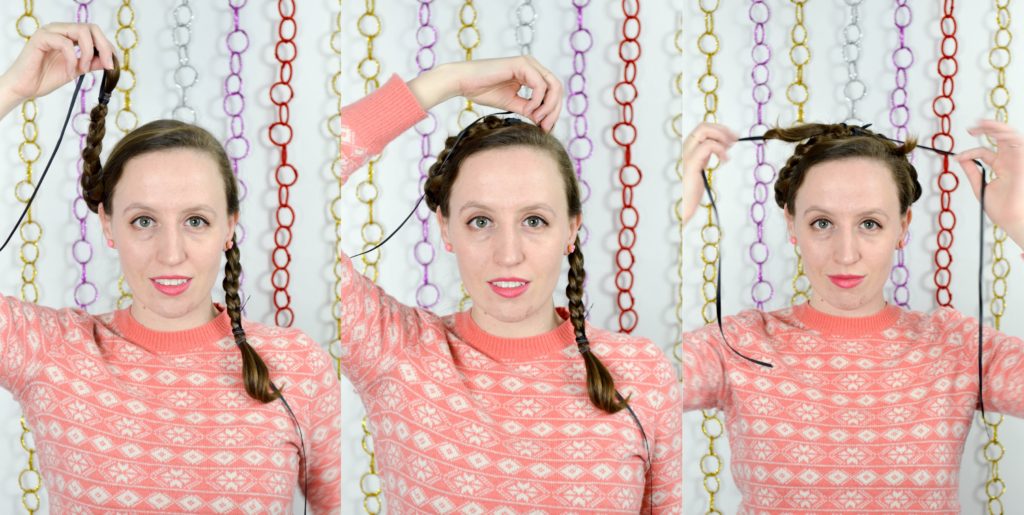
Step one: brush out hair and part far to the side.

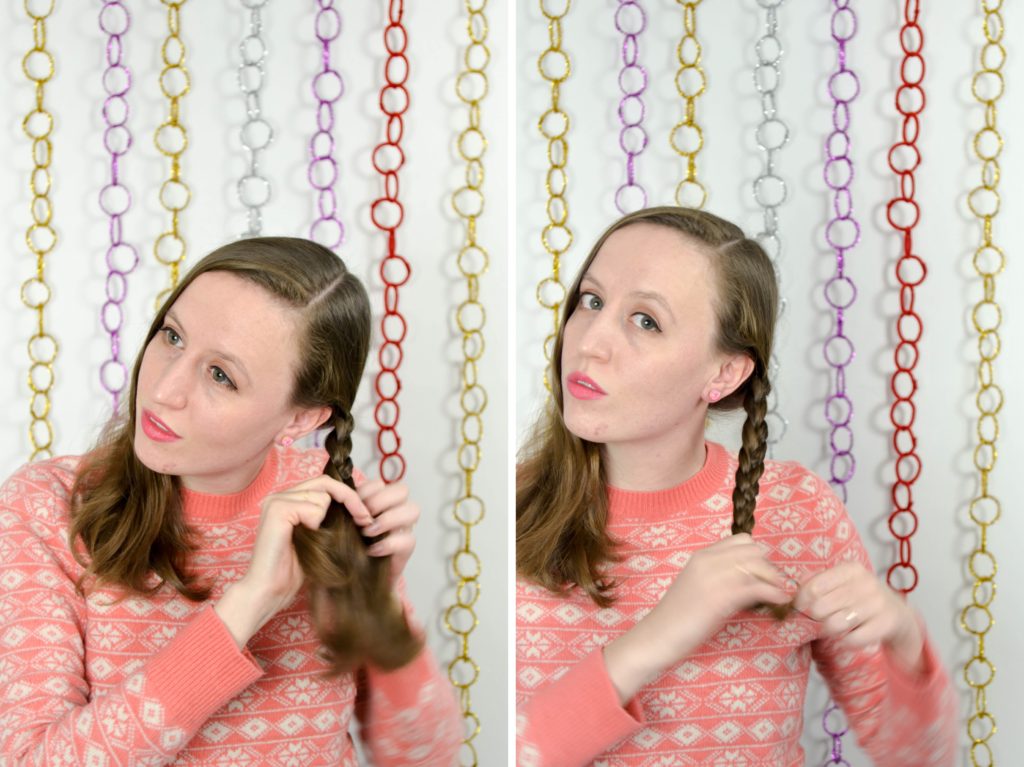
Step two: section hair on side without part from behind your ear to the part. Divide into 2-3 horizontal sections, depending on length and thickness, and roll hair inwards.

Step three: repeat on other side, dividing into 1-2 sections.

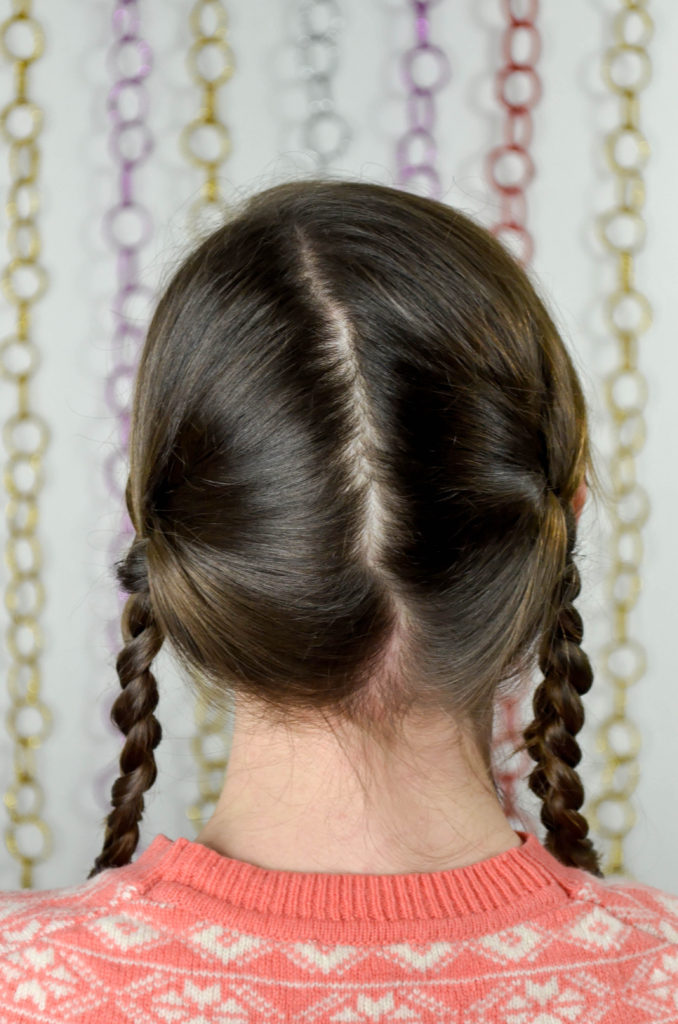
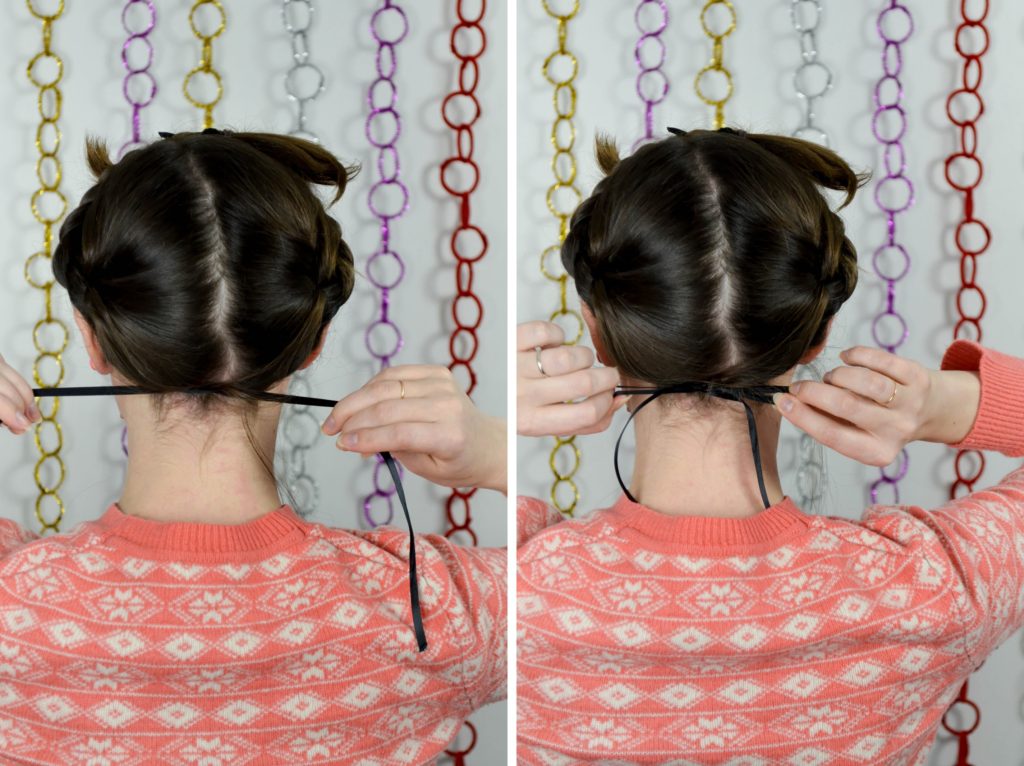
Step four: section hair, vertically, into four equal parts, parting down the centre and dividing each half in half again. On side with part, roll hair in 2-3 sections. I like to roll the bottom sections from here-on-out outwards instead of inwards for a bit of a flip at the bottom of my waves.

Step five: roll the back section of this side in 2-3 sections as well.

Step six: repeat on other side, using 3-4 sections for the front section, as you will have more hair gathered on this side, and 2-3 for the back.

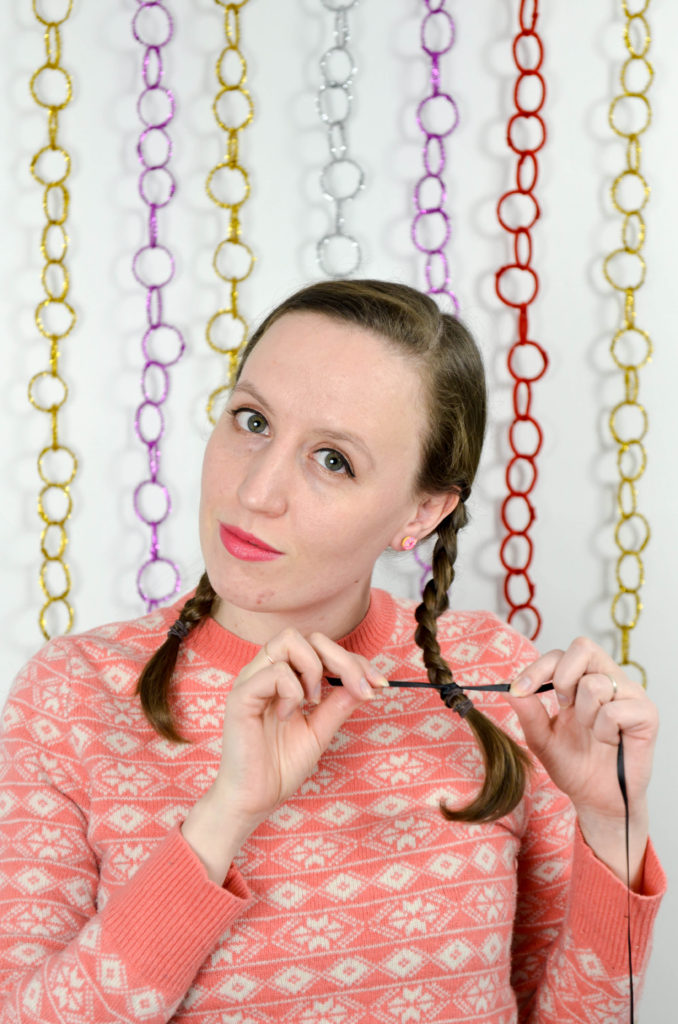
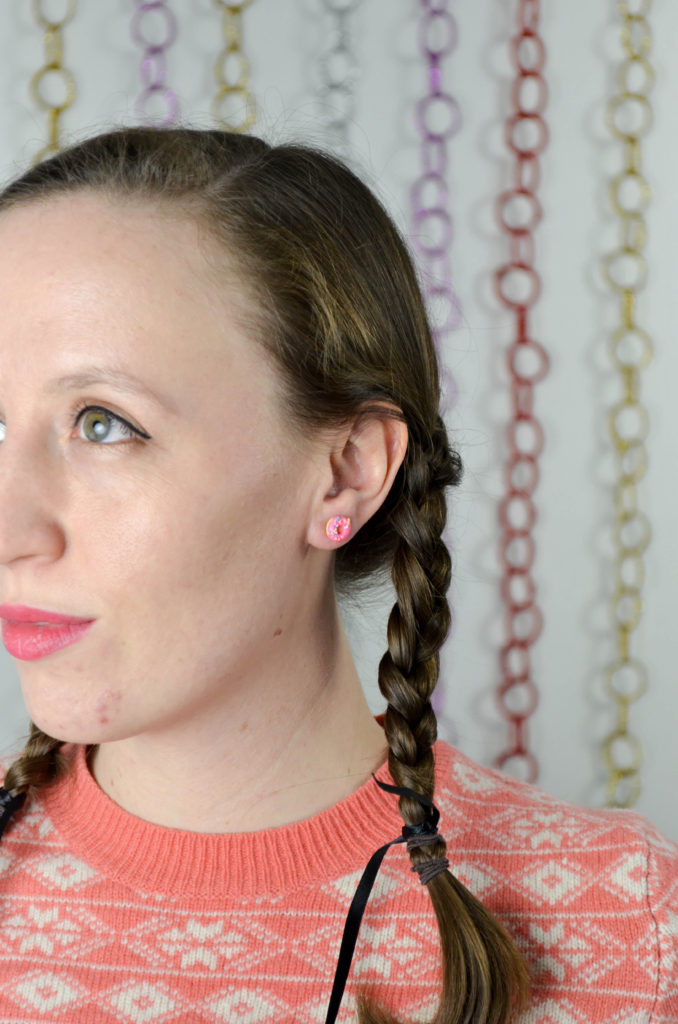
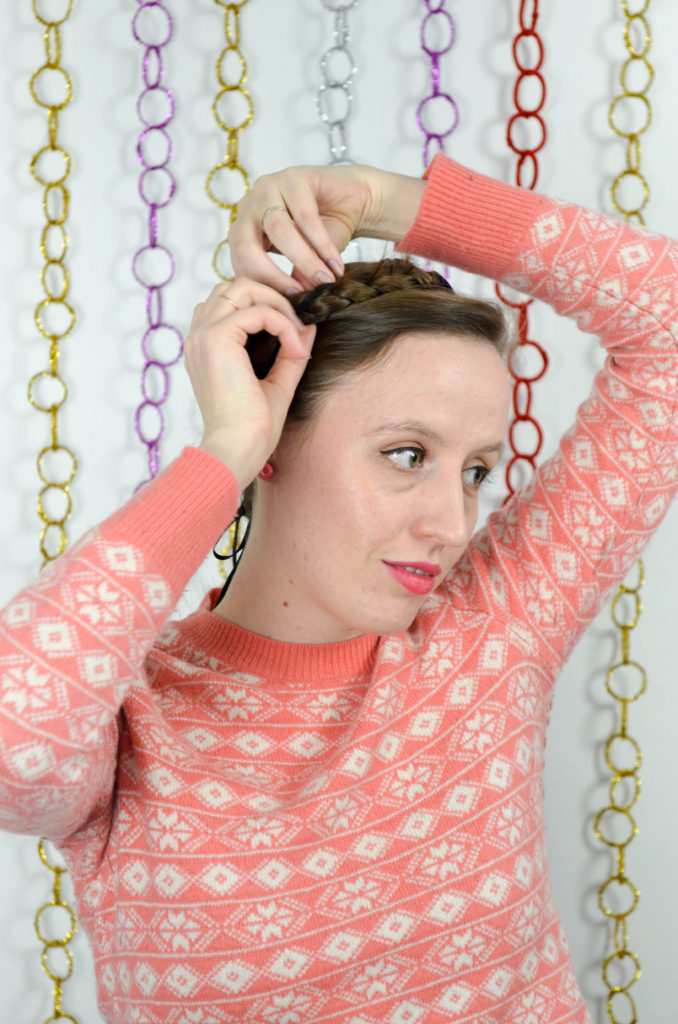
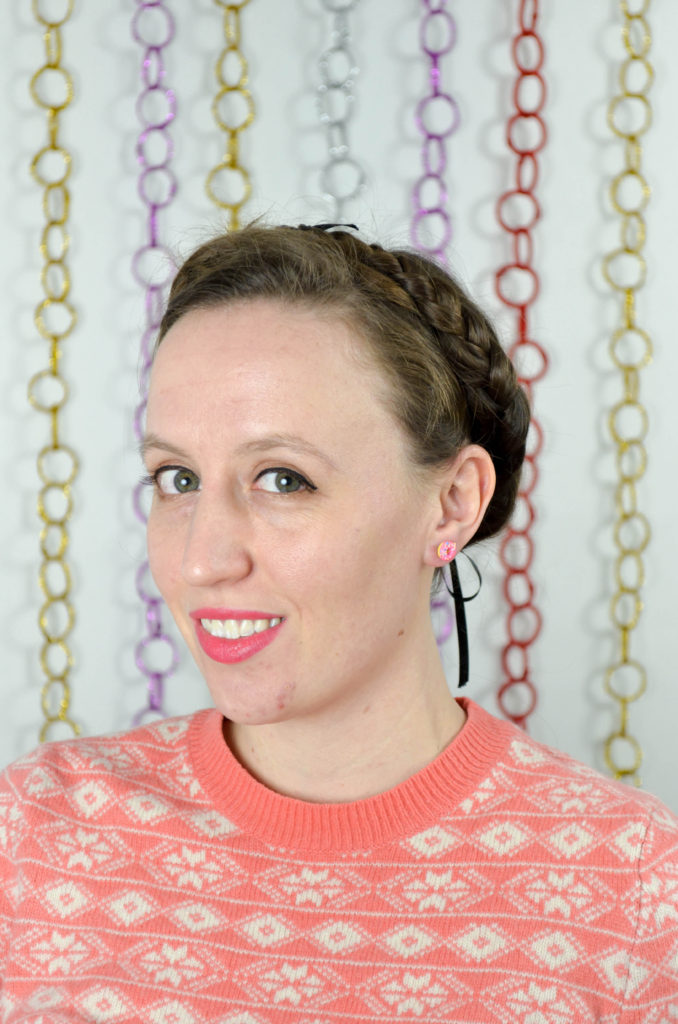
Step seven: let hair dry/cool. Remove clips/rollers and give hair a gentle tousle to loosen up some volume at the roots. Brush curls out softly with a boar hair brush, trying to only pass each area once. Set with hair spray, if you like.

How I Roll: 1940s Waves | Sophster-Toaster Blog

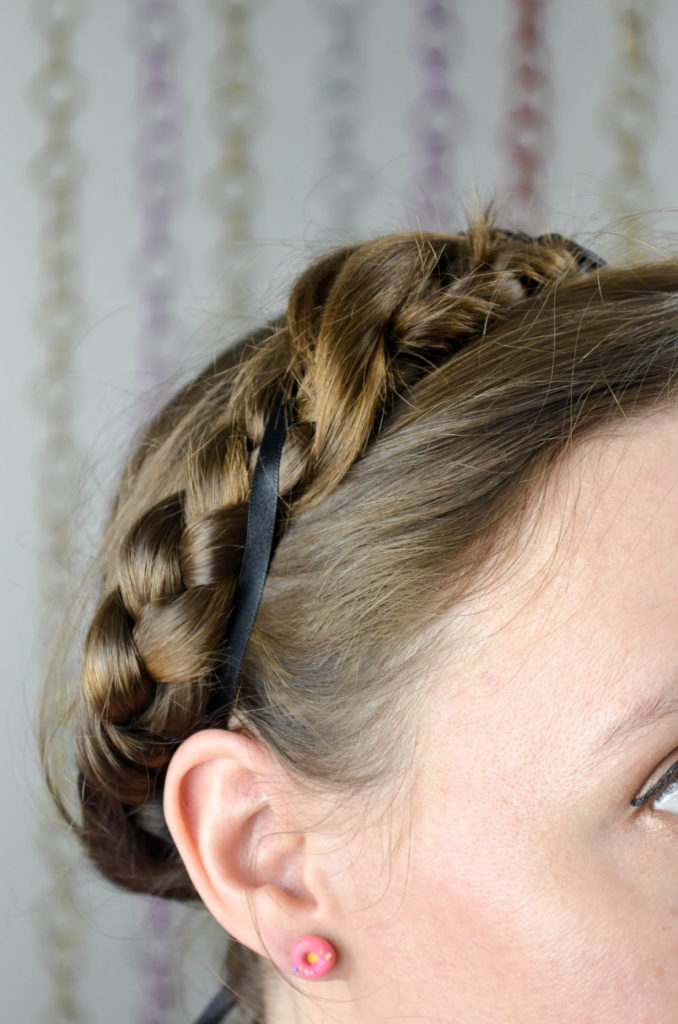
This roll pattern also sets a nice foundation for half up, half down throw-back styles like a Zooey Deschanel beehive.

All photos by me.

How to Make a Cushion Cover

How to Make a Cushion Cover | Sophster-Toaster Blog

A cushion cover takes a lot of fabric but not a lot of tools, practice or patience. It takes less than half an hour to complete and doesn’t require much skill, so it’s a good introductory project for anyone just learning how to sew. With an envelope style cushion cover like this, there are no zippers, buttons or button holes to sew in, making it a nice, relaxing project with a nap-ready result.

Fits snugly on a 20 x 20 Ikea cushion.

Tools Needed

  • fabric scissors
  • chalk pencil (or something for marking)
  • long ruler
  • pinking shears (or serger)
  • point turner (or similarly shaped object)
  • 1 yard or metre of a sturdy, woven fabric like twill or canvas for one pillow (1.5 yards for two). I will be using lightweight cotton twill from Spoonflower.

How to

Step 1

  • With fabric running lengthwise and folded in half so selvage sides are together, use a ruler and chalk pencil to draw a straight line to trim up the cut end of your fabric.

How to Make a Cushion Cover | Sophster-Toaster Blog

Step 2

  • Measure 21¼” from your first cut and draw a straight line. Cut.

How to Make a Cushion Cover | Sophster-Toaster Blog How to Make a Cushion Cover | Sophster-Toaster Blog How to Make a Cushion Cover | Sophster-Toaster Blog

Step 3

  • Rotate the fabric so you are measuring from the one folded side. Measure 24″, draw a straight line and cut. (Save the cut away piece for your next quilt.) You should now have a long rectangle.

How to Make a Cushion Cover | Sophster-Toaster Blog How to Make a Cushion Cover | Sophster-Toaster Blog How to Make a Cushion Cover | Sophster-Toaster Blog How to Make a Cushion Cover | Sophster-Toaster Blog

Step 4

  • Hem the two shorter sides of your lovely new rectangle by folding the edge over 3/8″, pressing with your iron, folding over again ½”, pressing again and sewing at the 3/8″ guideline on your sewing machine.

How to Make a Cushion Cover | Sophster-Toaster Blog How to Make a Cushion Cover | Sophster-Toaster Blog How to Make a Cushion Cover | Sophster-Toaster Blog

Step 5

  • Fold one of the hemmed short sides over by 6″ with wrong (printed) sides together.

How to Make a Cushion Cover | Sophster-Toaster Blog

Step 6

  • Fold the other side over to meet the folded edge. Press folds to hold them in place while you sew.

How to Make a Cushion Cover | Sophster-Toaster Blog How to Make a Cushion Cover | Sophster-Toaster Blog How to Make a Cushion Cover | Sophster-Toaster Blog

Step 7

  • Sew along entire open side with 5/8″ seam allowance. Finish the seams with pinking shears or a serger, if you have one. Trim the corners close to the stitching so they will turn out neatly.

How to Make a Cushion Cover | Sophster-Toaster Blog

Step 8

  • Turn your new cushion cover right side out. Using a point turner (or similarly shaped object) work the fabric into the right places for a nice, crisp corner. Press to remove any wrinkles.

How to Make a Cushion Cover | Sophster-Toaster Blog How to Make a Cushion Cover | Sophster-Toaster Blog

Don’t forget to wash and line-dry fabric before starting to prevent your finished project from shrinking. Give it a quick ironing, on reverse side of print, for more accurate measuring and straighter cuts.

How to Make a Cushion Cover | Sophster-Toaster Blog

All photos by me.

How To Care for Knits

How to Care for Knits | Sophster-Toaster Blog

I went thrift shopping for second hand sweaters recently and was somewhat shocked to see just how poorly people were taking care of their knits. Many sweaters, no more than decade old, were falling apart while those made of similar materials from 20 and 30 years ago were holding up just fine. I had to turn down several cute sweaters that had clearly been washed and even dried (gasp) with the regular laundry and then hung up in the closet. These sweaters with pilled, stretched and distorted to within an inch of their lives. Luckily, I still found plenty of well cared for pieces to choose from.

I wasn’t always a good knit respecting person. When I was a teenager I threw my knits into the regular wash without thinking, but I always pulled them out to dry, sometimes flat, sometimes on the clothesline – though I’m sure my brother just tossed them in the  dryer when he was on laundry duty. I only started folding my sweaters instead of hanging them a few months ago when I realized it was the best way to avoid stretched out sleeves and shoulder dents. Here’s what I’ve learned since coming to respect the wool, cotton and acrylic yarn of my sweaters, knee socks and knit tights.

How to Care for Knits | Sophster-Toaster Blog

How To Wash Knits

  • Sort your knits like you would your other laundry, into at least two different washes: lights and darks. This is especially important with knits as your lighter coloured items will pick up fuzz and pill in the darker colours with age.
  • Use a laundry detergent compatible with knits/delicates, I use Woolite for everything.
  • Wash on a gentle or wool setting (I wash my knits with my dresses and other delicates) with a low spin so your wool doesn’t get stretched.
  • Remove promptly before weird creases can set in.
  • Dry flat no matter what the care label says! Never hang a knit to dry. (I use a clotheshorse drying rack with a flat top.)

How To Store Knits

  • Once dry, fold up your knits and store them in a drawer or on a closet shelf with good air circulation. You can hang chalk in your closet to decrease humidity or cedar chips to help prevent moths.

Knits will take a little bit of damage every time you wash them, so try to wear them a few times before tossing them in the laundry basket. Follow these steps and your knits will look new for years!

How To Care for Knits | Sophster-Toaster Blog How To Care for Knits | Sophster-Toaster Blog How To Care for Knits | Sophster-Toaster Blog How To Care for Knits | Sophster-Toaster BlogHow To Care for Knits | Sophster-Toaster Blog

Top H&M
Cardigan ModCloth
Skirt Sophster-Toaster
Tights Shopper’s Drug Mart
Shoes ModCloth
Necklace Craft Arts Market / Sweetheart Jewelry Box

All photos by me.

No Pin Milkmaid Braids

No Pin Milkmaid Braids | Sophster-Toaster Blog

I love wearing my hair in milkmaid braids since growing it out. It’s one of the best ways to hide unwashed (and overgrown) hair. It’s great for camping and cottage trips where you can’t always wash or even wet your hair and don’t want to carry a lot of products. Before this fall, the only thing keeping it from being my perfect go-to hairstyle was all the tucking, pinning and pulling needed to pull off that charming trying-really-hard-to-look-like-I’m-not-trying look. Since then, I’ve found the secret to making milkmaid braids the quick and easy, lazy day style they deserve to be!

No Pin Milkmaid Braids | Sophster-Toaster Blog

I was inspired by a horror movie I watched around Halloween. I noticed that in the beautiful but not very exciting, The Witch, the 17th century New England women were wearing their hair in milkmaid braids, held together only by long pieces of ribbon. The next morning, I sauntered out of bed, as eagerly as one can, to see if this ribbon only method could really work. I found that I couldn’t do away with a couple of small hair elastics, to keep the ribbons from slipping off the ends of the braids, but was quite pleased when everything stayed in place without a single pin. They held tight for the rest of the day, captured by the light tension of ordinary ribbons I found laying around in my sewing stash.

Those women were on to something. With a bit of practice, these no pin milkmaid braids only take about 10 minutes to create and are comfortable worn all day. Here’s how I do it:

How-to:

  1. Start with brushed and moisturized hair. Split into two sections, down the middle, using a comb (or fingers for a messier look).

No Pin Milkmaid Braids | Sophster-Toaster Blog

2. Starting high up, near the top of the ear, braid each section leaving as short a tail as you can at the end.

No Pin Milkmaid Braids | Sophster-Toaster BlogNo Pin Milkmaid Braids | Sophster-Toaster BlogNo Pin Milkmaid Braids | Sophster-Toaster Blog

3. Cut two matching lengths of ribbon long enough to tie to the end of each braid, wrap around to the nape of the neck and tie in a bow. Tie each ribbon securely to the end of each braid, just above the elastic. I like to tie a basic knot, then wrap the ribbon around to the other side and tie another knot.

No Pin Milkmaid Braids | Sophster-Toaster Blog No Pin Milkmaid Braids | Sophster-Toaster Blog

4. Next, pick each braid up and place it over the top of your head. Hold each ribbon and pull them tightly across to hold the braids in place.

No Pin Milkmaid Braids | Sophster-Toaster Blog

5. Pull the ribbons around to the nape of your neck and tie in a bow. Tip you head back slightly to make sure the braids don’t slip off the back. It they do slide off, try placing them further forward, towards your hairline.

No Pin Milkmaid Braids | Sophster-Toaster Blog

6. Tuck in the ends of the braids, the ends of the ribbons and any other loose pieces of hair and you’re done!

No Pin Milkmaid Braids | Sophster-Toaster Blog No Pin Milkmaid Braids | Sophster-Toaster Blog

I find this method works especially well for medium length hair that isn’t quite long enough for any meaningful braid overlap to be pinned together.

No Pin Milkmaid Braids | Sophster-Toaster Blog No Pin Milkmaid Braids | Sophster-Toaster Blog

I like to use dark ribbon that blends into my hair colour but it might be fun to use brightly coloured ribbons and wrap them around the braids for a festive party look!

All photos by me.