Rose Macarons

Rose Macarons | Sophster-Toaster

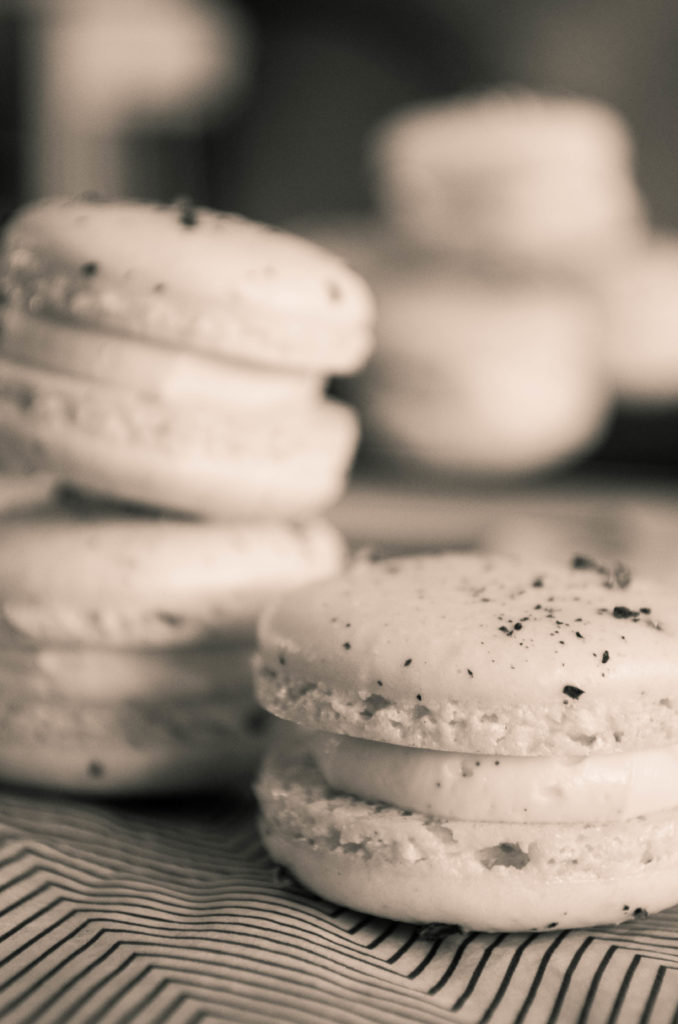
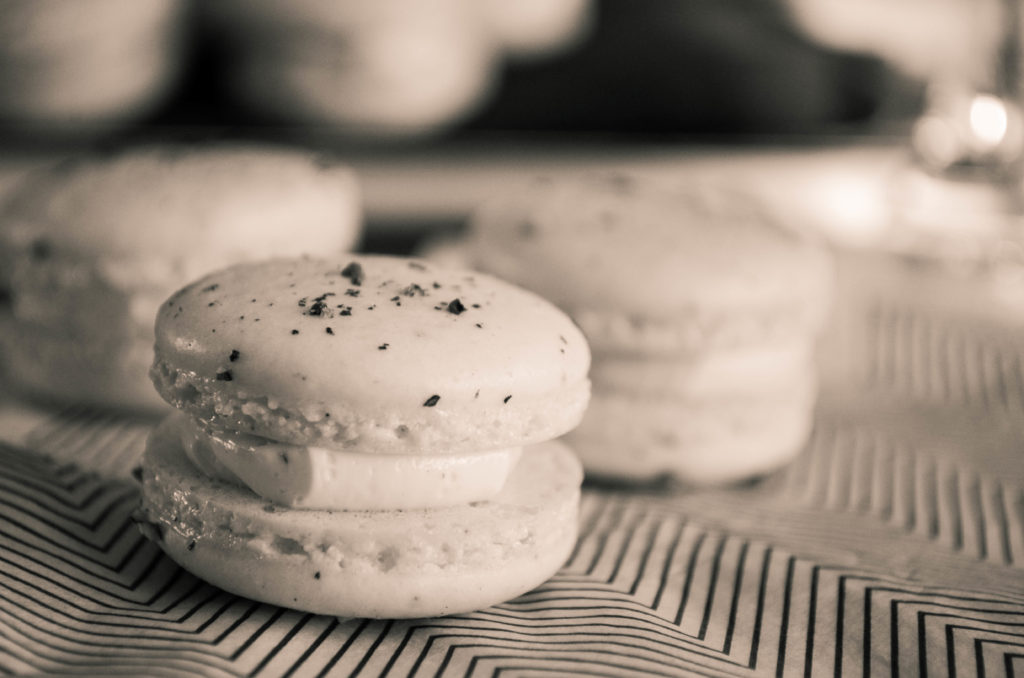
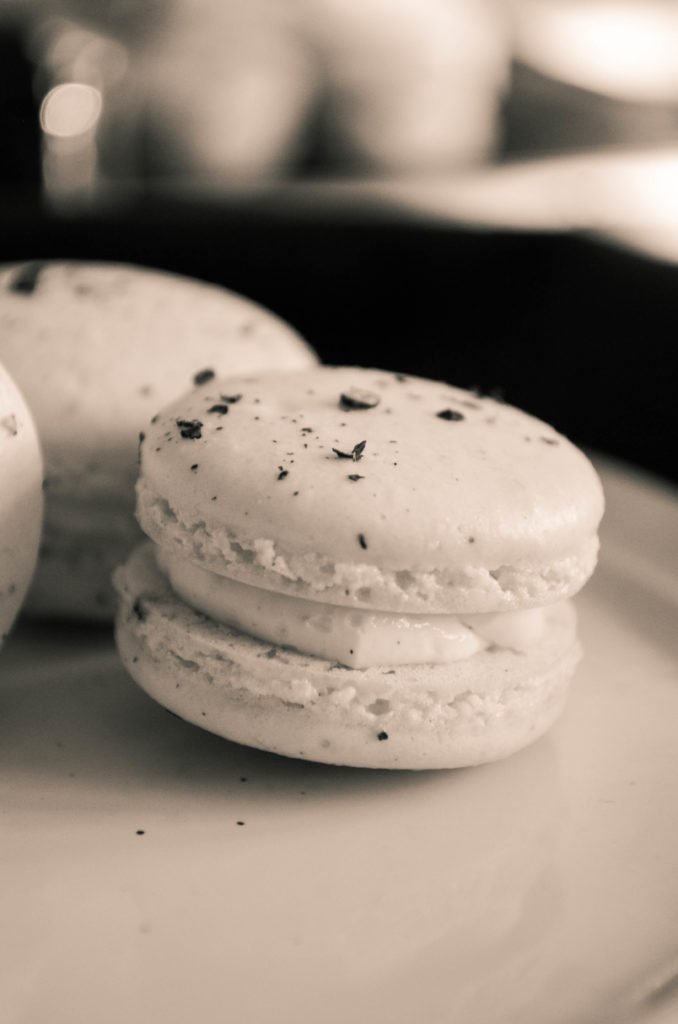
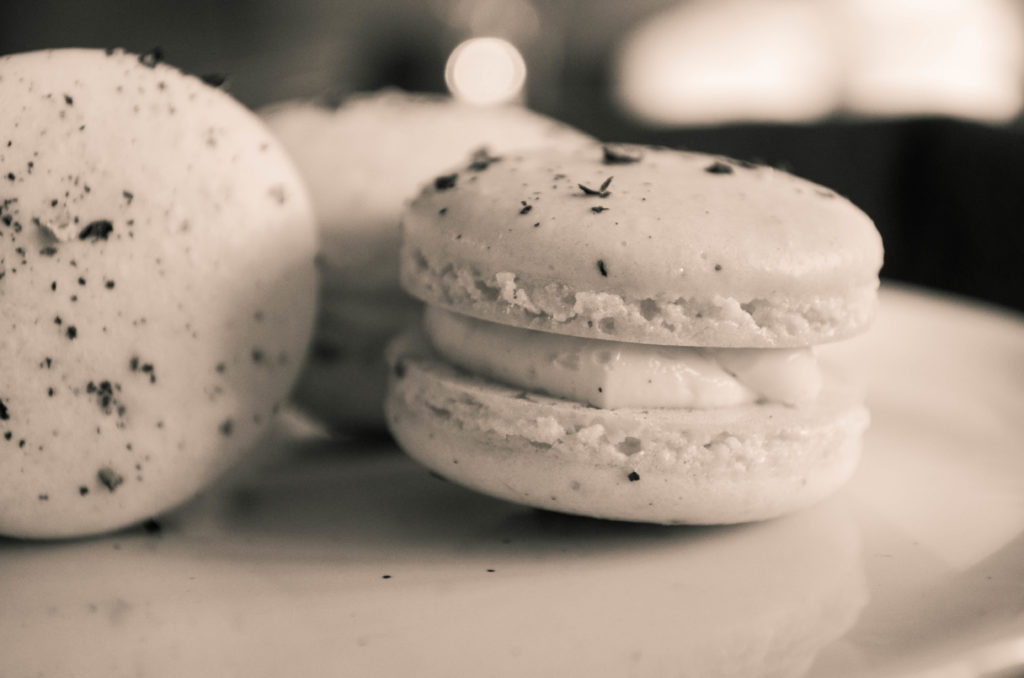
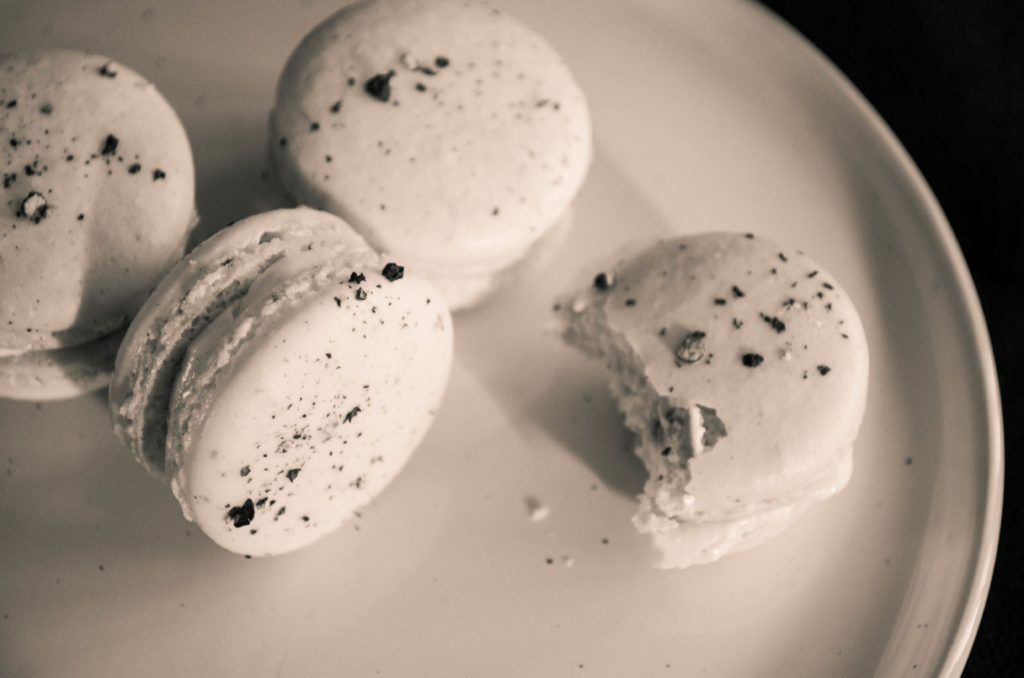
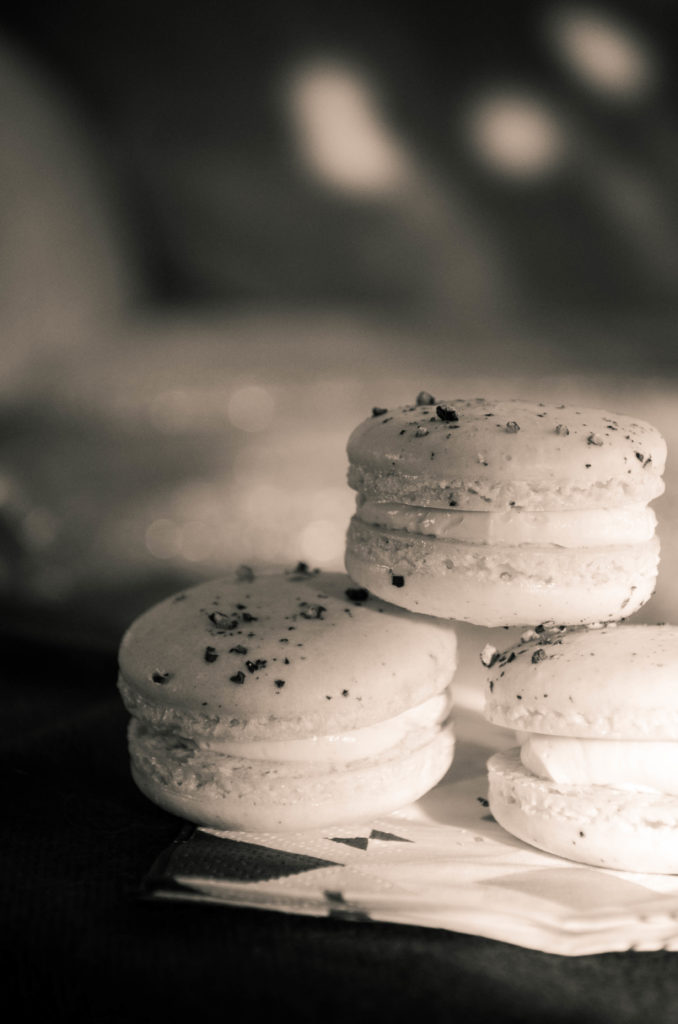
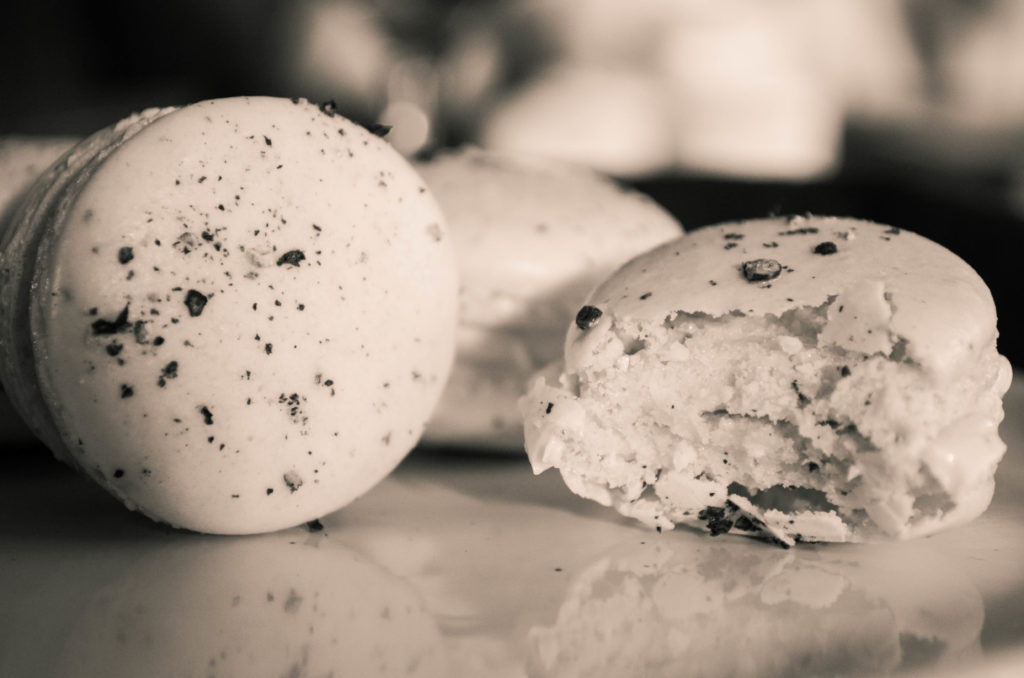
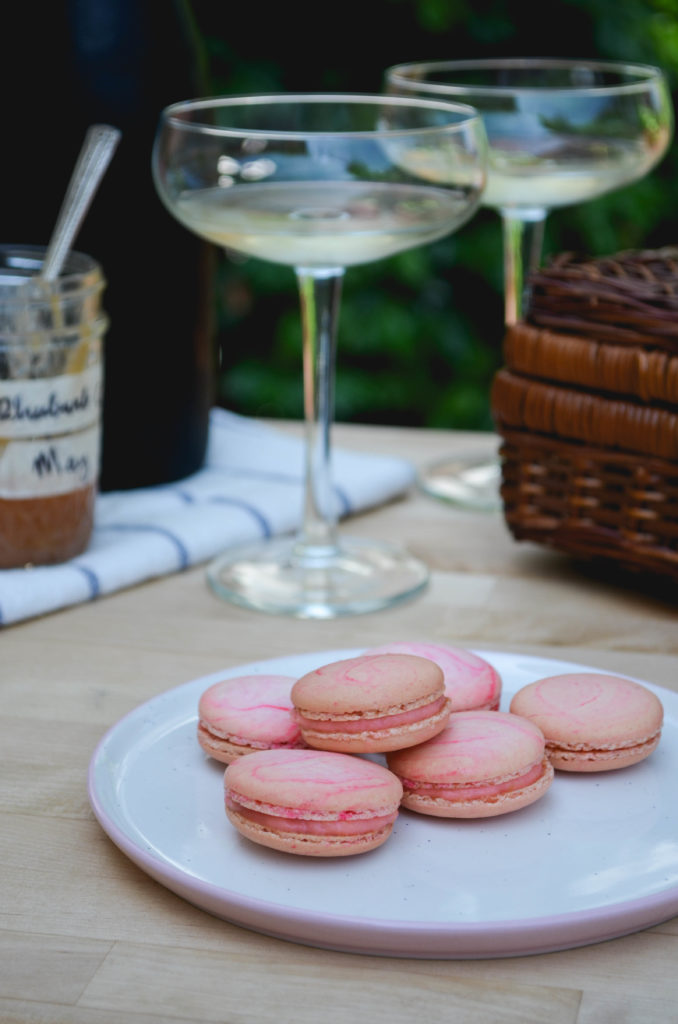
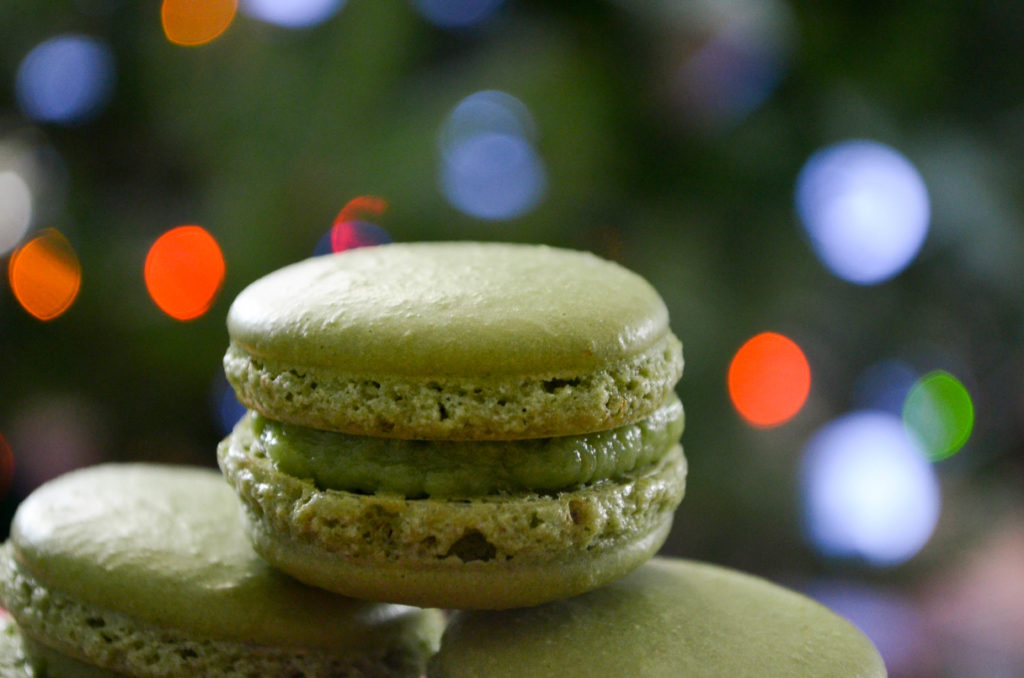
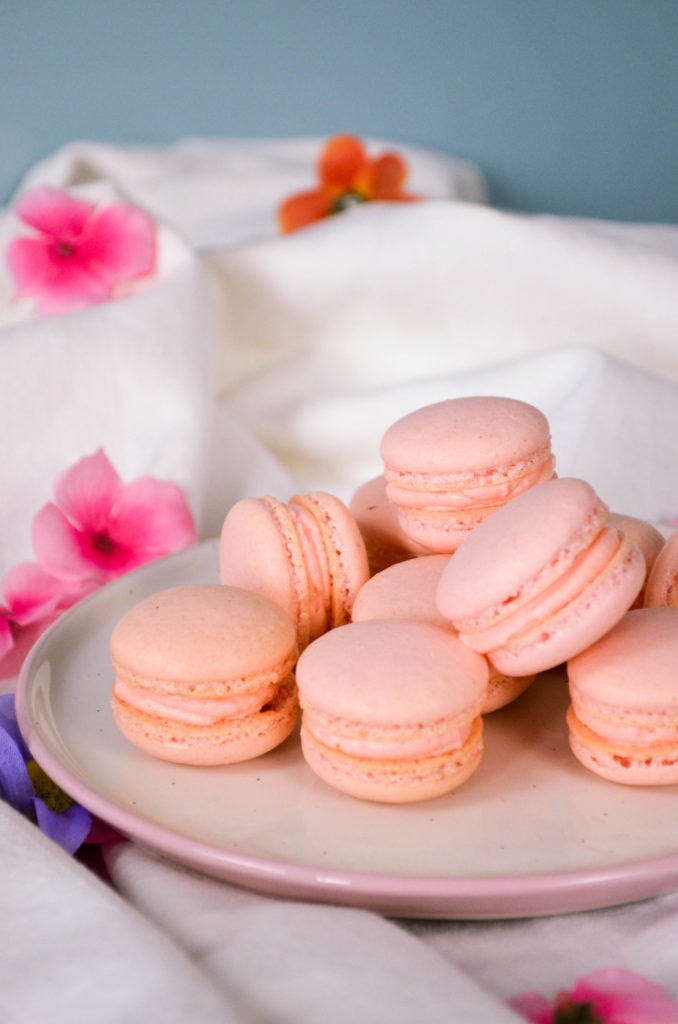
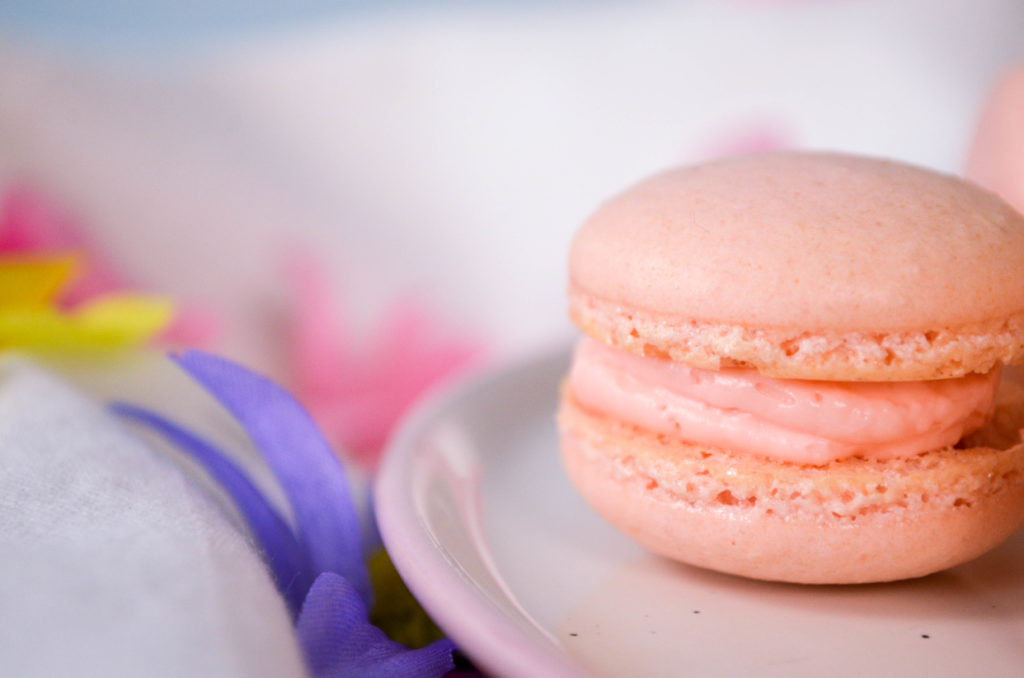
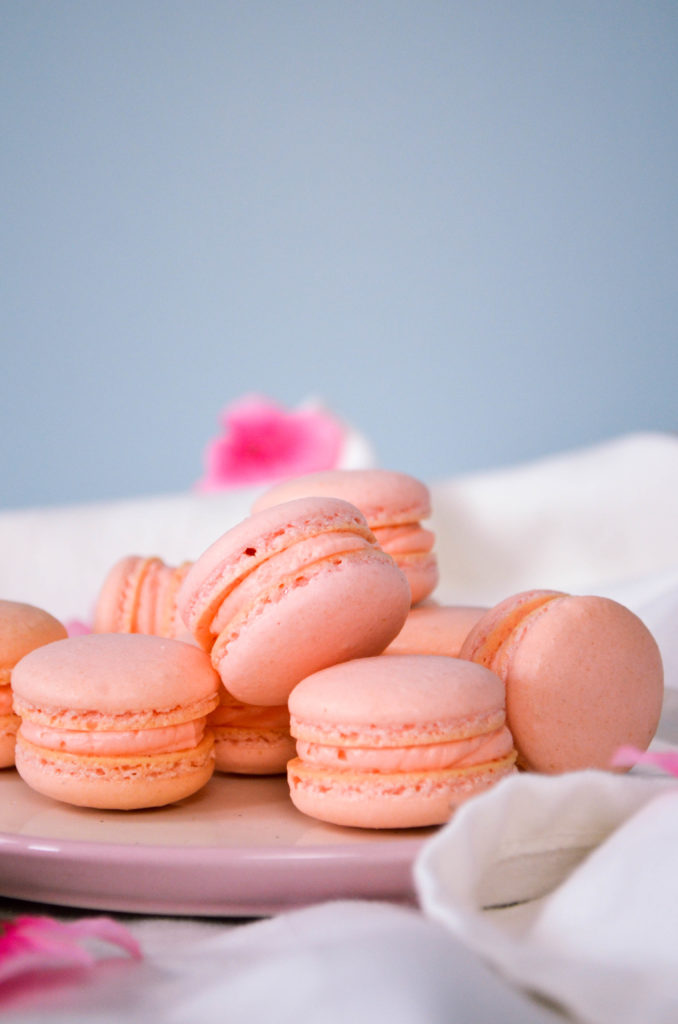
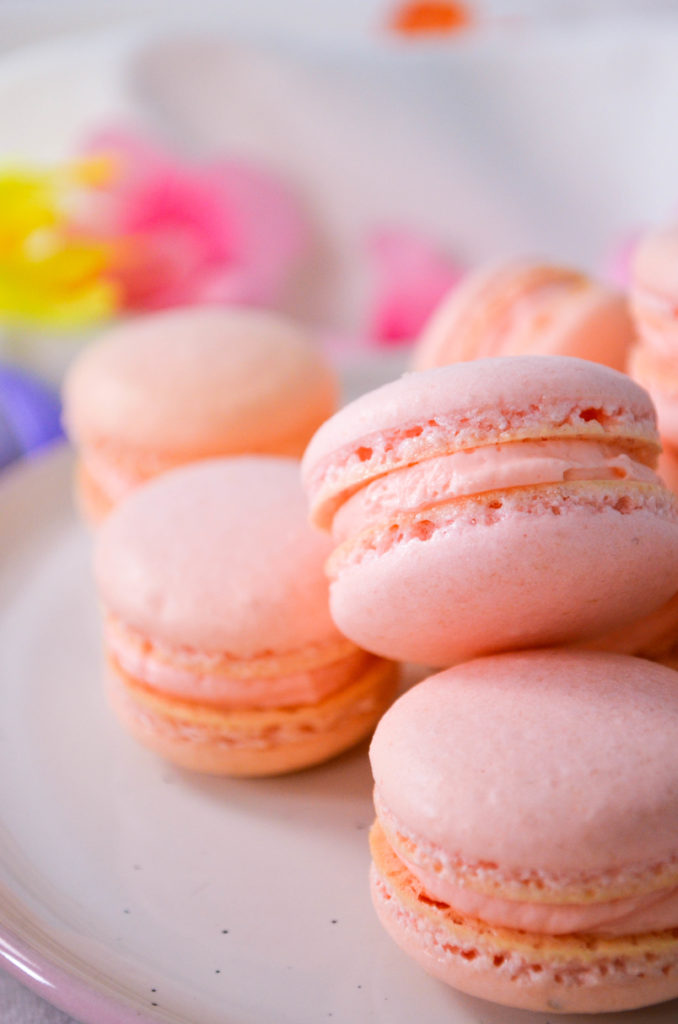
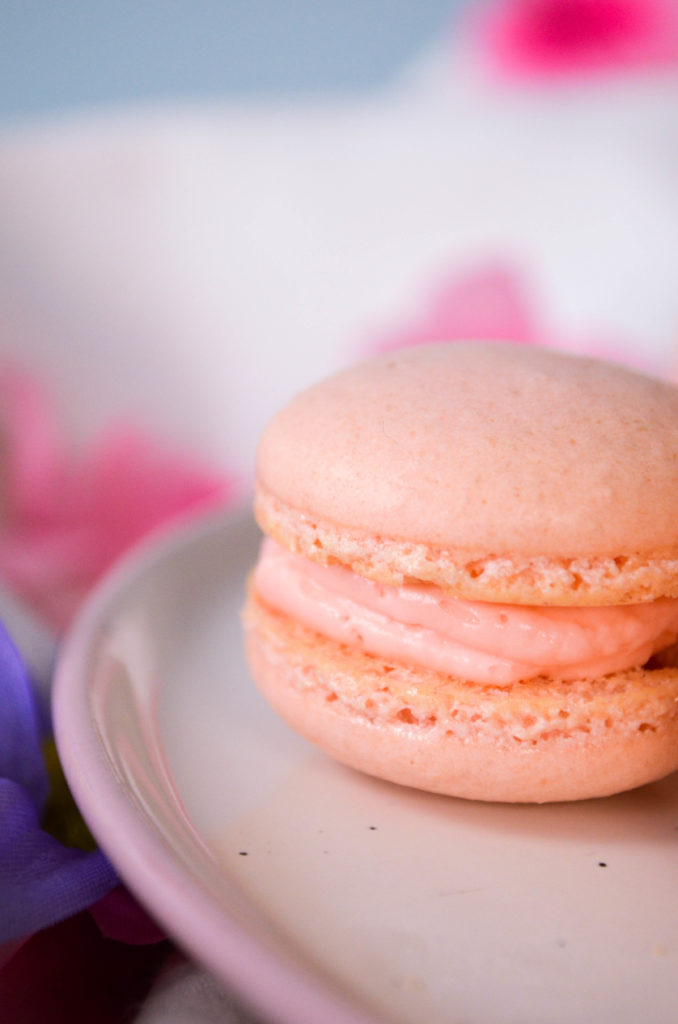
I’m keeping it simple with this month’s macarons. I’ve flavoured both the cookie and filling with rosewater to really bring out this subtle, soft flavour and not let anything else overpower it. The soft pink colour and sweet, floral flavour are just what’s needed at the end of this long, cold and stormy winter.

Rose Macarons | Sophster-Toaster Rose Macarons | Sophster-Toaster Rose Macarons | Sophster-Toaster

Ingredients

Make sure all ingredients are at room temperature before starting.

for the macaron shells

  • 1 cup ground almonds (as finely ground as you can find)
  • 1½ cup icing sugar
  • 3 large egg whites, at room temperature
  • 1/3 cup sugar
  • 1 tsp rosewater
  • pink gel food colouring

for the buttercream filling

  • 7 tbsp unsalted butter, softened
  • 3 tbsp water
  • 3 tbsp sugar
  • 1 egg, at room temperature
  • 1 tbsp rosewater
  • pink gel food colouring

Method

for the macaron shells

  1. Prepare your parchment sheets by drawing 1″ circles, ½” apart across the entire sheet (or using silicon baking mats with the circles already printed on them) and placing them on a large flat surface suitable for drying your batter, like a dining table. You will need 2-3 half sheet pan size pieces.
  2. Sift ground almonds and icing sugar together, twice. Set aside.
  3. In a large stainless steel mixing bowl, beat egg whites with a hand or stand mixer on high speed until you have a foam with no liquid remaining.
  4. Slowly add the sugar while continuing to beat the egg whites. Beat on high speed until the egg whites reach stiff peaks. You’ve made meringue!
  5. Add the rosewater and beat in at low speed.
  6. Add the pink gel food colouring and beat in at low speed.
  7. Fold your almond and icing sugar mixture into the meringue in two parts.
  8. Here’s the part that takes practice: it’s time for the macaronnage! With a spatula, spread the batter, with some force, against the side of the bowl. Then scoop it up by running the spatula along the side of the bowl again and try to flip it all over and sort-of lightly smack it back into the bottom of the bowl. Gather the batter up again and repeat 15 times. It takes some time to figure out the best way to do this, don’t be afraid to play around with it. When doing the macaronnage correctly, repeating more than 20 times can result in oily, blotchy macarons, but I’ve found that doing it incorrectly doesn’t count towards this limit. If you are doing it right, the batter will take on a noticeable and somewhat sudden change in consistency, this means you are about half-way to that limit. When finished, the batter should be thickened and drip slowly from the spatula. You will have to pipe it onto your baking sheets/mats and it won’t work if the batter is too runny. This is the technique that defines macarons, this is what makes mastery of them impressive.
  9. For perfectly round macarons, use a large, 0.4″ plain tip with a pastry bag, or do it the lazy way and cut a corner off a zip top bag for mostly round macarons. Twist (or don’t yet cut) the bag at the tip and place it, tip side down, in a tall glass. Fill with your batter and twist, close or clip the other end to help keep the messy batter moving in the right direction. Pipe the batter into the centre of the circles on your sheets/mats and stop before reaching the edges as the batter will spread out a bit.
  10. Once finished piping, carefully pick the sheets/mats up and drop them back on to the table from a height of a couple of inches. The theory is that this helps the cookies keep their round shape and form the little bubbles around the bottom (the pied) when you put them in the oven.
  11. Leave the cookies on the table, uncovered, for 15-30 minutes to dry (or more on a humid day). This is a good time to preheat your oven to 350°F. You will know the macarons are dry when they look smooth and are no longer sticky to the touch.
  12. Place an oven rack in the centre of your oven. Place a sheet of macarons on two stacked sheet pans (this will stop the bottoms from getting too hot, resulting in cracked macarons) and bake for about 15 minutes. Rotate the pan half way through baking. At this point, if you want to try to keep your cookies light in colour, place a second oven rack directly below the first and move your cookies down to it, then place a third sheet pan above the cookies on the higher rack to protect them from the heat above. It can be hard to tell when the macaron are done. I pull them out when the kitchen smells sweet and the cookies look crisp, have just started to brown, and don’t look blotchy in the middle.
  13. As soon as the parchment sheet/baking mat is cool enough to handle, take it out of the pan with all the cookies on top and place it on a cooling rack. The macarons will be too sticky to remove from the sheet/mat now; once cooled, they should peel off easily. I usually wait a few minutes for the pans to cool a bit and for the oven to come back to a steady temperature before moving the next sheet to the pans and baking the next round.

for the buttercream

  1. Warm the butter in a double boiler or in the microwave until it is soft but not melted and beat until creamy.
  2. Break an egg into a large heat-resistant mixing bowl and beat lightly with a hand mixer. Set aside.
  3. Add water and sugar to a small saucepan and place over medium-low heat. Bring to a simmer and stir until thick and syrupy, about 7 minutes. You’ve made simple syrup!
  4. Slowly pour your simple syrup into the beaten egg while beating with a hand mixer on as high a speed as you can without flinging syrup everywhere, remember it is very hot and sticky. Once all the syrup is in, beat the mixture on high speed, slowly reducing speed until it is thick, light in colour and the bowl is no longer hot.
  5. Add the butter to this mixture in two or three parts and beat on medium speed until fully incorporated and creamy. If the buttercream splits and continuing to beat doesn’t bring it back together, it has likely become too cold. Pop it in the warm oven or over a double boiler for 10-30 seconds and try beating it again. Continue doing this until it comes together.
  6. Add the rosewater and beat in.
  7. Add the pink gel food colouring and beat in.

Once everything has cooled, place your buttercream in a piping or zip-top bag and pipe onto half of your shells. Then place another similarly sized shell on top and gently press them together.

Rose Macarons | Sophster-Toaster

All photos by me.

Vanilla & Peppercorn Macarons

Vanilla & Peppercorn Macarons | Sophster-Toaster

I realized, early last week, that I would have overlapping challenges this month. My goal of making one new macaron recipe per month and my self-imposed challenge to only shoot in black and white for the month of January were going to collide.

Early into my new flavour brainstorming session, I decided I wanted to draw inspiration from naturally dark or pale foods. As a big fan of herbal flavours, and having built up some confidence with my recent  Lavender and Juniper Macarons recipes, I had a crazy idea: black pepper. Not sure how it would turn out, I paired it with a safe and scrumptious vanilla buttercream for naturally light coloured cookies and cream with dark speckles. Enjoy!

Vanilla & Peppercorn Macarons | Sophster-Toaster Vanilla & Peppercorn Macarons | Sophster-Toaster Vanilla & Peppercorn Macarons | Sophster-Toaster Vanilla & Peppercorn Macarons | Sophster-Toaster Vanilla & Peppercorn Macarons | Sophster-Toaster

Ingredients

for the macaron shells

  • 1 cup ground almonds (as finely ground as you can find)
  • 1½ cup icing sugar
  • 3 large egg whites, at room temperature
  • 1/3 cup sugar
  • ¾ tsp fresh ground pepper + garnish to taste

for the buttercream filling

  • 7 tbsp unsalted butter, softened
  • 3 tbsp water
  • 3 tbsp sugar
  • 1 egg, at room temperature
  • ½ tsp vanilla bean paste (or vanilla extract)

Method

for the macaron shells

  1. Prepare your parchment sheets by drawing 1″ circles, ½” apart across the entire sheet (or using silicon baking mats with the circles already printed on them) and placing them on a large flat surface suitable for drying your batter, like a dining table. You will need 2-3 half sheet pan size pieces.
  2. Sift ground almonds and icing sugar together, twice. Set aside.
  3. Add the fresh ground pepper.
  4. In a large stainless steel mixing bowl, beat egg whites with a hand or stand mixer on high speed until you have a foam with no liquid remaining.
  5. Slowly add the sugar while continuing to beat the egg whites. Beat on high speed until the egg whites reach stiff peaks. You’ve made meringue!
  6. Fold your almond and icing sugar mixture into the meringue in two parts.
  7. Here’s the part that takes practice: it’s time for the macaronnage! With a spatula, spread the batter, with some force, against the side of the bowl. Then scoop it up by running the spatula along the side of the bowl again and try to flip it all over and sort-of lightly smack it back into the bottom of the bowl. Gather the batter up again and repeat 15 times. It takes some time to figure out the best way to do this, don’t be afraid to play around with it. When doing the macaronnage correctly, repeating more than 20 times can result in oily, blotchy macarons, but I’ve found that doing it incorrectly doesn’t count towards this limit. If you are doing it right, the batter will take on a noticeable and somewhat sudden change in consistency, this means you are about half-way to that limit. When finished, the batter should be thickened and drip slowly from the spatula. You will have to pipe it onto your baking sheets/mats and it won’t work if the batter is too runny. This is the technique that defines macarons, this is what makes mastery of them impressive.
  8. For perfectly round macarons, use a large, 0.4″ plain tip with a pastry bag, or do it the lazy way and cut a corner off a zip top bag for mostly round macarons. Twist (or don’t yet cut) the bag at the tip and place it, tip side down, in a tall glass. Fill with your batter and twist, close or clip the other end to help keep the messy batter moving in the right direction. Pipe the batter into the centre of the circles on your sheets/mats and stop before reaching the edges as the batter will spread out a bit.
  9. Once finished piping, carefully pick the sheets/mats up and drop them back on to the table from a height of a couple of inches. The theory is that this helps the cookies keep their round shape and form the little bubbles around the bottom (the pied) when you put them in the oven.
  10. Grind as much pepper as you like directly onto the macarons now before they dry.
  11. Leave the cookies on the table, uncovered, for 15-30 minutes to dry (or more on a humid day). This is a good time to preheat your oven to 350°F. You will know the macarons are dry when they look smooth and are no longer sticky to the touch.
  12. Place an oven rack in the centre of your oven. Place a sheet of macarons on two stacked sheet pans (this will stop the bottoms from getting too hot, resulting in cracked macarons) and bake for about 15 minutes. Rotate the pan half way through baking. At this point, if you want to try to keep your cookies light in colour, place a second oven rack directly below the first and move your cookies down to it, then place a third sheet pan above the cookies on the higher rack to protect them from the heat above. It can be hard to tell when the macaron are done. I pull them out when the kitchen smells sweet and the cookies look crisp, have just started to brown, and don’t look blotchy in the middle.
  13. As soon as the parchment sheet/baking mat is cool enough to handle, take it out of the pan with all the cookies on top and place it on a cooling rack. The macarons will be too sticky to remove from the sheet/mat now; once cooled, they should peel off easily. I usually wait a few minutes for the pans to cool a bit and for the oven to come back to a steady temperature before moving the next sheet to the pans and baking the next round.

for the buttercream

  1. Warm the butter in a double boiler or in the microwave until it is soft but not melted and beat until creamy.
  2. Break an egg into a large heat-resistant mixing bowl and beat lightly with a hand mixer. Set aside.
  3. Add water and sugar to a small saucepan and place over medium-low heat. Bring to a simmer and stir until thick and syrupy, about 7 minutes. You’ve made simple syrup!
  4. Slowly pour your simple syrup into the beaten egg while beating with a hand mixer on as high a speed as you can without flinging syrup everywhere, remember it is very hot and sticky. Once all the syrup is in, beat the mixture on high speed, slowly reducing speed until it is thick, light in colour and the bowl is no longer hot.
  5. Add the butter to this mixture in two or three parts and beat on medium speed until fully incorporated and creamy. If the buttercream splits and continuing to beat doesn’t bring it back together, it has likely become too cold. Pop it in the warm oven or over a double boiler for 10-30 seconds and try beating it again. Continue doing this until it comes together.
  6. Add the vanilla and beat until mixed in.

Once everything has cooled, place your buttercream in a piping or zip-top bag and pipe onto half of your shells. Then place another similarly sized shell on top and gently press them together.

Vanilla & Peppercorn Macarons | Sophster-Toaster

All photos by me.

A Year of Macaron Recipes

Alright, so not quite a year. I started this journey of writing one new macaron recipe per month in February of last year. At first, I just wanted to practice my macaron making and food photography skills but, somewhere around July’s lavender macarons, I realized what I was really doing was building a series of recipes that I could turn into a proper collection (and maybe even a real cookbook) someday.

I love experimenting with unusual and unconventional seasonal flavours. Even though it can be hard to know how to work with a new flavour, or what to pair it with, especially when you are inventing as you go, I feel like I’ve made some really interesting and delicious macarons this year.

Looking back like this, I can really see how much I’ve learned and how much better I’ve become at making these tricky little pastries. I’m so looking forward to continuing this goal of one new recipe a month for another year. I have a few big ideas in mind and I’m really excited to see what I come up with!

February

Chili Macarons with Bitter Chocolate Ganache

Chocolate Chili Macarons | Sophster-Toaster Blog

A spicy and earthy macaron for Valentine’s Day.

March

Vanilla Macarons with Whiskey Buttercream

Whiskey Cream Macarons | Sophster-Toaster Blog

Skills have already taken a running leap forward as I really learn the importance of humidity. Festive green macarons for St. Patrick’s Day.

April

Froot Loops Macarons with Froot Loops Buttercream

Froot Loops Macarons | Sophster-Toaster Blog

Something weird I had been wanting to try out for a while. It took a few tries to get the size and amount of crushed Froot Loops right, but I love the soft spring colours of this Easter time macaron.

May

Rhubarb Macarons with Rhubarb Pastry Cream

Garden Rhubarb Macarons | Sophster-Toaster Blog

The first time I looked to my garden for inspiration. The summer humidity was arriving and I battled it for these thin shells with small feet. The rhubarb pastry cream was divine but made the cookies soggy after a few days. Definitely a recipe to assemble as needed or for a large party.

June

Matcha Macarons with White Chocolate Ganache

Matcha Macarons with White Chocolate Ganache | Sophster-Toaster

I became obsessed with matcha last summer and drank it almost everyday. I love flavouring things with tea so I am no stranger to the steep, but the fact that matcha is a powder made these one of the easiest flavouring I’ve ever worked with. No one told me white chocolate behaved nothing like regular chocolate, so that was a huge learning curve.

July

Lavender Macarons with Lavender Buttercream

Lavender Macarons Sophster-Toaster Blog

It was a busy month of summer travelling and markets. I was excitedly preparing for a market at a lavender farm and wanted all things lavender, all the time. The summer humidity made it impossible to make shells that didn’t crack or otherwise form correctly in the oven. I had to make several batches of this flavour while I finally gave up on what was to be my “winter recipe” and develop a “summer recipe” that could dry in heavy humidity. I was eating ugly macarons for months.

August

Vanilla Macarons with Peach Buttercream

Peaches & Cream Macarons | Sophster-Toaster

Having figured out the formula for stress free (ie crack-free) summer macarons, this is when I really got bold with colouring.

September

Chocolate Macarons with Cashew Butter

Peanut Butter & Chocolate Macarons | Sophster-Toaster

I was already thinking about Halloween when I made these more classically flavoured shells with a somewhat nontraditional filling.

October

Vanilla Macarons with Absinthe Buttercream

Absinthe Macarons | Sophster-Toaster

These Halloween themed macarons were the best I made all year, in terms of technique. They were high, crunchy on the outside, soft on the inside and had gorgeous feet. The absinthe buttercream had such classic, old-world flavours while also being incredibly exotic and difficult to pin down. The colours were fun to work with, too.

November

Peppermint Macarons with Peppermint Buttercream

Peppermint Macarons | Sophster-Toaster

Poor November is so boring, it always gets overshadowed by Christmas. I couldn’t help but break out my holiday ideas early. Using peppermint tea as a bit of a twist on a classic Christmastime flavour, these macaron were both traditional and distinctive.

December

Juniper Macarons with Juniper Buttercream

Juniper Macarons | Sophster-Toaster

Finishing strong with something weird. The most delicious Christmas tree you’ve ever tasted.

Juniper Macarons

Juniper Macarons | Sophster-Toaster

I’m a big fan of weird flavours, especially when it comes to my macarons. I made a more traditional Christmas flavour last month with my Peppermint Macarons, so this month I wanted to try something unusual.

I wanted to provide an unfamiliar but undeniable Christmas flavour. Something that could bring up memories of Christmas morning, even if you’d never tasted anything like it before. I found that flavour in the pungently aromatic juniper berry that is somehow, paradoxically, both bitterly resinous and the sweetest berry you’ve ever tasted. Think about the first time you tried gin and thought it tasted like “Christmas trees” versus how complex and lovely it is now that it’s grown on you: that’s the magic of juniper.

Juniper Macarons | Sophster-Toaster Juniper Macarons | Sophster-Toaster Juniper Macarons | Sophster-Toaster Juniper Macarons | Sophster-Toaster Juniper Macarons | Sophster-Toaster

Ingredients

for the macaron shells

  • 1 cup ground almonds (as finely ground as you can find)
  • 1½ cup icing sugar
  • 3 large egg whites, at room temperature
  • 1/3 cup sugar
  • 2 tsp whole juniper berries (shared with buttercream)
  • “juniper green” gel food colouring

for the buttercream filling

  • 7 tbsp unsalted butter
  • 3½ tbsp milk
  • 2 egg yolks
  • ¼ cup sugar
  • “juniper green” gel food colouring

Method

for the macaron shells

  1. Prepare your parchment sheets by drawing 1″ circles, ½” apart across the entire sheet (or using silicon baking mats with the circles already printed on them) and placing them on a large flat surface suitable for drying your batter, like a dining table. You will need 2-3 half sheet pan size pieces.
  2. Sift ground almonds and icing sugar together, twice. Set aside.
  3. Grind 2 tsp of whole juniper berries in a mortar and pestle. Sift what will into almond and sugar mixture. Keep larger pieces to flavour the buttercream.
  4. In a large stainless steel mixing bowl, beat egg whites with a hand or stand mixer on high speed until you have a foam with no liquid remaining.
  5. Slowly add the sugar while continuing to beat the egg whites. Beat on high speed until the egg whites reach stiff peaks. You’ve made meringue!
  6. Add the gel food colouring and gently beat in.
  7. Fold your almond and icing sugar mixture into the meringue in two parts.
  8. Here’s the part that takes practice: it’s time for the macaronnage! With a spatula, spread the batter, with some force, against the side of the bowl. Then scoop it up by running the spatula along the side of the bowl again and try to flip it all over and sort-of lightly smack it back into the bottom of the bowl. Gather the batter up again and repeat 15 times. It takes some time to figure out the best way to do this, don’t be afraid to play around with it. When doing the macaronnage correctly, repeating more than 20 times can result in oily, blotchy macarons, but I’ve found that doing it incorrectly doesn’t count towards this limit. If you are doing it right, the batter will take on a noticeable and somewhat sudden change in consistency, this means you are about half-way to that limit. When finished, the batter should be thickened and drip slowly from the spatula. You will have to pipe it onto your baking sheets/mats and it won’t work if the batter is too runny. This is the technique that defines macarons, this is what makes mastery of them impressive.
  9. For perfectly round macarons, use a large, 0.4″ plain tip with a pastry bag, or do it the lazy way and cut a corner off a zip top bag for mostly round macarons. Twist (or don’t yet cut) the bag at the tip and place it, tip side down, in a tall glass. Fill with your batter and twist, close or clip the other end to help keep the messy batter moving in the right direction. Pipe the batter into the centre of the circles on your sheets/mats and stop before reaching the edges as the batter will spread out a bit.
  10. Once finished piping, carefully pick the sheets/mats up and drop them back on to the table from a height of a couple of inches. The theory is that this helps the cookies keep their round shape and form the little bubbles around the bottom (the pied) when you put them in the oven.
  11. Leave the cookies on the table, uncovered, for 15-30 minutes to dry (or more on a humid day). This is a good time to preheat your oven to 350°F. You will know the macarons are dry when they look smooth and are no longer sticky to the touch.
  12. Place an oven rack in the centre of your oven. Place a sheet of macarons on two stacked sheet pans (this will stop the bottoms from getting too hot, resulting in cracked macarons) and bake for about 15 minutes. Rotate the pan half way through baking. At this point, if you want to try to keep your cookies light in colour, place a second oven rack directly below the first and move your cookies down to it, then place a third sheet pan above the cookies on the higher rack to protect them from the heat above. It can be hard to tell when the macaron are done. I pull them out when the kitchen smells sweet and the cookies look crisp, have just started to brown, and don’t look blotchy in the middle.
  13. As soon as the parchment sheet/baking mat is cool enough to handle, take it out of the pan with all the cookies on top and place it on a cooling rack. The macarons will be too sticky to remove from the sheet/mat now; once cooled, they should peel off easily. I usually wait a few minutes for the pans to cool a bit and for the oven to come back to a steady temperature before moving the next sheet to the pans and baking the next round.

for the buttercream

  1. Warm the butter in a double boiler or in the microwave until it is soft but not melted. Beat until creamy.
  2. In a small saucepan, bring milk to a boil and the remainder of the 2 tsp of ground juniper berries. Cover and steep for 10 minutes.
  3. Meanwhile, place the egg yolks in a small bowl and whisk lightly. Add the sugar and beat with a whisk until they are a pale yellow in colour.
  4. Slowly pour the steeped milk mixture into the egg mixture, whisking constantly.
  5. Strain this mixture back into the saucepan and discard the juniper.
  6. Simmer over low heat until the mixture has thickened.
  7. Now pour the mixture into a clean bowl and beat with a whisk until it has cooled and coats the back of a spoon.
  8. Add the butter in three parts and whisk until smooth with each addition.
  9. Add the gel food colouring and whisk through.
  10. Once everything has cooled, place your buttercream in a zip-top bag, snip the corner off  and pipe it onto half of your shells. Then place a similarly sized shell on top and gently press them together.

All photos by me.