Thread and Pin Art DIY

Thread and Pin Art DIY \\ Sophster-Toaster Blog

I’m always looking for uses for leftover thread. There are a few ways to reuse it while sewing, like using it for basting stitches, but after a few years of frequent sewing, it really starts to fill up the drawers and boxes you’ve been tossing it into. I had quite a lot of thread matching fabrics that I used up years ago, so I came up with a creative way to use it up: Thread and Pin Art.

It’s also a good way to reuse old, dull pins.
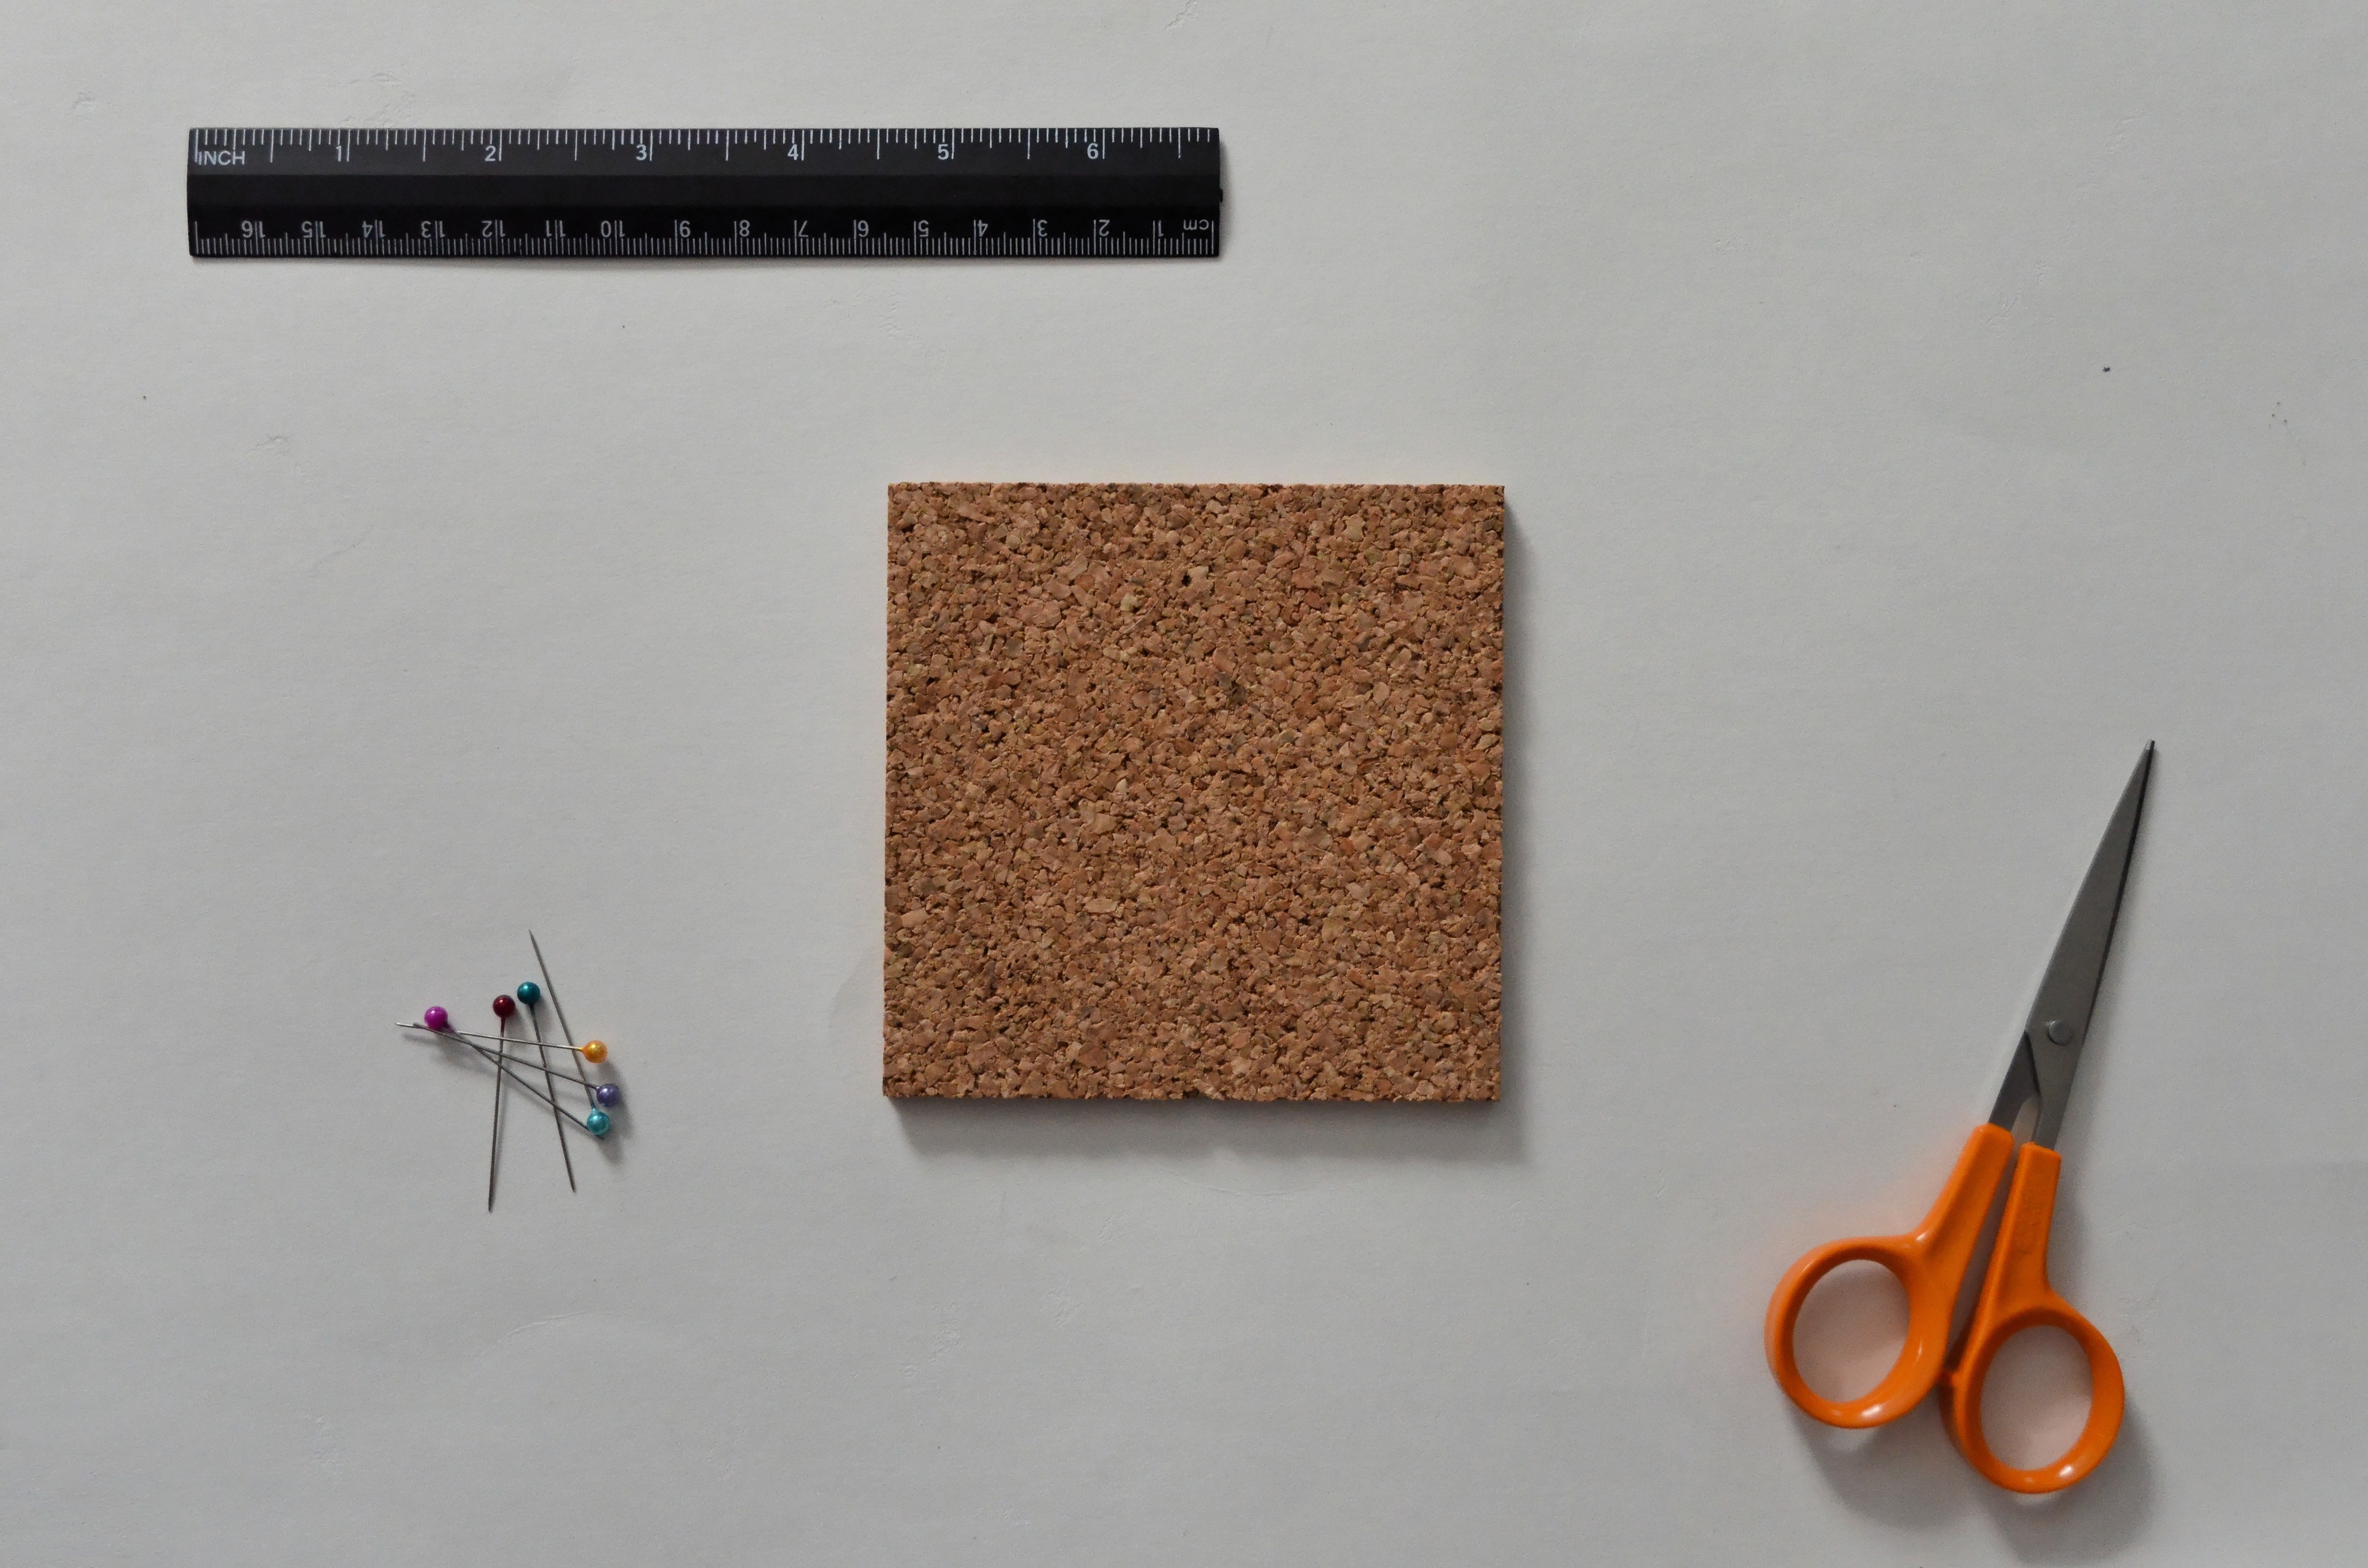
The Supplies

Cork Tile – I got mine here
Leftover Thread
Pins
Ruler
Scissors

Thread and Pin Art DIY \\ Sophster-Toaster Blog

How-to

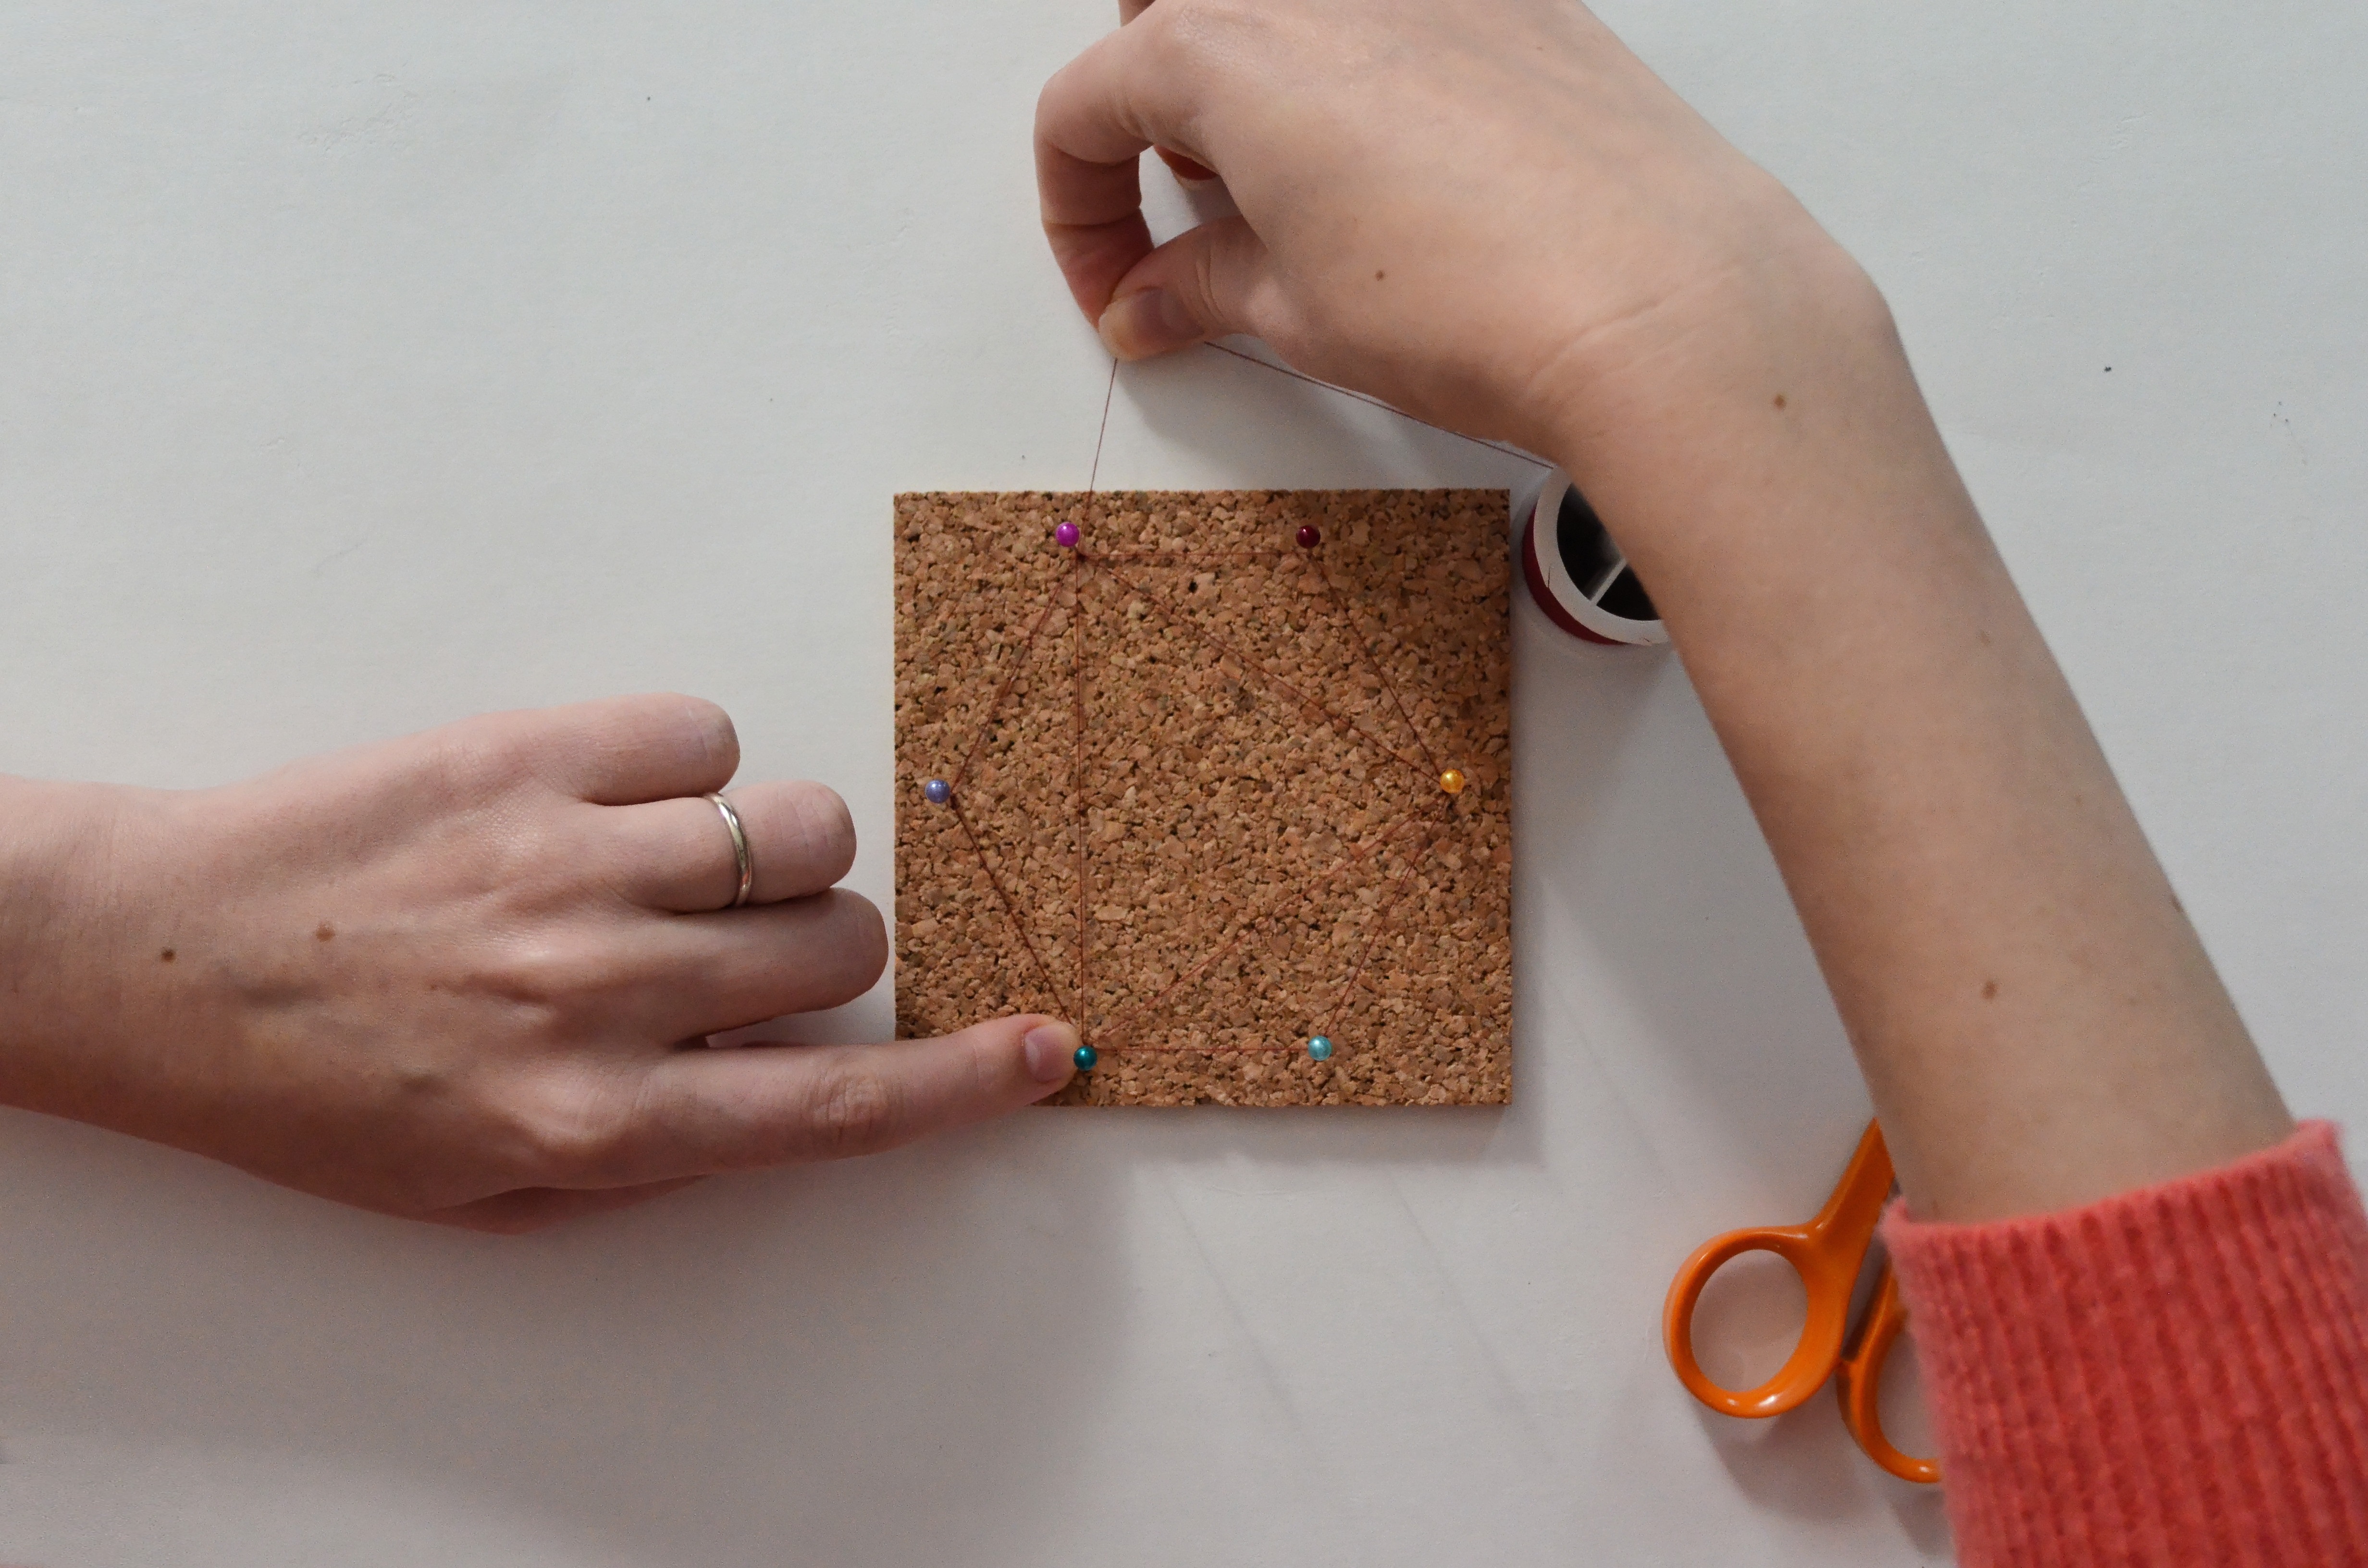
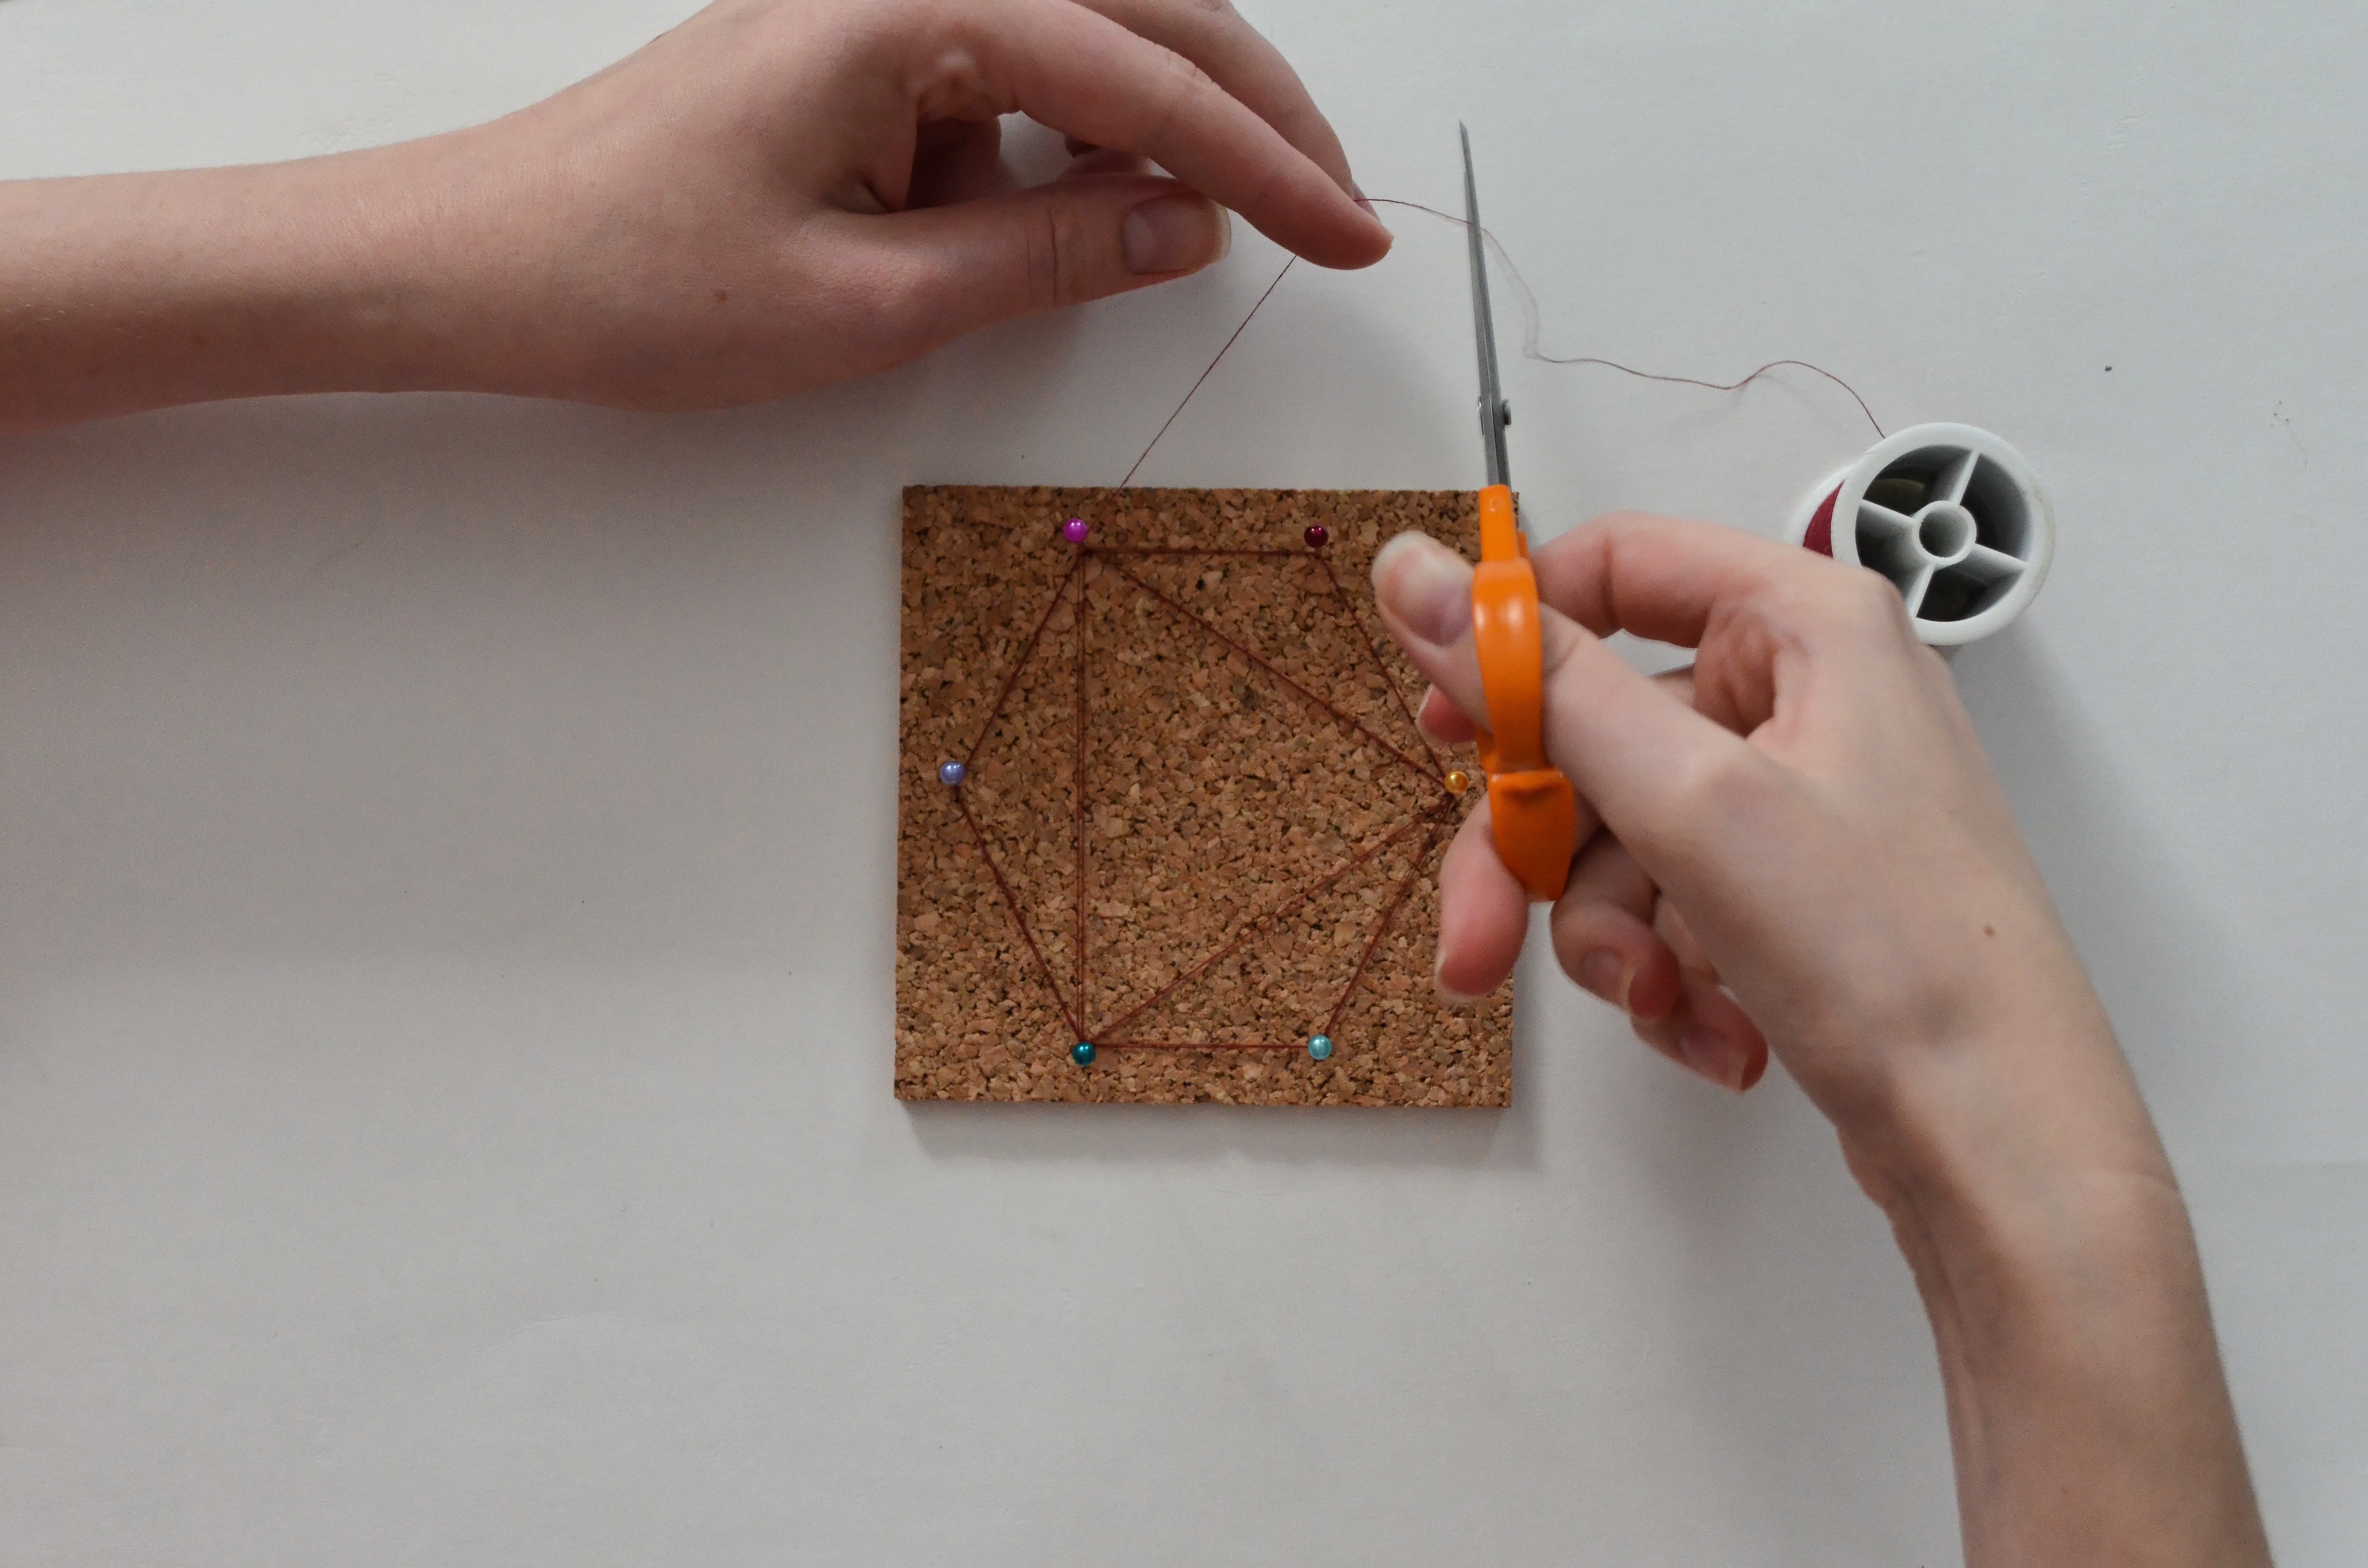
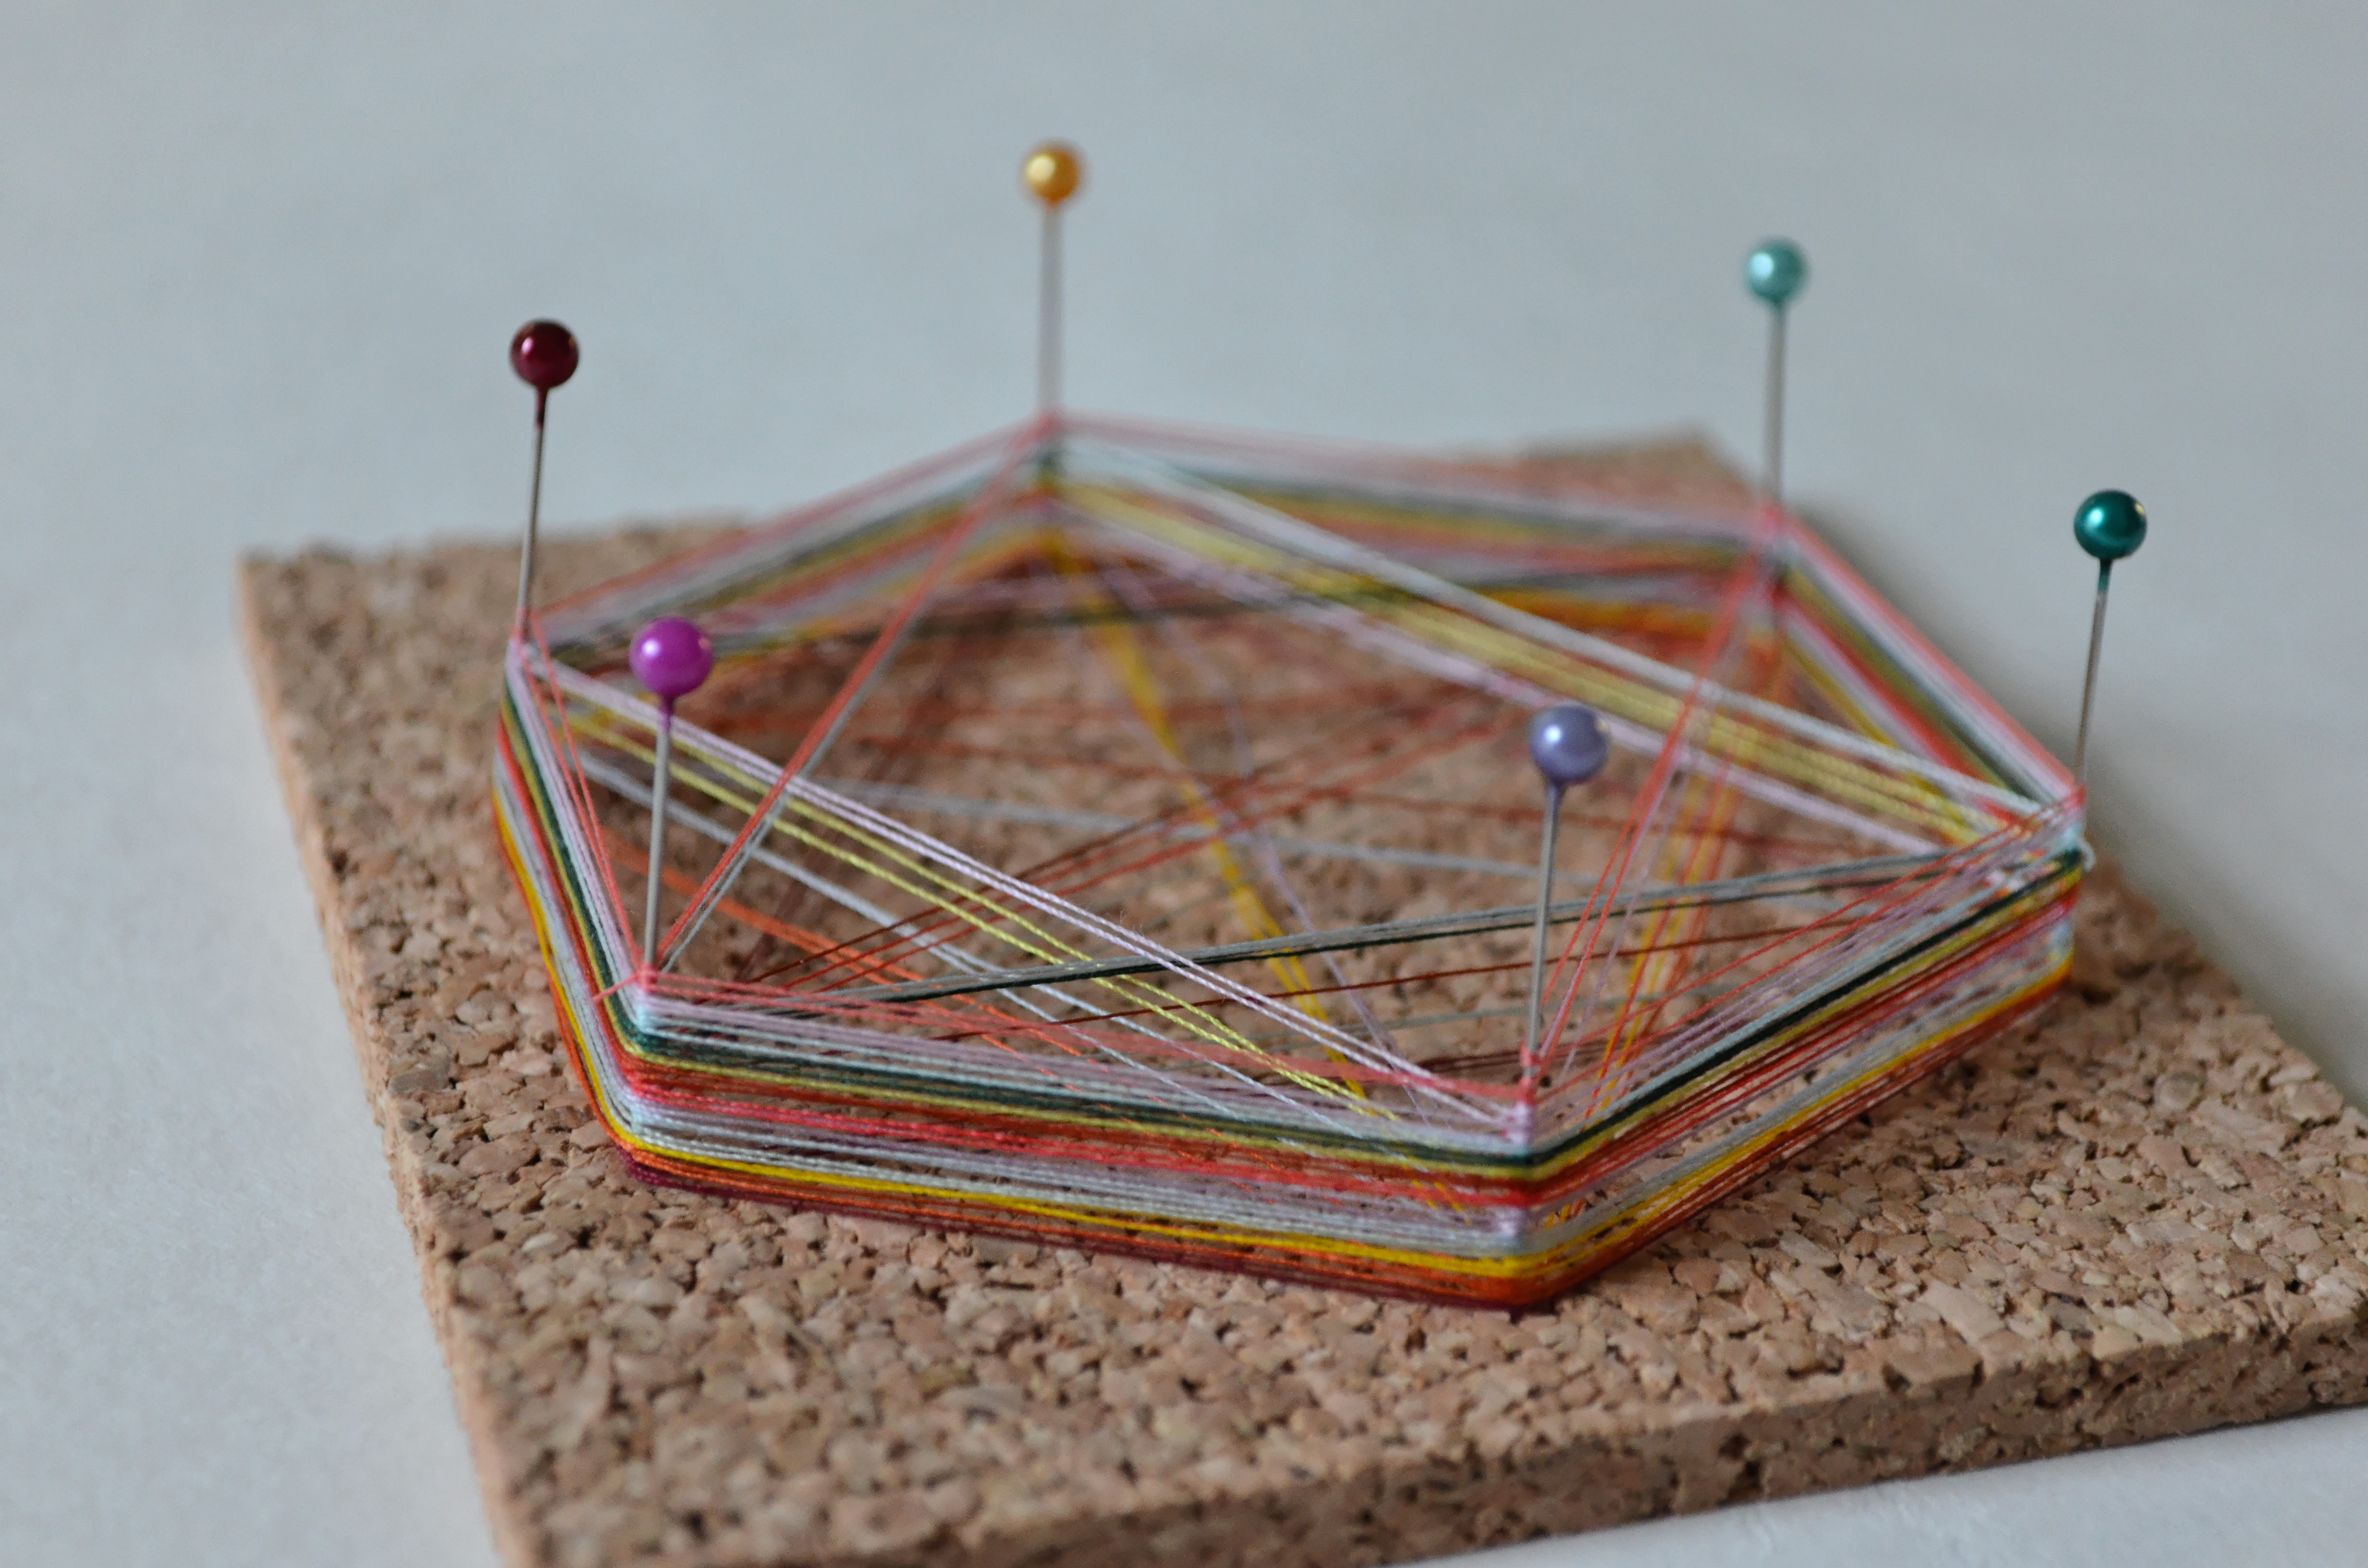
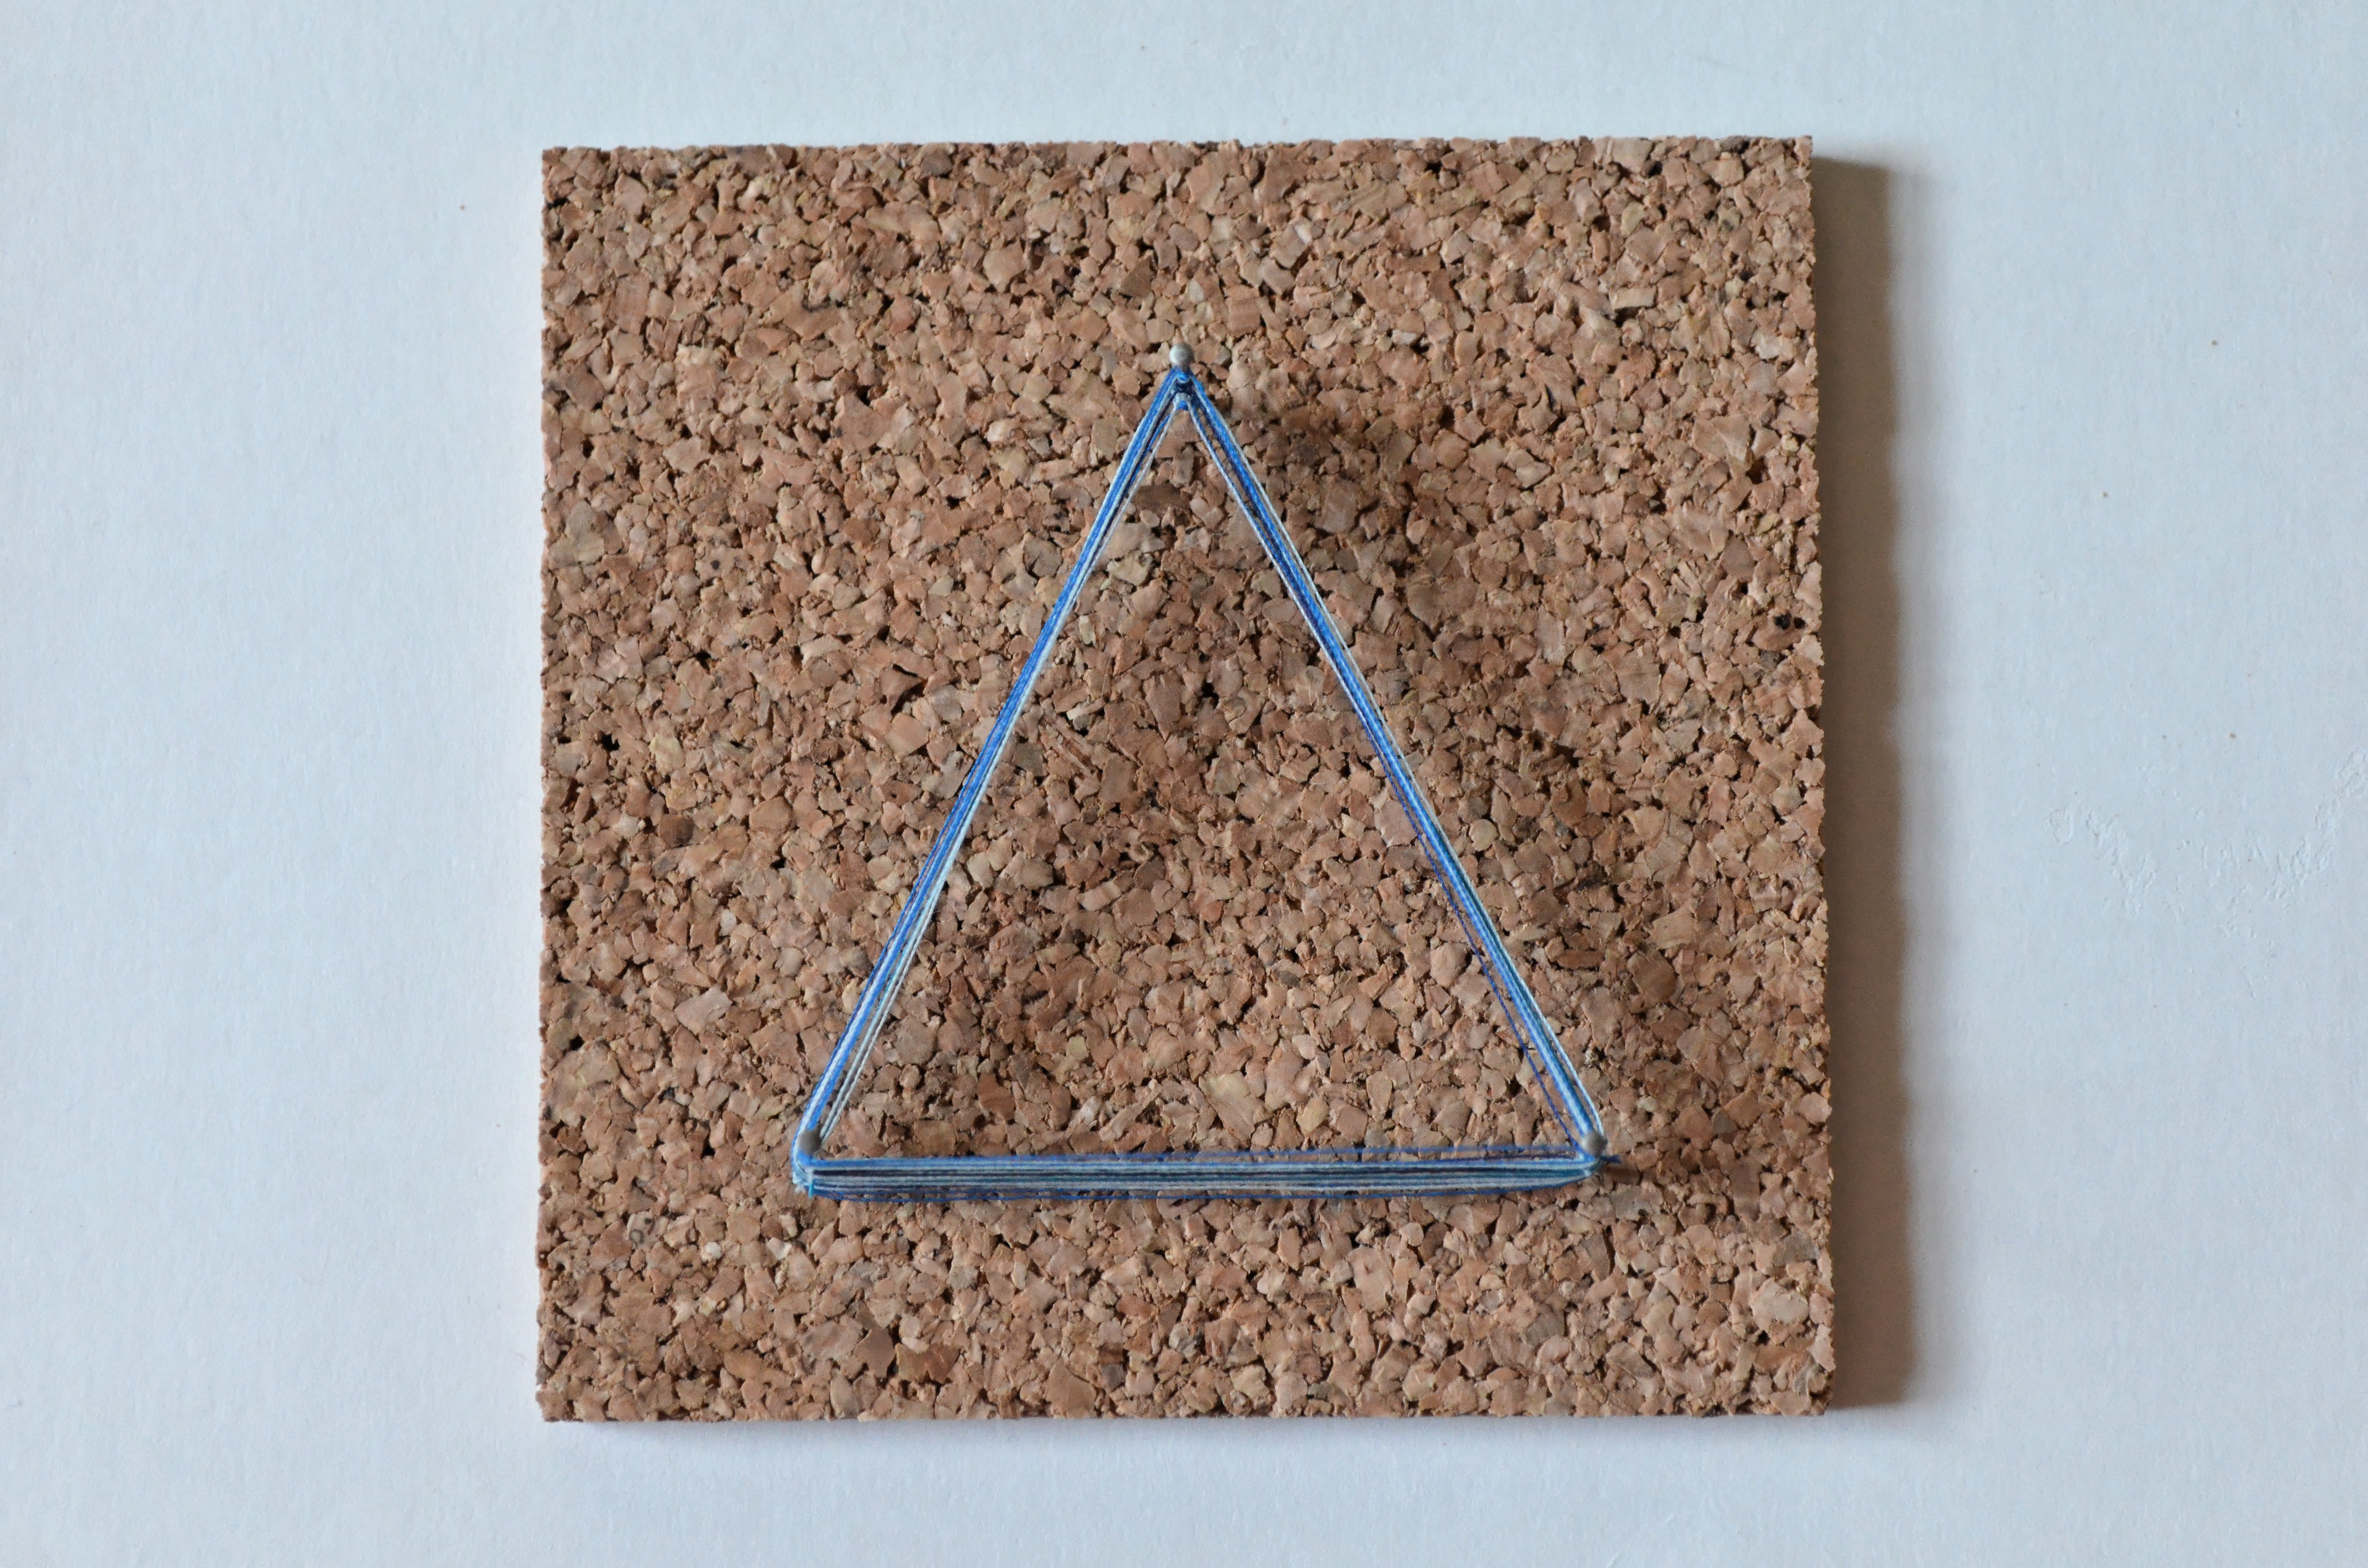
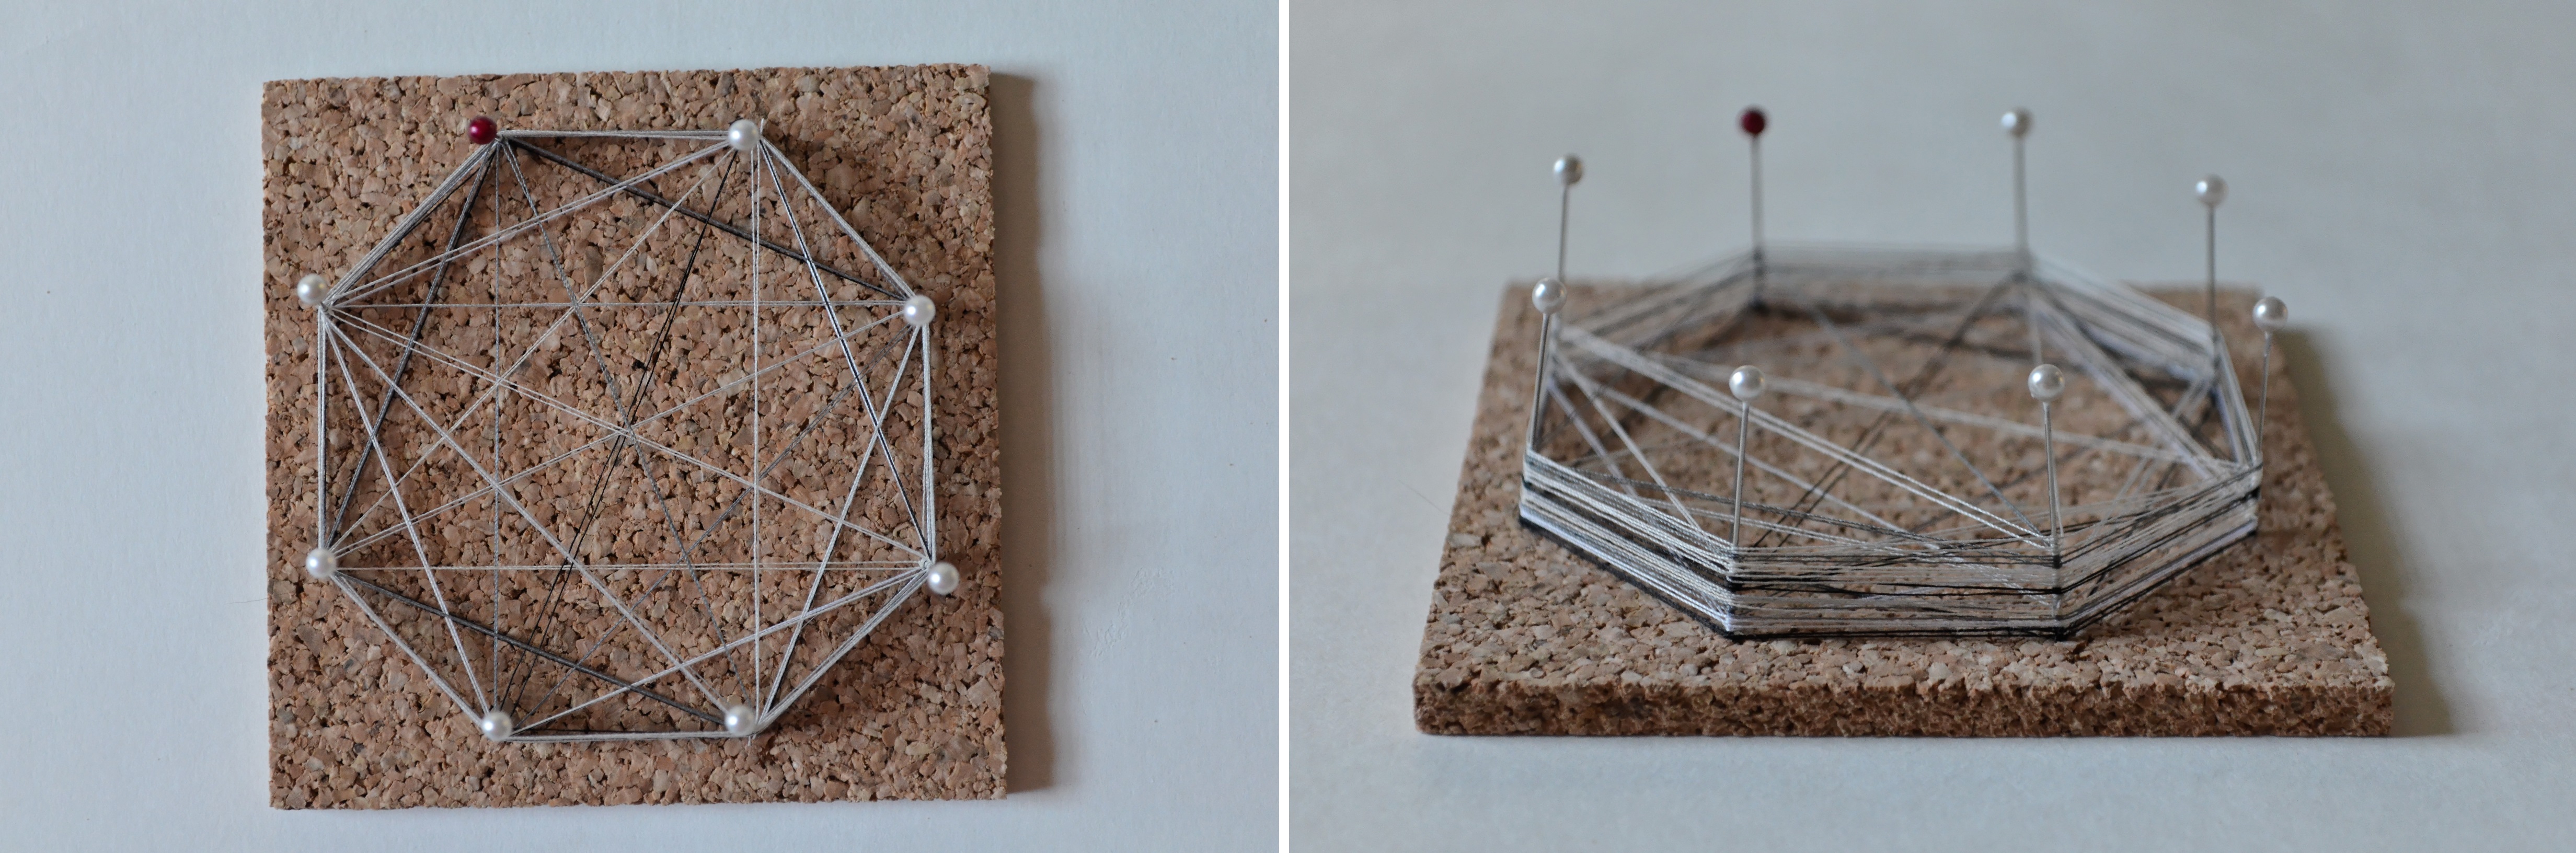
Start by forming a geometric shape with the pins in the cork tile. When you like the shape, use a ruler to measure all of your points to make sure they are equal and symmetrical. I placed my pins 1 cm in from the edge of the tile.

https://www.etsy.com/listing/97601401/cork-coasters-square-4-6-mm-14-natural?ref=favs_view_14

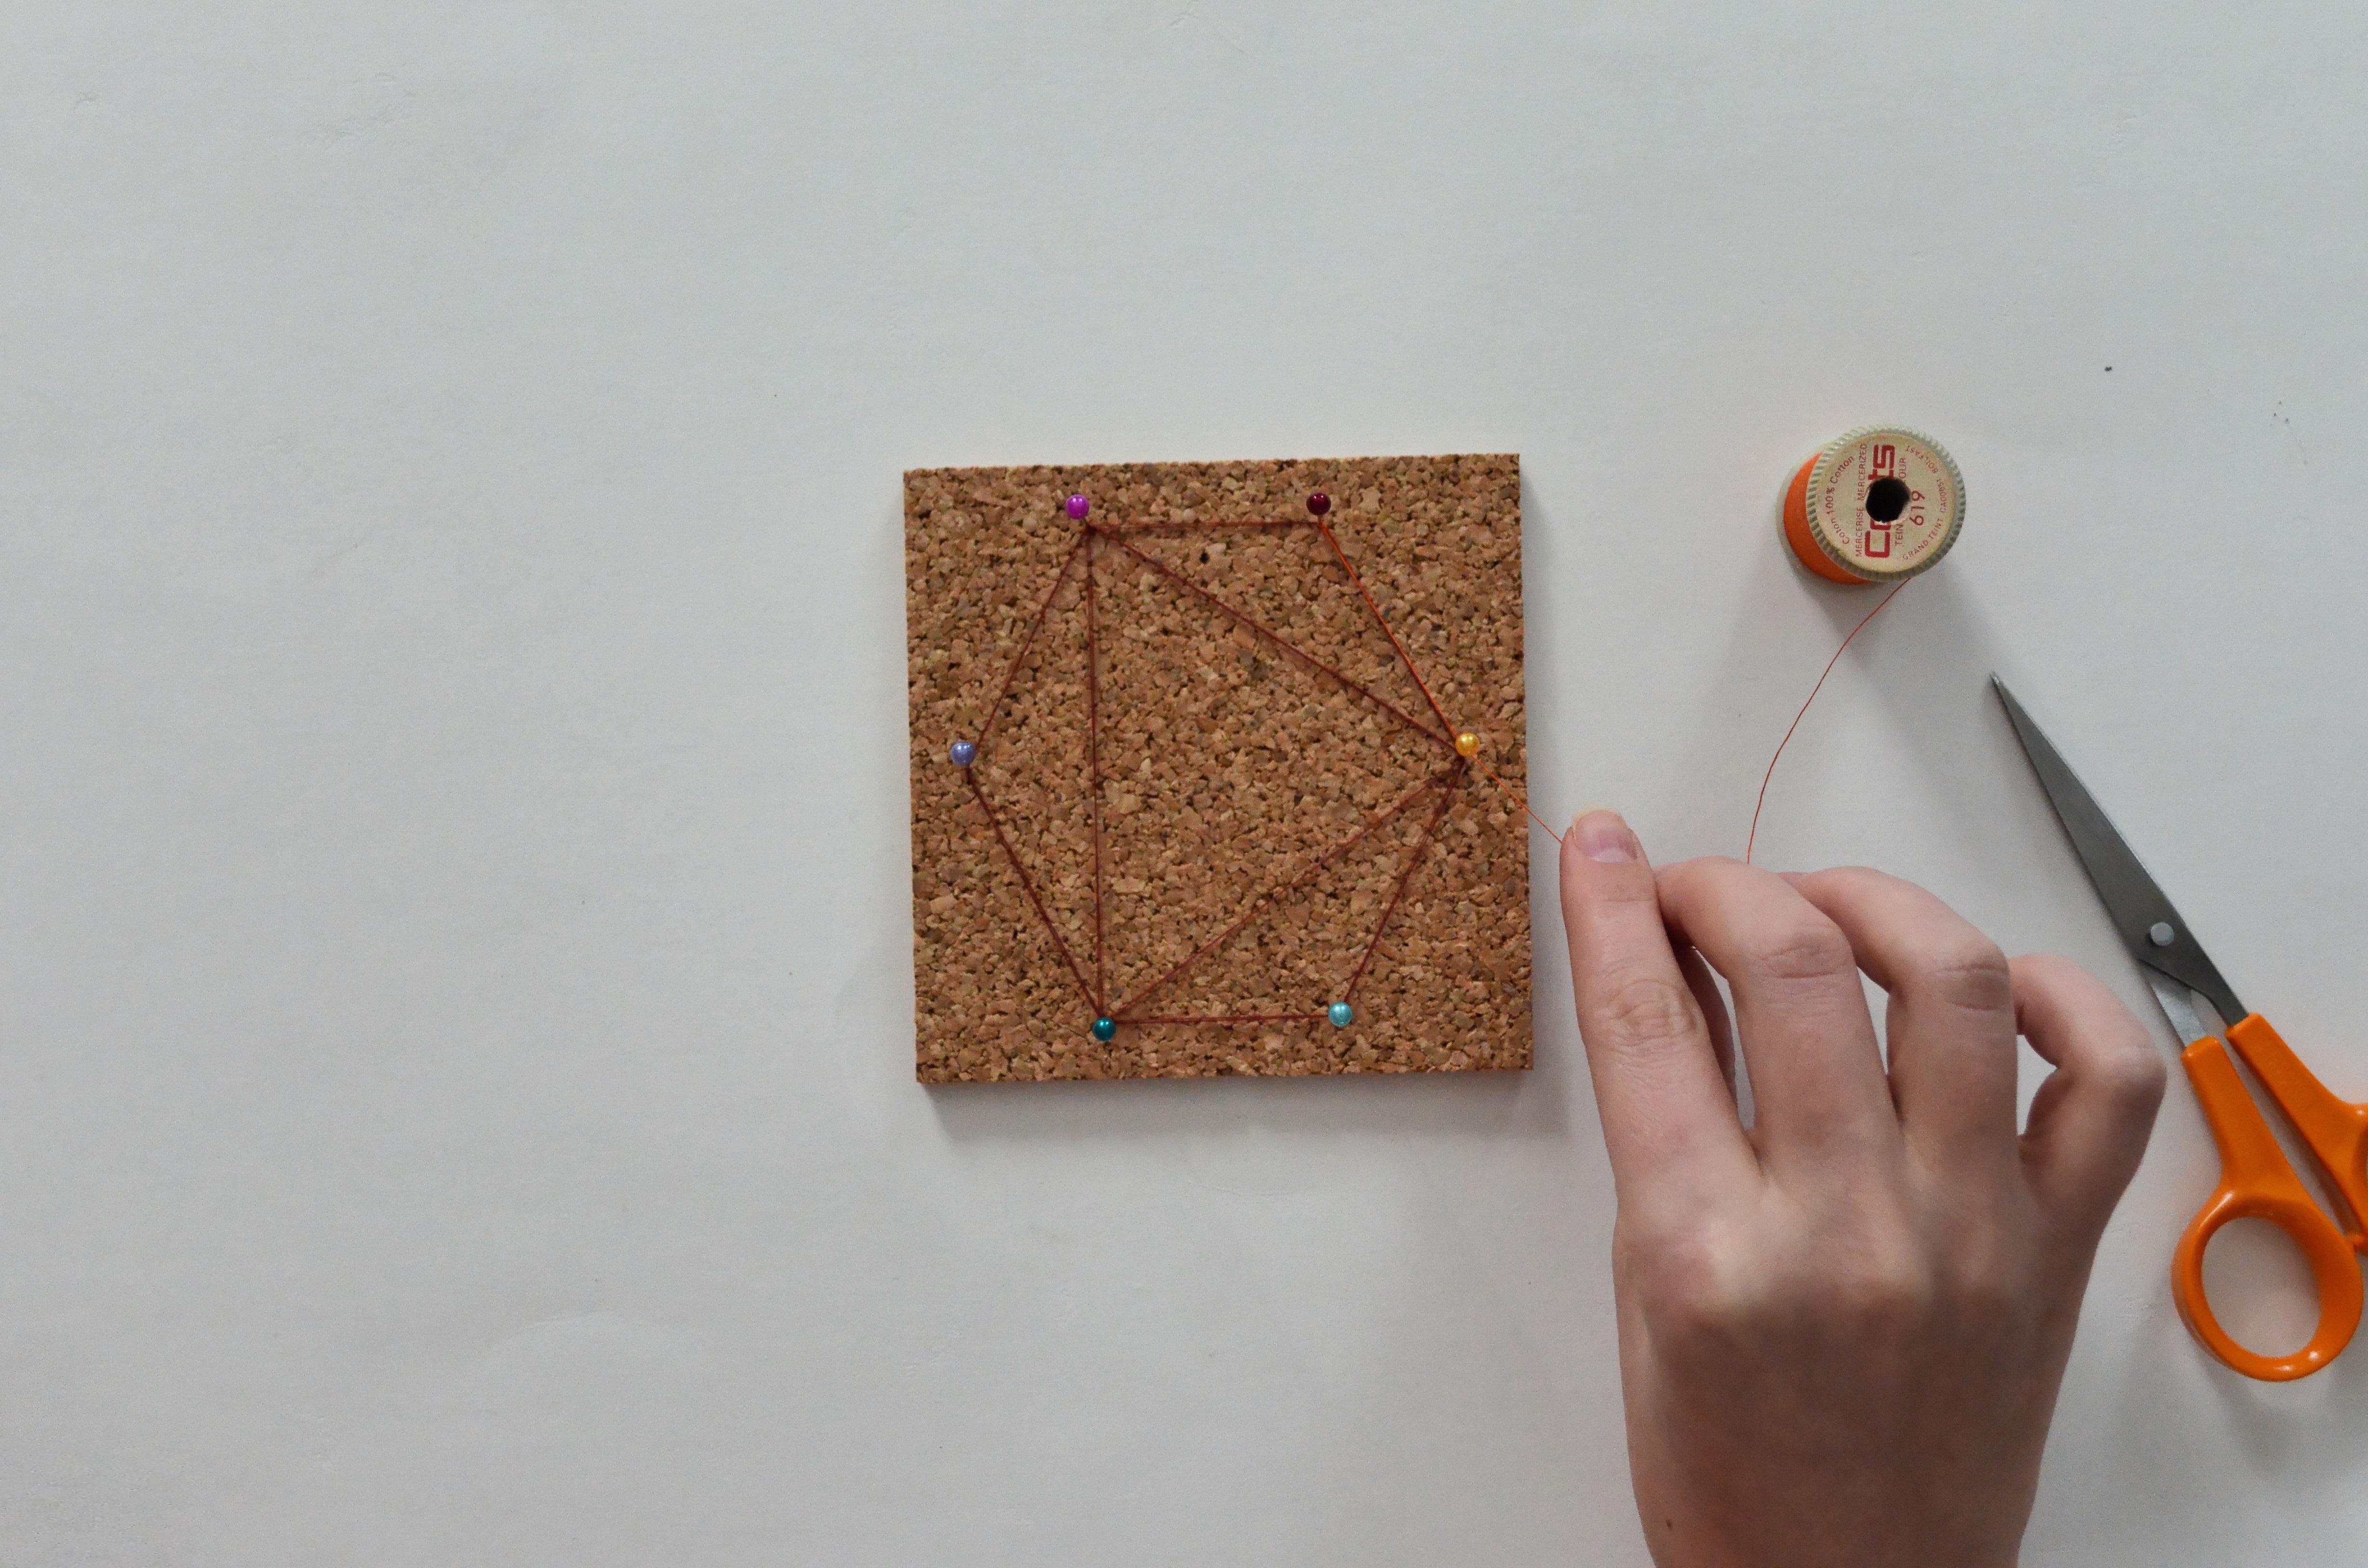
Then choose a starting point and tie the end of the thread around the pin with a double knot. Trim the excess thread. Gently push the knot down the pin until it is touching the cork tile. Now you can start wrapping the thread around the pins, doing a loop around each pin you pass, to form geometric shapes as you go. I find that wrapping the thread around the outside of the shape once before crossing through the inside works best. When you have encircled the outside and made one shape in the middle, repeat your steps so that each line you made is doubled. You should finish at the same pin as you started. Tie the thread around that pin in another double knot and trim the end.

Thread and Pin Art DIY \\ Sophster-Toaster Blog Thread and Pin Art DIY \\ Sophster-Toaster Blog

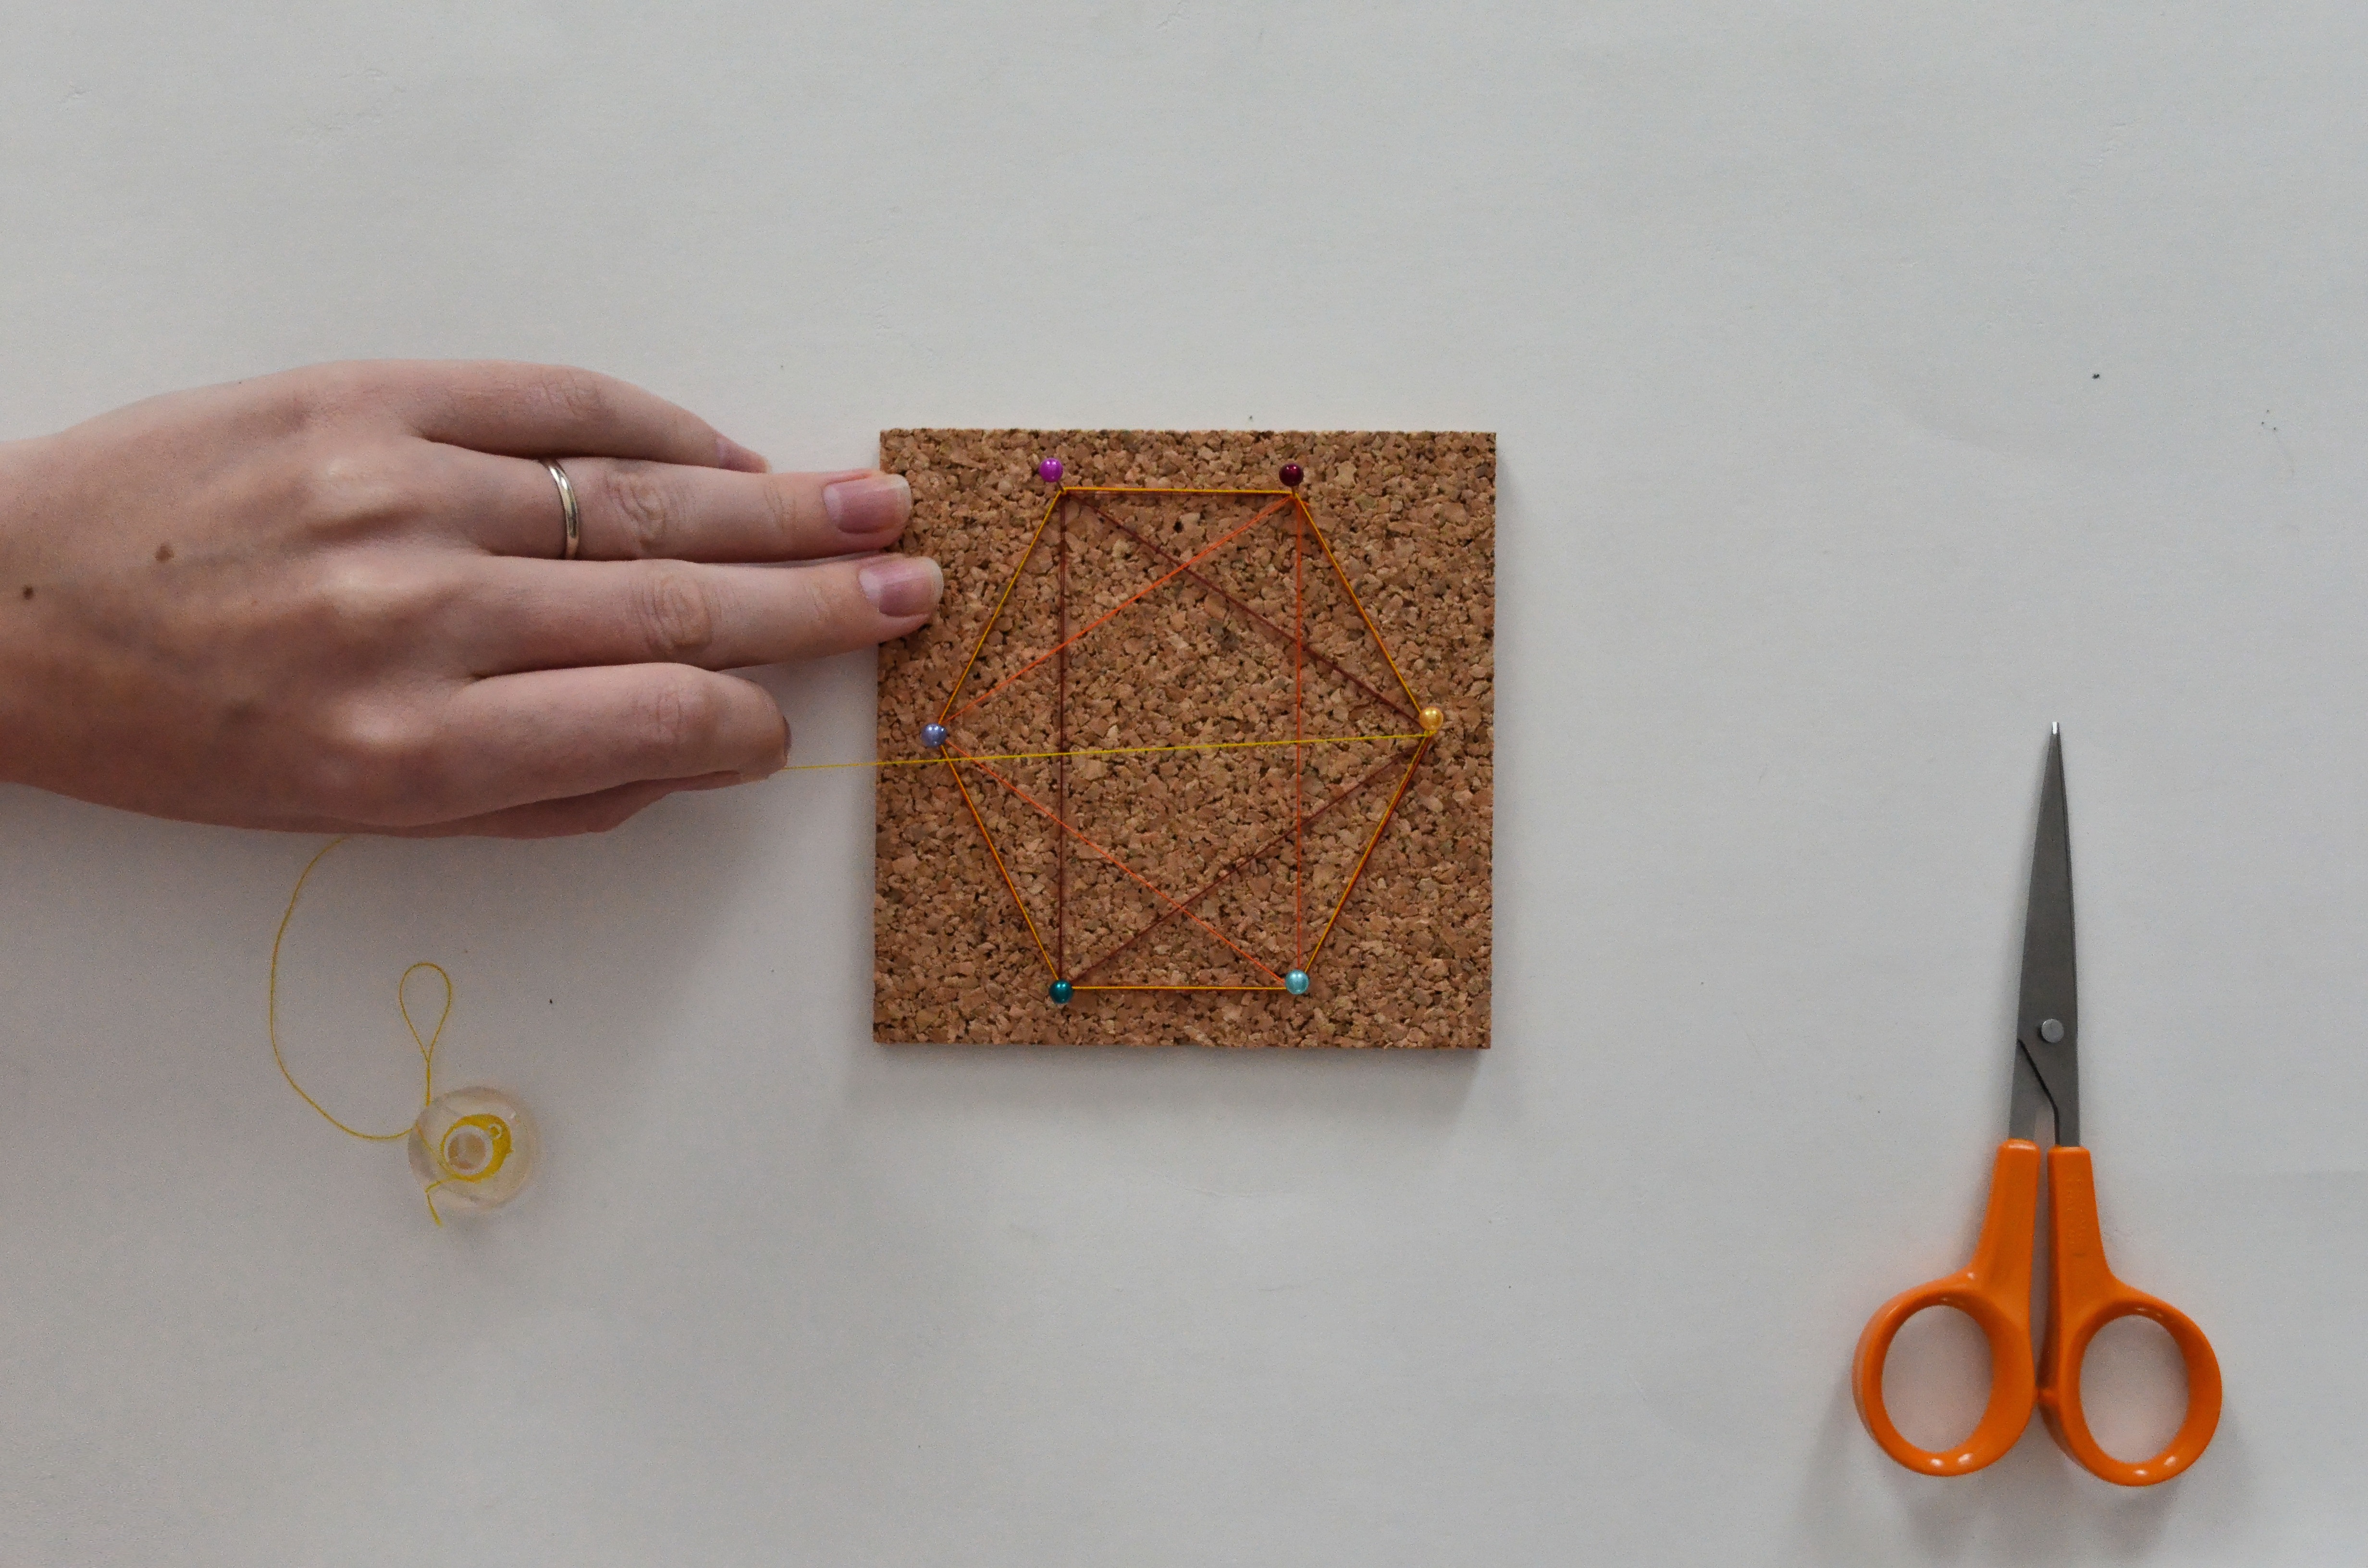
Next, choose a different colour of thread and start at the next pin over. You can make the same shape you did the first time or try a different one. I like to keep making the same shape until the lines start repeating. Some shapes will be redundant after two or three iterations and others can make it all the way around the shape before they lap over each other – memories of elementary school geometry will come flooding back.

Thread and Pin Art DIY \\ Sophster-Toaster Blog Thread and Pin Art DIY \\ Sophster-Toaster Blog

Keep repeating this process until you’ve made it back to your starting pin a few times and you are happy with your shapes and colours.

Thread and Pin Art DIY \\ Sophster-Toaster Blog Thread and Pin Art DIY \\ Sophster-Toaster Blog

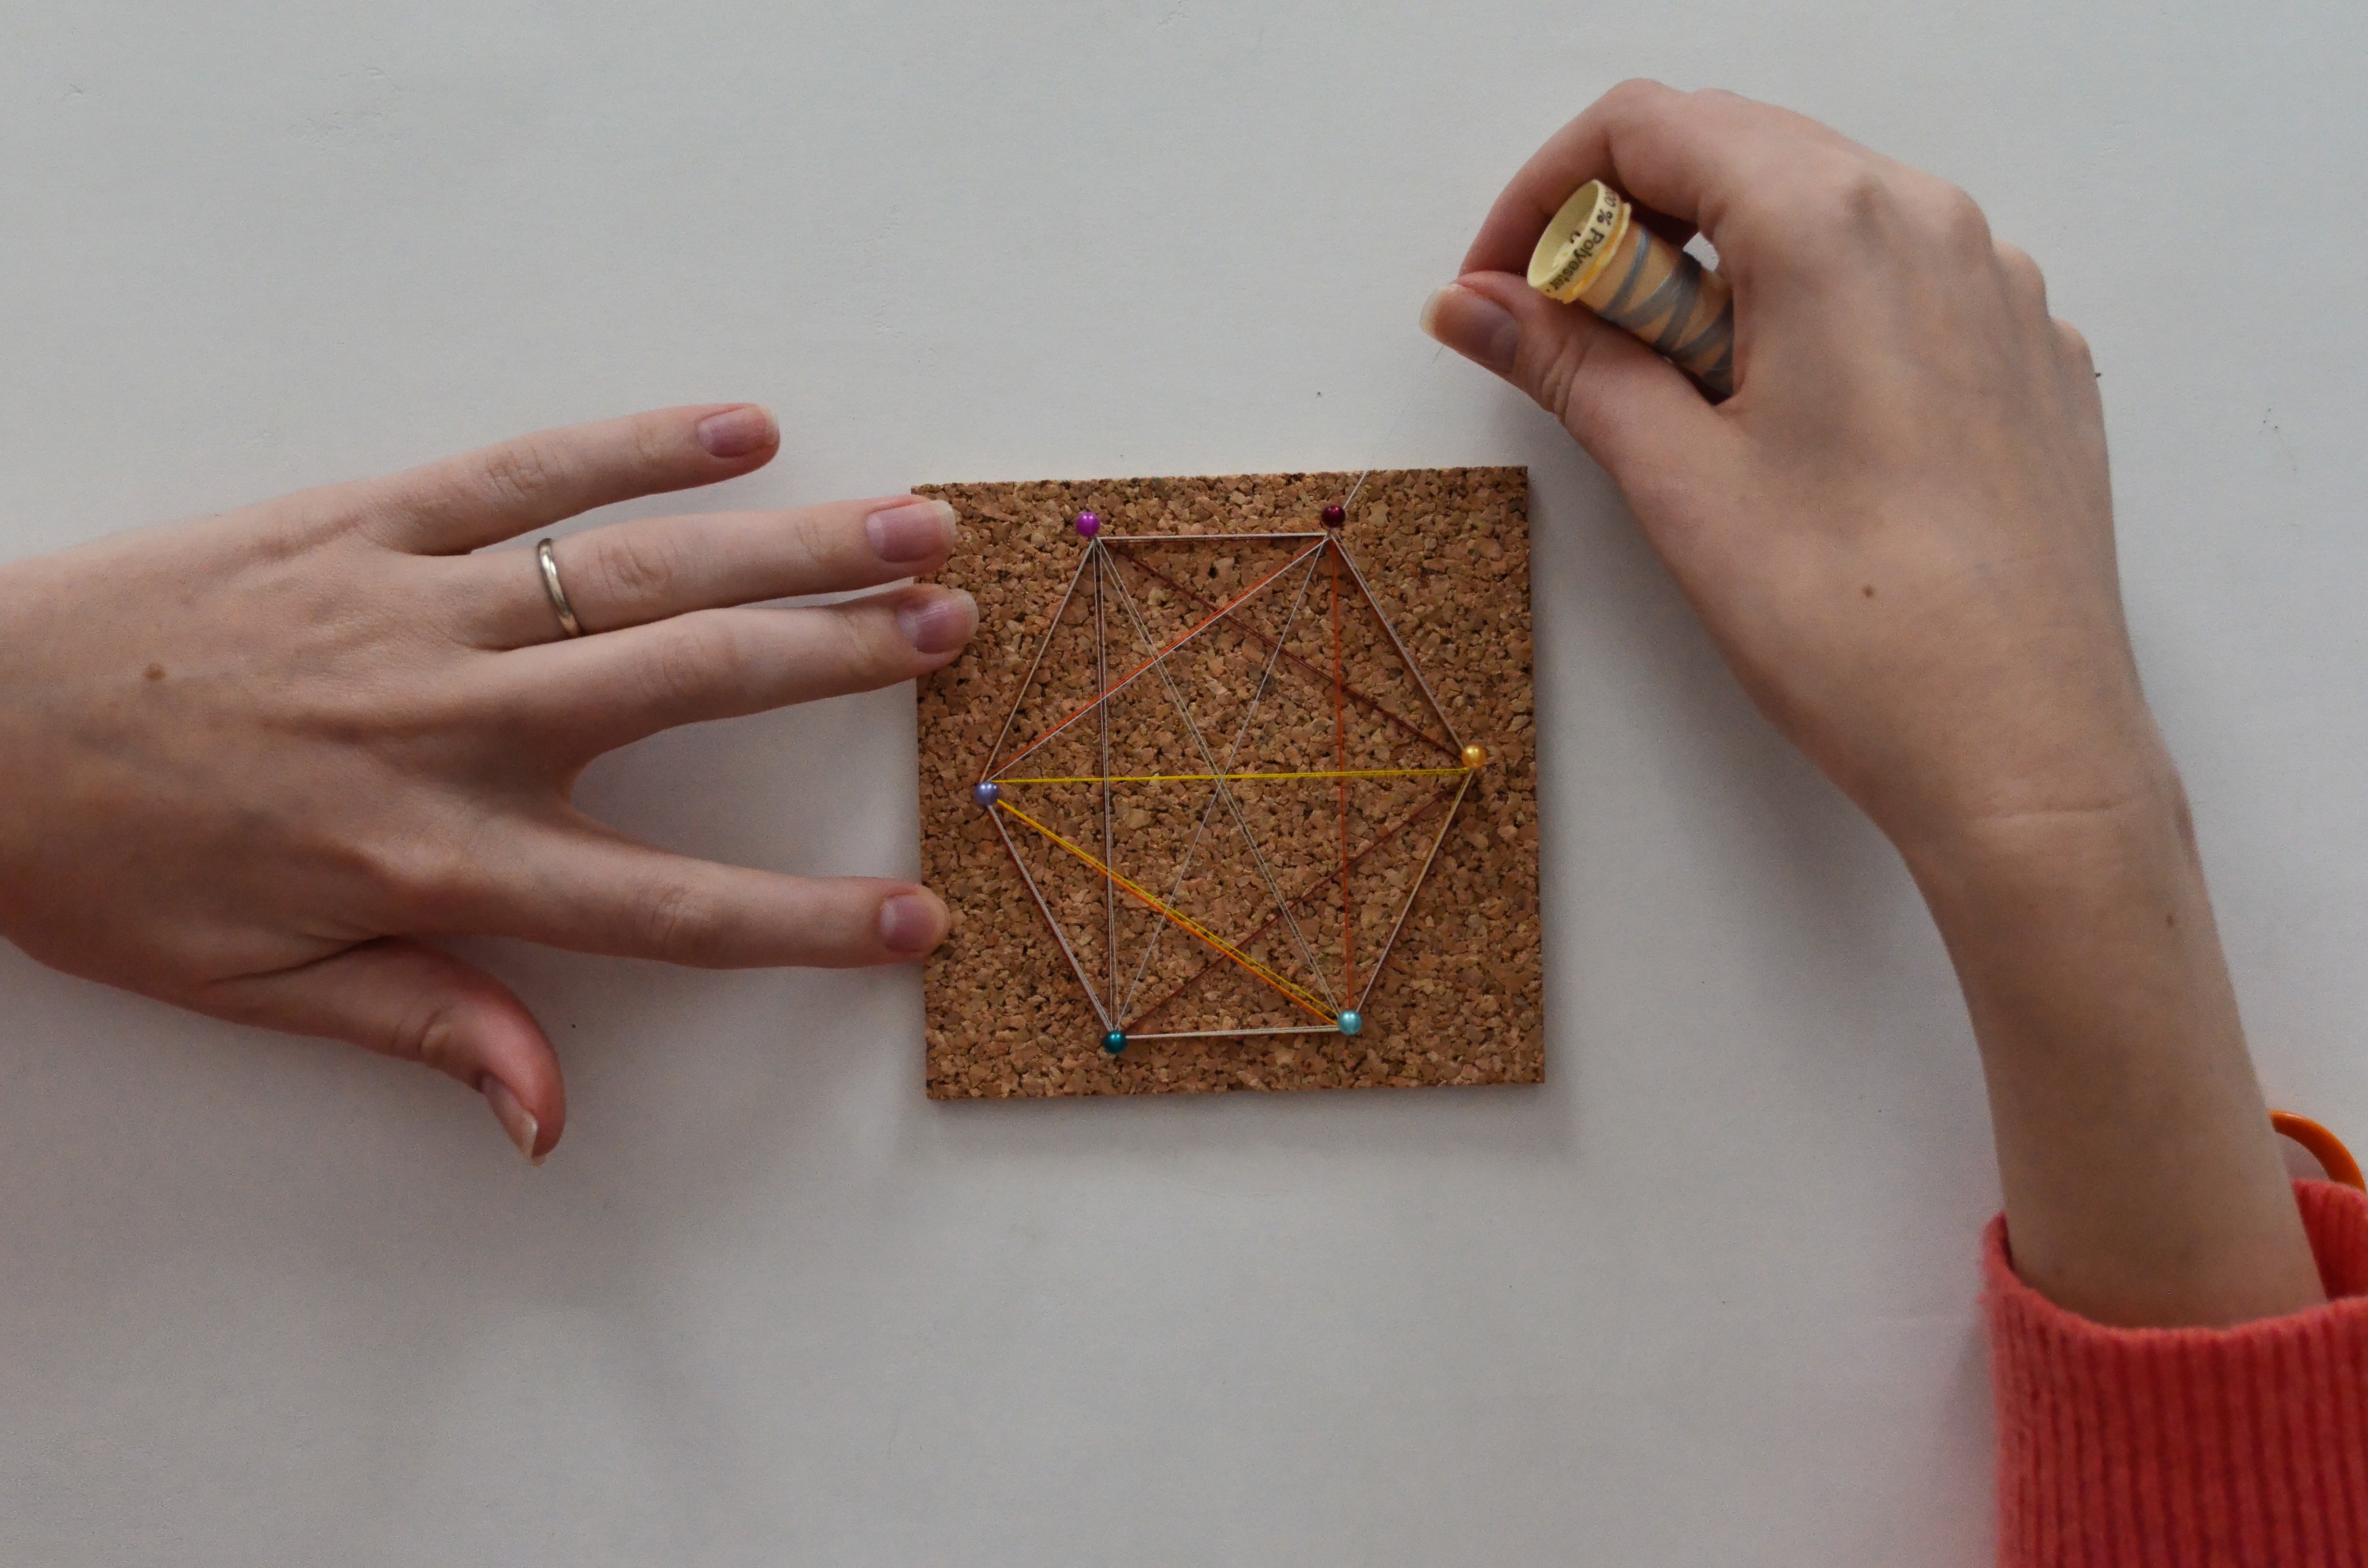
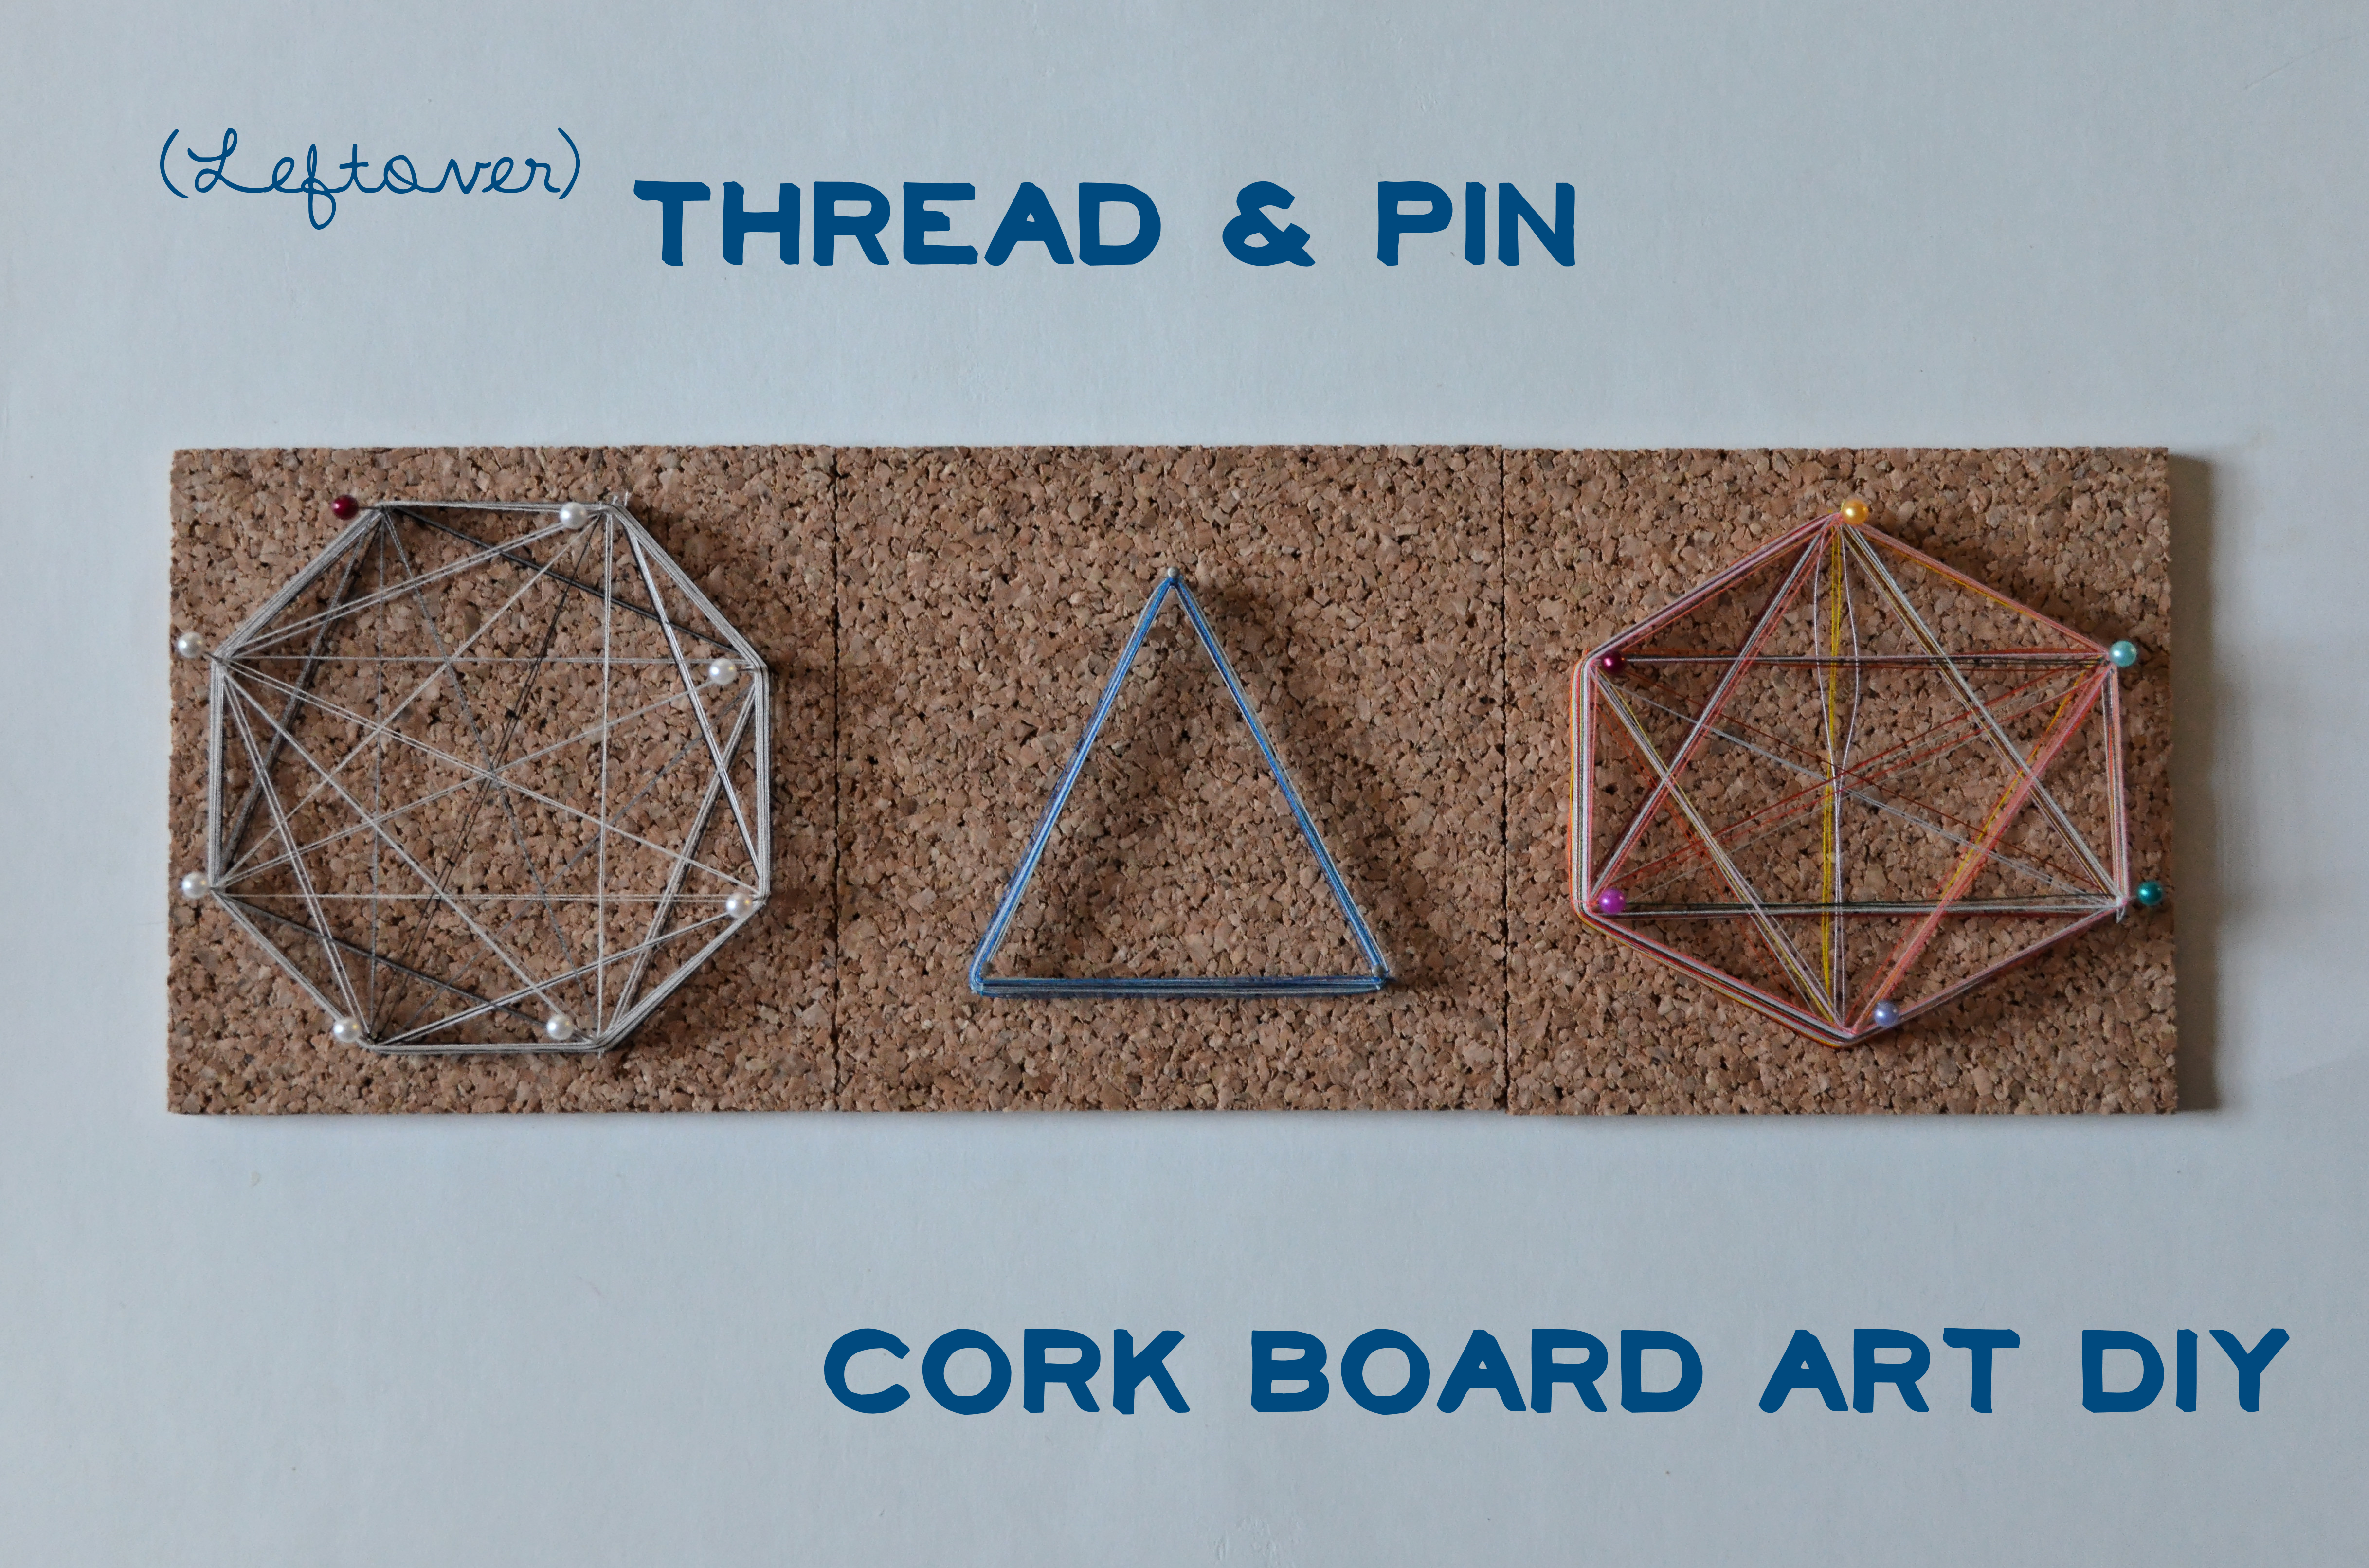
When you’re done, you’ll have something that looks like this:

Thread and Pin Art DIY \\ Sophster-Toaster Blog Thread and Pin Art DIY \\ Sophster-Toaster Blog Thread and Pin Art DIY \\ Sophster-Toaster Blog

Then you can give them to friends are hang them on your wall with Command Strips.

Thread and Pin Art DIY \\ Sophster-Toaster BlogThread and Pin Art DIY \\ Sophster-Toaster Blog

All photos by me.

DIY Bounce Board

The defining challenge that separates the novice photographer from the skilled hobbyist or professional lies in making the switch from flash to natural light. Anyone can invest in expensive equipment but that fancy camera body or editing software can only take you so far before you learn the limitations and exploitable facets of natural light sources.

I find that photographing in natural, diffused daylight is especially important when it comes to Etsy listing photos. The colour, texture and three-dimensional shape of your hand-crafted items need to be accurately represented in every photo – nobody likes surprises when it comes to shopping online. Most new Etsians seem to go through the same learning curve when they take their first leaps into product photography. They start like I did, photographing things in an unused corner of a tiny apartment; the lighting isn’t great and the space and budget are limited so they use the on-board flash to light the tightly cropped scene, resulting in a brightly coloured but visually unappealing image. Next, they think they can solve every problem by moving to the exact opposite end of the lighting spectrum and taking things outdoors… into direct, harsh sunlight. Now they’ve got an image with high contrast where everything is a weird, warm yellowy-orange, casts a dark black shadow and makes your colour correction software cry. Eventually all serious Etsy sellers will figure out which lighting conditions work best, when and where they occur during the course of the day and year, and then, someday, how to tweak and tinker with the light to take full advantage of everything it’s got.

I am at the tweaking and tinkering phase. The budget is still low, as I’m sure it is with most people who are trying to get a small business off the ground, so I don’t have a sticky wad of cash to through at every photography tool that I decide I need. I’d rather save that for the important things like lenses and a sturdy tripod that won’t fall over and break those shiny new lenses. This is where DIYs come in.

I recently made a quick and cheap DIY bounce board to solve a problem I’d been frequently coming up against: my apartment, though it has many floor to ceiling windows, only has windows on one side of each room, and the rooms that I photograph in most, the kitchen and my office/studio, only have one skinny window each. I found it was hard to adequately light a scene without one side being washed out by being closer to the single light source. I wasn’t ready to invest in an professional quality artificial light source, so I needed something to help bounce the light around the room. This DIY bounce board did the trick and now I don’t take a single shot without it. Here’s how I made it:

Photography Bounce Board DIYFoam Board Foam Board

Materials

  1. aluminum foil
  2. spray adhesive
  3. scissors
  4. foam board (white)

Photography Bounce Board DIY

How to

Measure and cut the lengths of aluminum foil needed to cover one side of the foam board – we’ll leave the other side white so we can have a double sided bounce board to better control the light intensity.

Spray one side of the foam board with spray adhesive, following the manufacturers instructions.

Carefully smooth the sheets of aluminum foil over the tacky (glue) side of the foam board. Trim the excess.

Photography Bounce Board DIY

Then just set up where ever you can best catch the light. I’ve been propping it up on chairs, leaning it against my tripod and wedging it in closet doorways.

Photography Bounce Board DIY

What I’m Working on This Week: 30/12/13

The new blog design is done! We put the finishing touches on and gave it a nice spit shine last night. Although it is nearly a full month late for the big debut date my hard-working husband originally quoted for me, it will coincide nicely with the completion of my new hair bow collection, and my full set giveaway.

Pink and Black Polka Dot Hair Bows

Continue reading

What I’m Working On This Week: 02/12/13

I started working on my DIY chalkboard dress form last week – taking it apart, fixing it up and putting it back together in my size/ my sample size – and I picked up my chalkboard paint ($22.97 at Home Depot), brush, roller, paint tray, putty to fill the gaps/seams, putty knife and sanding sponge yesterday. All together, after tax, the whole project cost me $53.33, not too shabby considering a small printed shop sign is $40 before time or money spent on the design. I should have it puttied and ready for paint by the end of the week.

Judy

It is my exact double, and it kind of creeps me out.

Continue reading