Don’t let the apathetic title fool you, I am quite passionate about photography, I am, however, also a realist – not to be confused with a pessimist – and I understand the limits of a shutter-happy society wielding what might as well be 0.2 megapixel potatoes. My goal is not to bring my reader to the level of someone who has been practicing for 20 years with one snappy article, but to give them the tips necessary to start the journey towards taking stunning photographs.
The best way only way to learn a new skill is to jump in, mess around and then practice for 10000 hours. Judging by the blurry, misguided attempts at photography that flood my news feed, I would guess that most people are at the jumping in and messing around stage. I entered this stage at an age when I was still convinced that the toilet was a monster that flushes right before it attacks; at an age when most children are carrying around a beloved doll or teddy, not a small red book of photographs their father took at the zoo.
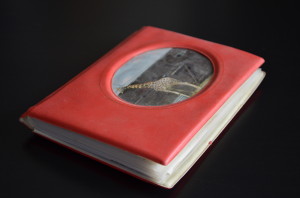
I loved this book dearly, I carried it around and studied the pictures meticulously, trying to understand what made them so compelling.
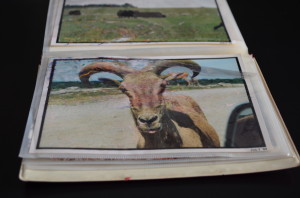
My favourite picture in the book.
This little red book has literally survived a flood and now rests on my bookshelf alongside the albums of photographs produced by the cheap, plastic learning cameras of my youth.

It also includes a picture of myself, which I like to keep as a reminder of how to design my costume when I become a super villain.
My first camera was so cheap that it did not even have a built-in flash; this introduced me to the harsh laws of lighting. By the time I was permitted to touch my dad’s fancy camera, the built-in light meter was a luxury that I had no use for. My next camera was a little better, with it I learned about focal length, field of view and how to keep my fingers out of the shot.

I still have my little green camera.
Next came digital and the land of infinite, consequence-free practice. This is where I learned foreground, middle ground and background, creating optical illusions and pulling what I wanted out of my sitters. Then I bought my first DSLR, and it all came together.
Now enough about me, time for the lesson.
Tip 1:
Focus! Someday, you will have to learn how to focus a picture, but for now there is no shame in using autofocus. Even the best of us take fuzzy pictures every now and then.

Have you ever tried to take a sharp picture of a fluffy kitten without blinding it, it’s nearly impossible!
The trick to it is to discard this mistake, never allow it off of the memory card and certainly never post it to facebook/ twitter/ instagram – take your pick.
Tip 2:
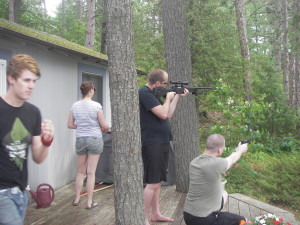
Be aware of everything in the shot. A perfectly good picture of a giant and his kitten can be ruined by a projector hat.

You see?
Photo Credit: Brett Didemus
You need to know when something that will distract from the dynamic or cohesiveness of your shot is in the background. It’s like seeing a boom mic in a low budget film or a typo in a novel – it takes you out of the moment.
Tip 3:
Lighting. The best way to learn about light is to play with it. Start with the light to your back; you mostly can’t go wrong with the light to your back. The biggest problem here is capturing your shadow, though I do love old black and white family vacation photos with the photographer’s shadow. Try different natural lighting conditions, my favourite light for portraits has always been sunset and twilight.

Though friends try to ruin it for me. Brett: destroyer of nice picture since 2012.
Try to cast bad shadows on your sitter’s face to learn how they can best be avoided. Put someone directly under a florescent light and witness the carnage. Take a picture of a cat lounging in a sunspot. Play until it’s automatic.
Tip 4:
Centre your subject. With practice, this rule can be broken, but for now, be sure to place the thing you are taking a picture of in the middle of the frame with equal and adequate space around the subject and the edges of the frame.

Toby: centred, good space, decent light – chosen by subject as profile picture.
Tip 5:
Straighten your horizon. This is especially true for landscape shots. Even if your horizon is not straight in reality (this is the case at my cottage) it should appear so in your pictures.

What not to do.
Photo Credit: Toby Sheepers
Tip 5 B:
Don’t take those weird angled photographs that are oh so common in bad wedding photography these days… and don’t hire a photographer that puts them in their portfolio.

Making fun of bad photography with Mitch.
Tip 6:
Beware of photobombers.