Category Archives: DIY & How To

Artisan Market Red Flags

I’ve previously written about the handmade/artisan market application process from the point of filling out the application. That’s the easy part. Today I’m going back to the beginning and talking about how you decide which markets to apply to in the first place.

Applying to a market is the same as committing to do the market. All (good) markets state in their contracts – which you must sign at the time of application – that should you be accepted, you agree to pay the fees and attend the market. This can frequently mean planning to devote huge amounts of resources to an event that you know very little about.

Applications to a market can go up as early as seven or eight months before the actual event. It’s one of the first things organizers need to get done, after booking the venue and making some-sort of website to advertise and host the applications. At this point in the market planning process, there can be a lot of unfulfilled intentions for the organizers and a lot of unknowns for you.

A good market application website, or mass email invite, will provide some information, like date and location, some stats, a mission statement of sorts, a link to a website, and an idea of the marketing language and imagery, but not much else. Finding and figuring the rest of the information is up to you. This can be very tricky for a maker new to their craft or new to selling at these big events, and, if you are anything like me, you will make a lot of mistakes and bad judgements before you get the hang of it.

Here are some of the red flags I’ve noticed in my four years of doing artisan markets. These early giveaways almost always guarantee a market will be bad, resulting in poor turn out and small-to-no profit for your time and effort.

The Market Stats are Estimates

When a market, especially one that’s been around for awhile, gives you a projected estimate of how many shoppers they expect, in place of real statistics gathered and averaged over the years, this number tends to be a result of wishful thinking and not something they can actually deliver on the day. New markets are an exception, but you should always take their estimates with a grain of salt.

They Don’t Limit Vendors by Category

Don’t be afraid when you see that the market organizers will be curating, limiting, or wait-listing. This is a good thing. This means that when you get in, the market will have healthy competition and won’t be over run with popular categories, which can end up being bad for everyone. I’m lucky in that my category is not very common. The best markets I’ve ever done have had 3-5 other clothing vendors, with differing styles or techniques. The worst markets have been the ones where I’m the only clothing vendor and completely out of context among the 7 soap makers, 3 additional bath and body vendors, and 11 jewellery designers all vying for attention.

They Allow Re-sellers in a Handmade Oriented Market

This is the number one determiner for a bad market! When I say re-sellers, I’m talking about people involved in “direct selling” schemes, or as I call it from atop my high horse, pyramid selling. Organizers will get desperate, greedy, or are just plain ill-informed, and allow these people in. Not only are they hard for people who make all of their own products (and all of their packaging, branding materials, etc) to compete with, they seem to lower the prestige of the market. Their products are often of lower quality and the people designing and producing the stock for them to sell don’t have the same ethical and environmental concerns and standards that a small, local maker has. People come to these events to support what we do, they are happy to pay us what we are worth. They don’t want to see this. Not here, not now.

A good way to tell if a market will allow direct sellers is that they will say somewhere in the application info that they will be limiting the number people who resell Scentsy, Sweetlegs, etc.

The Market is not the Main Event

This took me the longest to notice. I didn’t piece the trend together until a few weeks ago. It looks so obvious now; the best markets I’ve ever done have been purely a shopping event and the worst markets I’ve ever done have been tacked on to something else, like a street festival, fashion show or food truck fair. Another insidious sign, can be a market that plans workshops or children’s activities. It feels like the organizer wasn’t confident the vendors could draw people in on their own. In my experience, it actually reduces turn out and restricts demographics.

I image it could be different if you are selling food at a food festival, or children’s products at a children’s event, but the worst market I’ve ever done, was at a fashion show…. When an organizer does this, people don’t come for the vendors. They come for the event and maybe do a quick lap around the vendors, but they have no intention to actually stop and shop.

The Contract Doesn’t Forbid Early Tear Down

If a market goes badly, and there is no language in the contract prohibiting early tear down and pack up – followed by strict threats of being blacklisted for breaking this rule – less professional vendors will leave early. This creates unappealing gaps in once neat lines of vendor booths. The few people still shopping will think the market is over and leave before seeing every artisan still hanging on. Once one vendor (or an organizer!) starts packing up, they cause a chain reaction of others willing to cut their losses and throw in the towel early.

The Application Doesn’t Require Photos of Your Setup

This one is more of an orange flag. The very best markets will ask for examples of your typical booth layout so they can neighbour you with other vendors that complement or give intriguing contrast to your look, styling and branding. Most market organizers actually don’t think to ask about this, but still seem to put some thought into not pairing two competing category vendors next to each other or doing something silly like sandwiching a maker of vegan products between butter and leather artisans. But hey, I’ve seen some things that have made me think the organizers just tossed everyone in randomly. Poor planning like this from an organizer can be harder to predict ahead of time so when paired with other red flags on this list, I take this one more seriously.

The Name/Branding/Website is Bad

If you don’t like branding, don’t understand the name or can’t navigate the website, run. Your target demographic is going to feel the same way and things aren’t going to improve as the market approaches. Definitely don’t apply to a market that doesn’t have a website or at least a very strong social media presence.

The Location is Bad

If you have to look the venue up on a map and then can’t find it on street view, it’s a bad venue. Another thing to take into account is how the people who connect with your brand and products travel. Are they college kids who rely on public transportation? Don’t apply to a market in the middle of nowhere.

There’s No Fee

This seems like a great thing when you’ve never done a market before and have a lot of investments to make in something with no guarantee of return. But take a minute to consider all the time and money an organizer puts into pulling off a successful market. They have to book a venue, buy insurance, market the event and put together and process the applications, just to name a few. A good amount for a first time market to charge for a one day event (in my area on the edge of the golden horseshoe in Ontario) is $50-$75. An established market in a prime location can charge from $120-$200 for one day, but you’re going to get a lot more for that money. This organizer’s experience and reputation will draw a greater attendance. The best and biggest market in my area goes all out and provides a two day “upscale shopping experience” that brings out well-to-do women who shop like it’s a sport. They charge $250-$300.

The Booths are Small

Most markets will sell 10×10 foot booths where you bring your own tent. Some will offer smaller, less expensive spaces for vendors who make smaller, less expensive products, makes sense. Some indoor markets will sell 8×8 booths, which you can scale down so somewhat easily when you don’t have to worry about uneven ground, mud and other obstacles that comes with outdoor markets. Anything smaller than that, more than being difficult to adapt your tediously planned and perfected setup to, shows a real lack of knowledge and experience on the part of the organizer.

You Learn about the Event from a Last Minute Invite

Think twice about applying to a market that sends you an email inviting you to apply after the deadline for applications has passed.

There you have it. I wouldn’t say I sit down with a checklist every time I research a new market, but these are definitely things that when I see, I give a second thought about sending in my application. There are of course exceptions to these rules, but I have found them to be very good indicators, months out, of whether a market will be worth my time, work, and money. Of course, if you do see these signs, or are unsure of anything when looking into a market application, don’t be afraid to ask the organizer for more details!

No Pin Milkmaid Braids

No Pin Milkmaid Braids | Sophster-Toaster Blog

I love wearing my hair in milkmaid braids since growing it out. It’s one of the best ways to hide unwashed (and overgrown) hair. It’s great for camping and cottage trips where you can’t always wash or even wet your hair and don’t want to carry a lot of products. Before this fall, the only thing keeping it from being my perfect go-to hairstyle was all the tucking, pinning and pulling needed to pull off that charming trying-really-hard-to-look-like-I’m-not-trying look. Since then, I’ve found the secret to making milkmaid braids the quick and easy, lazy day style they deserve to be!

No Pin Milkmaid Braids | Sophster-Toaster Blog

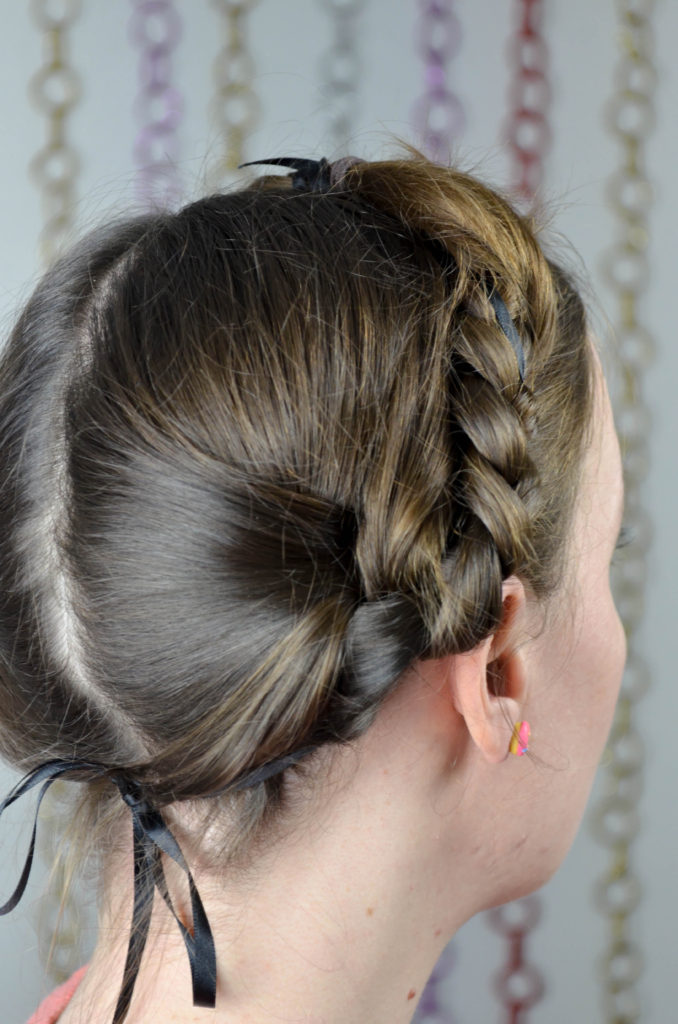
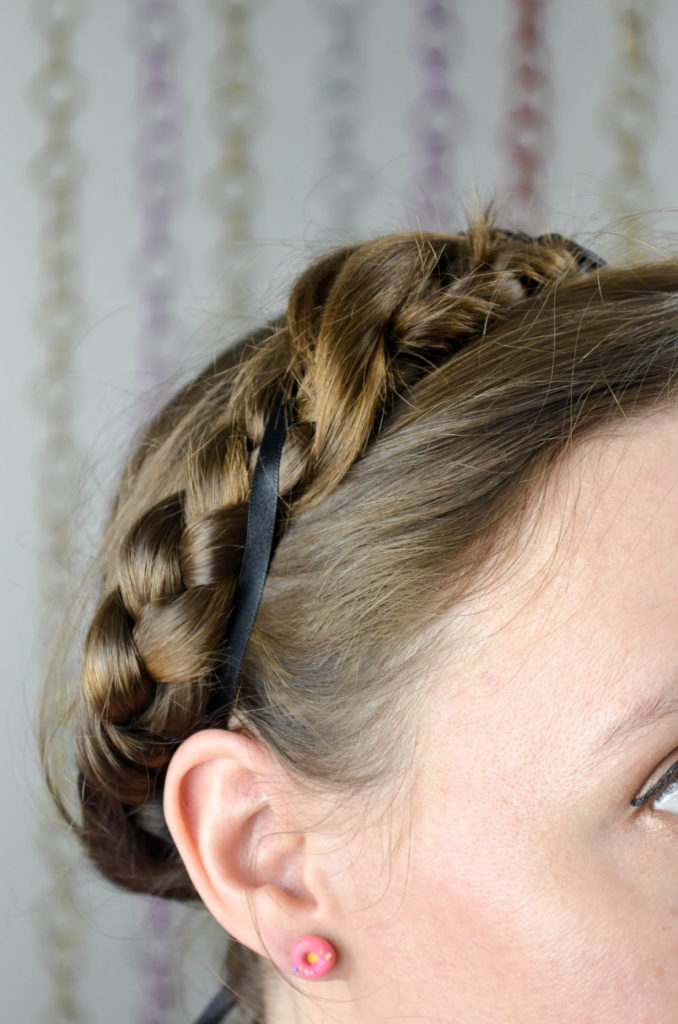
I was inspired by a horror movie I watched around Halloween. I noticed that in the beautiful but not very exciting, The Witch, the 17th century New England women were wearing their hair in milkmaid braids, held together only by long pieces of ribbon. The next morning, I sauntered out of bed, as eagerly as one can, to see if this ribbon only method could really work. I found that I couldn’t do away with a couple of small hair elastics, to keep the ribbons from slipping off the ends of the braids, but was quite pleased when everything stayed in place without a single pin. They held tight for the rest of the day, captured by the light tension of ordinary ribbons I found laying around in my sewing stash.

Those women were on to something. With a bit of practice, these no pin milkmaid braids only take about 10 minutes to create and are comfortable worn all day. Here’s how I do it:

How-to:

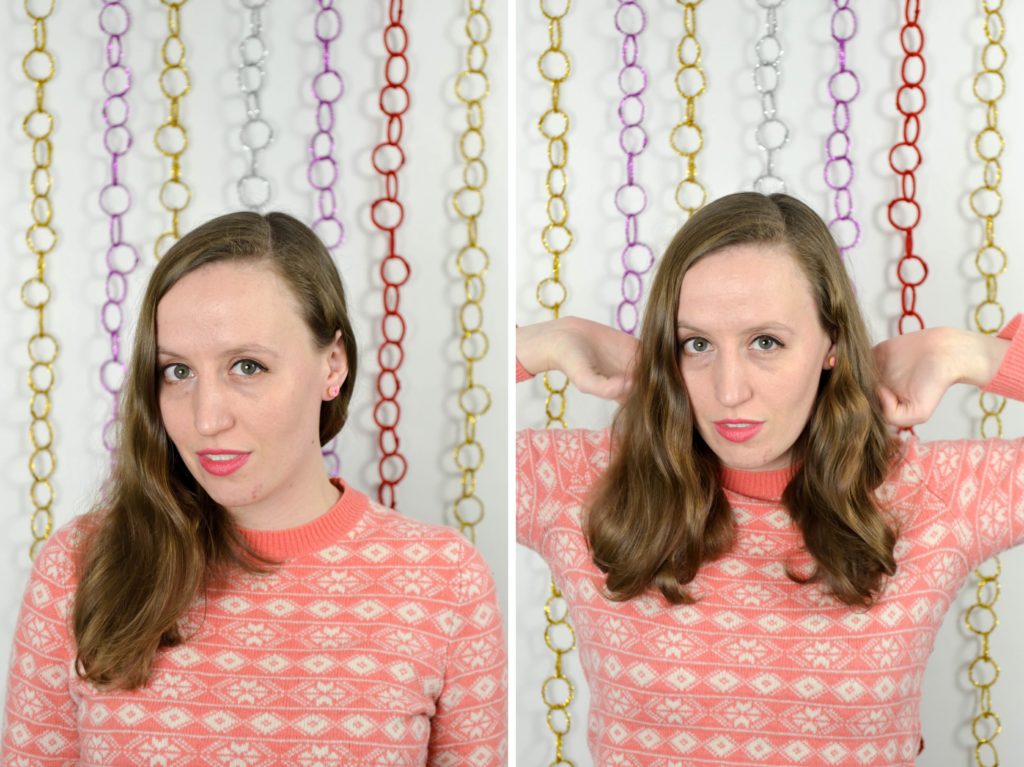
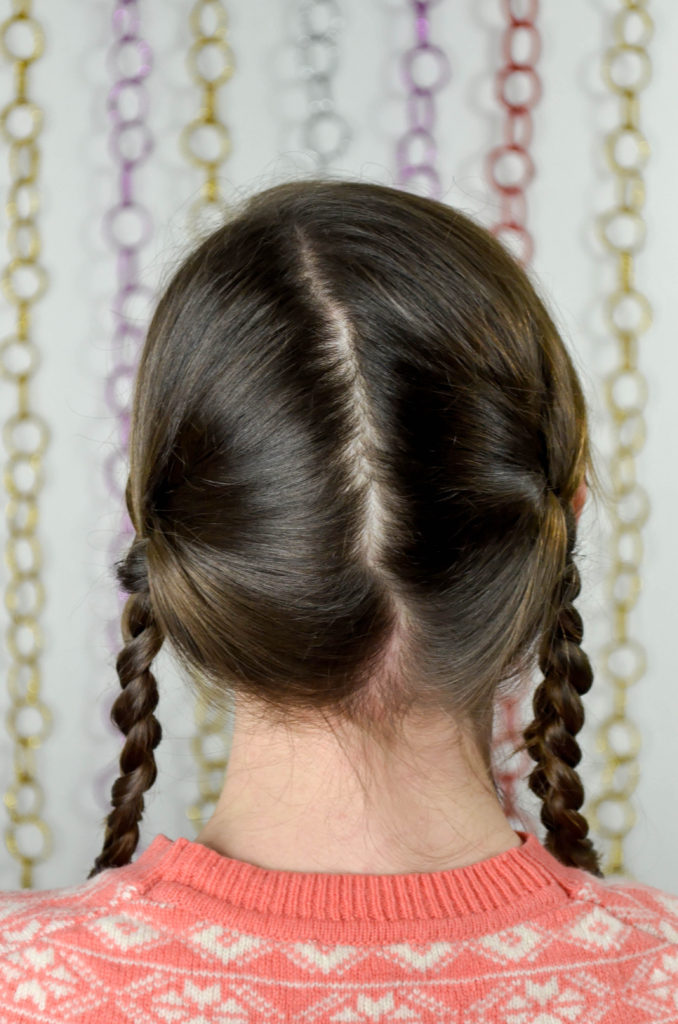
  1. Start with brushed and moisturized hair. Split into two sections, down the middle, using a comb (or fingers for a messier look).

No Pin Milkmaid Braids | Sophster-Toaster Blog

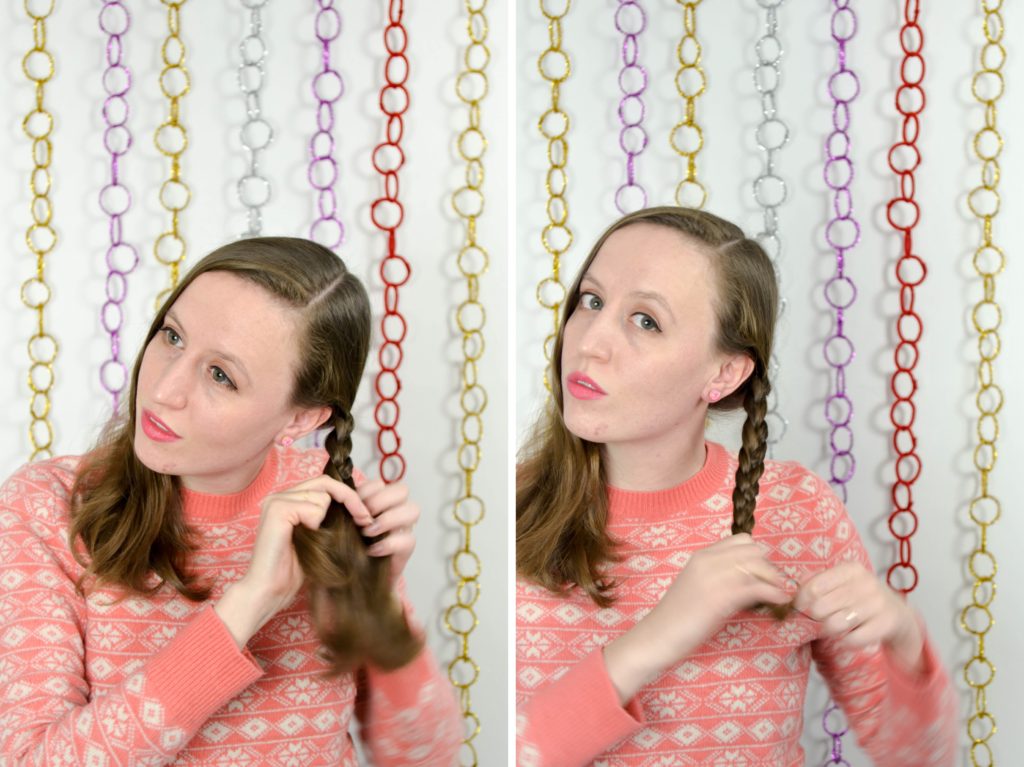
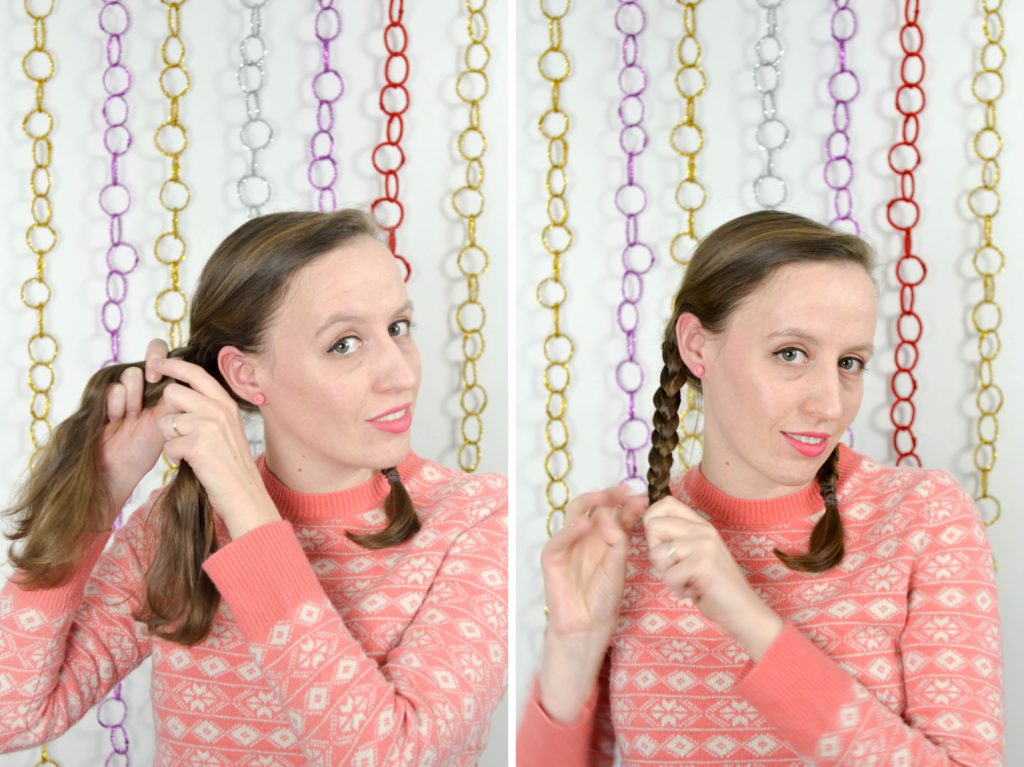
2. Starting high up, near the top of the ear, braid each section leaving as short a tail as you can at the end.

No Pin Milkmaid Braids | Sophster-Toaster BlogNo Pin Milkmaid Braids | Sophster-Toaster BlogNo Pin Milkmaid Braids | Sophster-Toaster Blog

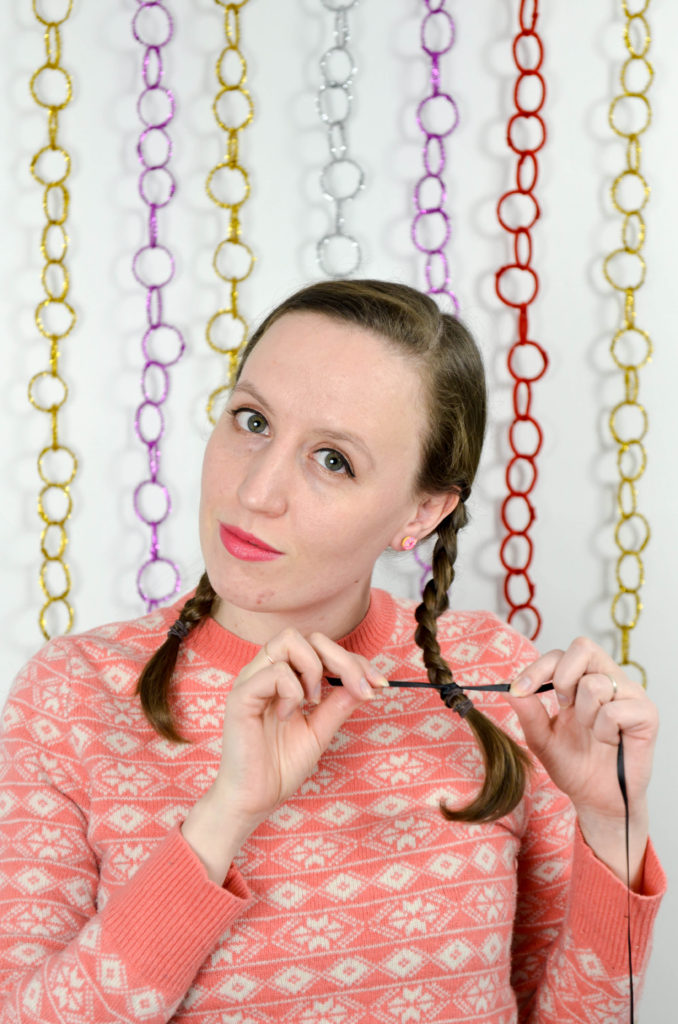
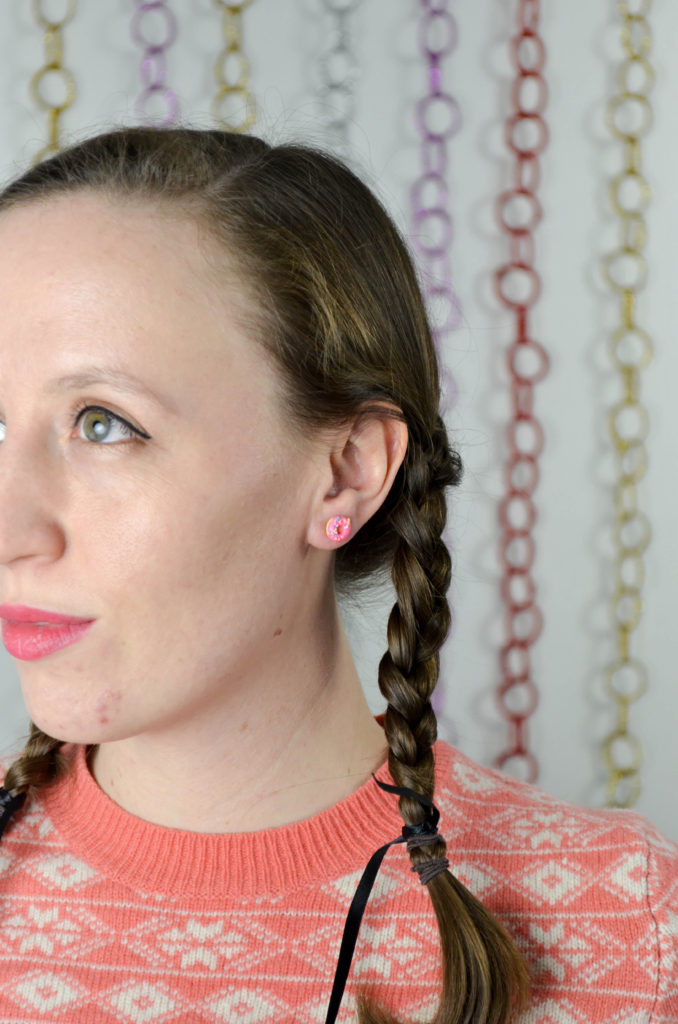
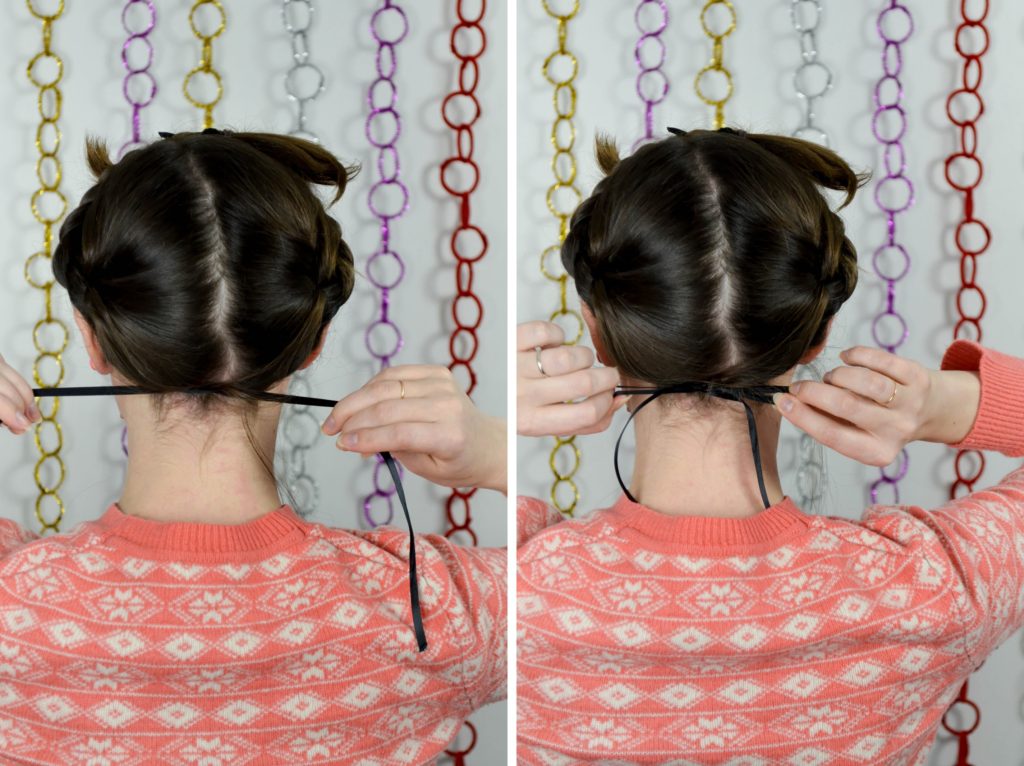
3. Cut two matching lengths of ribbon long enough to tie to the end of each braid, wrap around to the nape of the neck and tie in a bow. Tie each ribbon securely to the end of each braid, just above the elastic. I like to tie a basic knot, then wrap the ribbon around to the other side and tie another knot.

No Pin Milkmaid Braids | Sophster-Toaster Blog No Pin Milkmaid Braids | Sophster-Toaster Blog

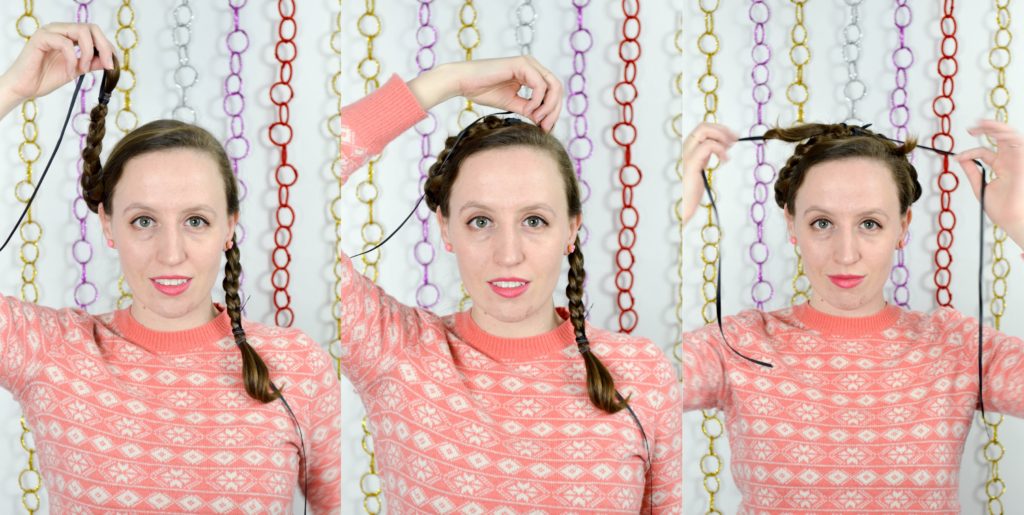
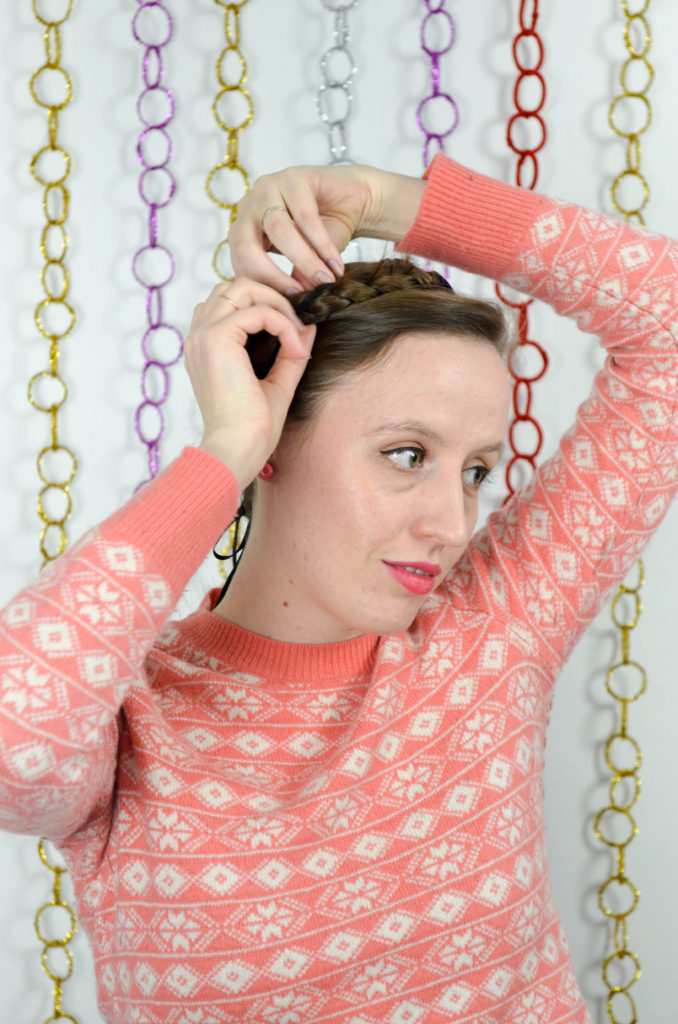
4. Next, pick each braid up and place it over the top of your head. Hold each ribbon and pull them tightly across to hold the braids in place.

No Pin Milkmaid Braids | Sophster-Toaster Blog

5. Pull the ribbons around to the nape of your neck and tie in a bow. Tip you head back slightly to make sure the braids don’t slip off the back. It they do slide off, try placing them further forward, towards your hairline.

No Pin Milkmaid Braids | Sophster-Toaster Blog

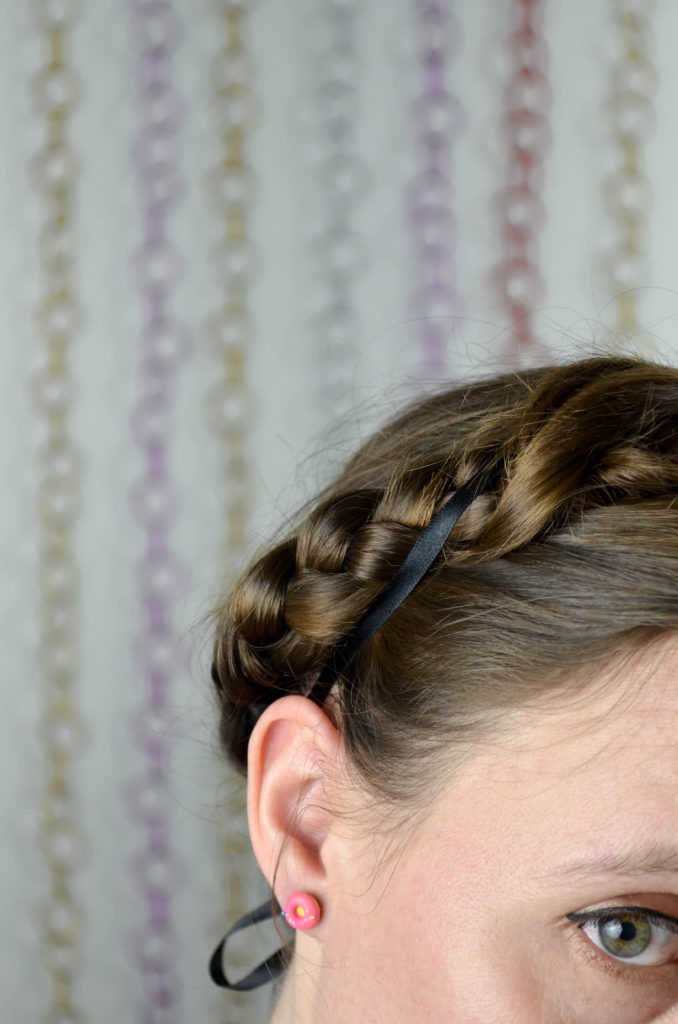
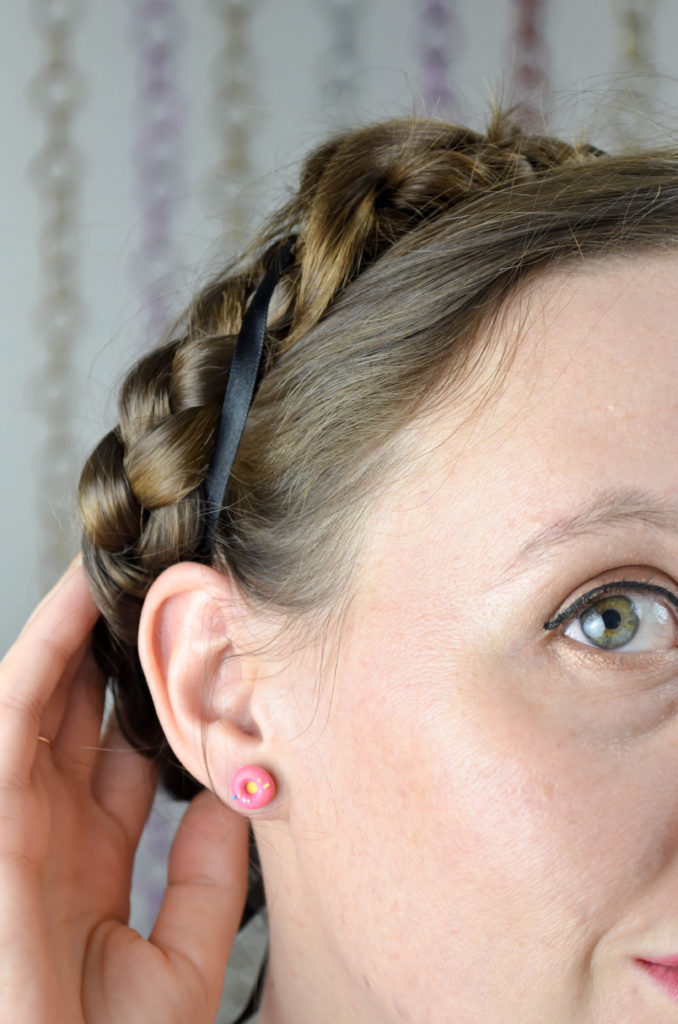
6. Tuck in the ends of the braids, the ends of the ribbons and any other loose pieces of hair and you’re done!

No Pin Milkmaid Braids | Sophster-Toaster Blog No Pin Milkmaid Braids | Sophster-Toaster Blog

I find this method works especially well for medium length hair that isn’t quite long enough for any meaningful braid overlap to be pinned together.

No Pin Milkmaid Braids | Sophster-Toaster Blog No Pin Milkmaid Braids | Sophster-Toaster Blog

I like to use dark ribbon that blends into my hair colour but it might be fun to use brightly coloured ribbons and wrap them around the braids for a festive party look!

All photos by me.

Thread and Pin Art DIY

Thread and Pin Art DIY \\ Sophster-Toaster Blog

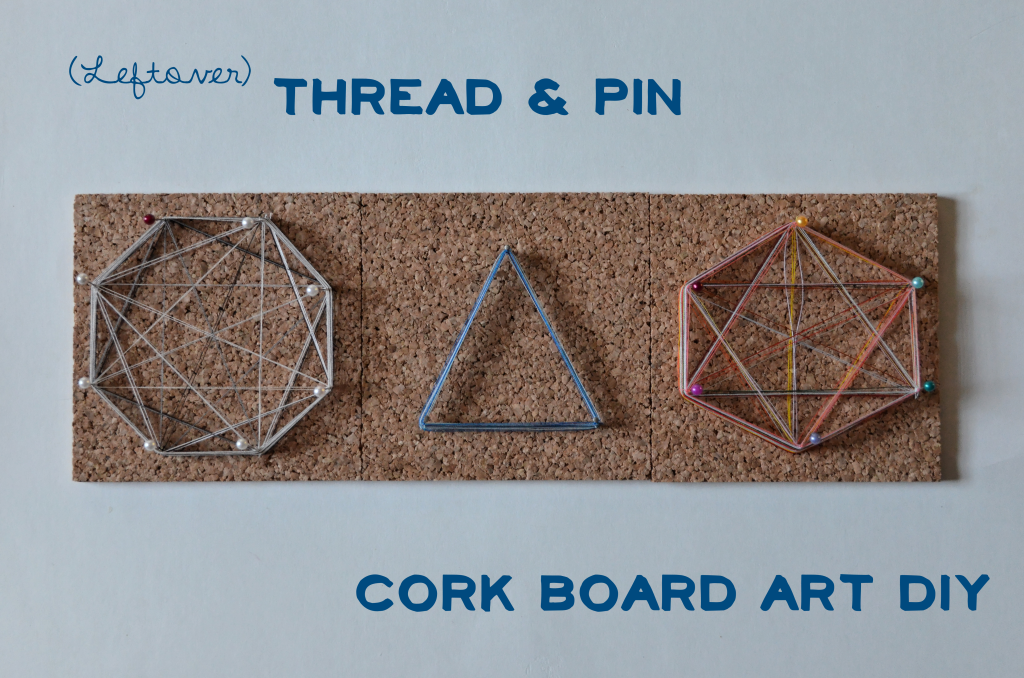
I’m always looking for uses for leftover thread. There are a few ways to reuse it while sewing, like using it for basting stitches, but after a few years of frequent sewing, it really starts to fill up the drawers and boxes you’ve been tossing it into. I had quite a lot of thread matching fabrics that I used up years ago, so I came up with a creative way to use it up: Thread and Pin Art.

It’s also a good way to reuse old, dull pins.

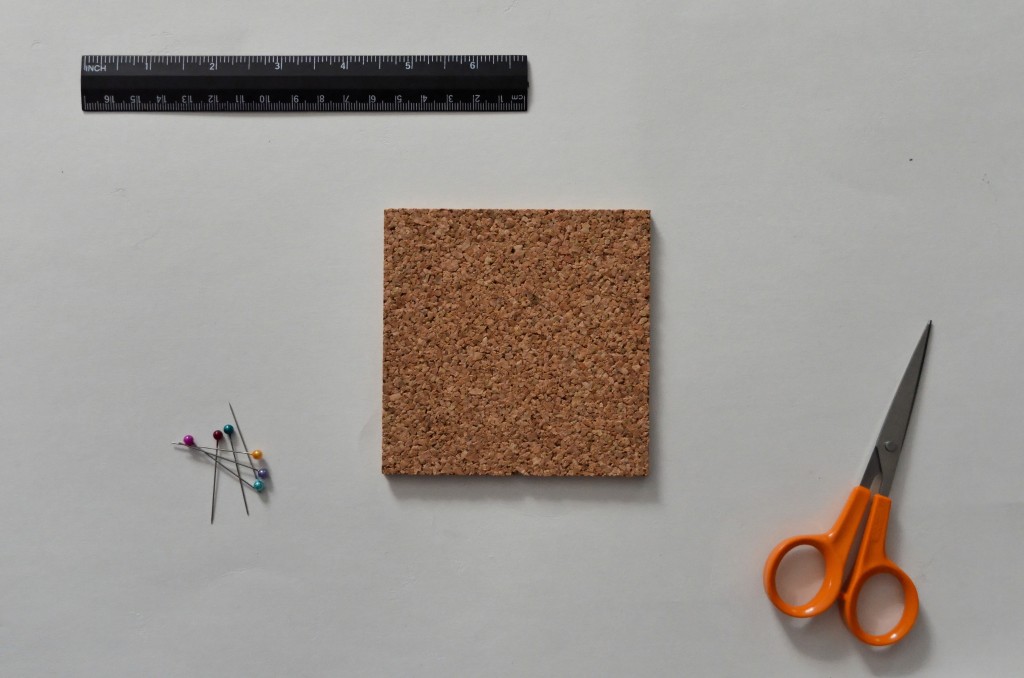
The Supplies

Cork Tile – I got mine here
Leftover Thread
Pins
Ruler
Scissors

Thread and Pin Art DIY \\ Sophster-Toaster Blog

How-to

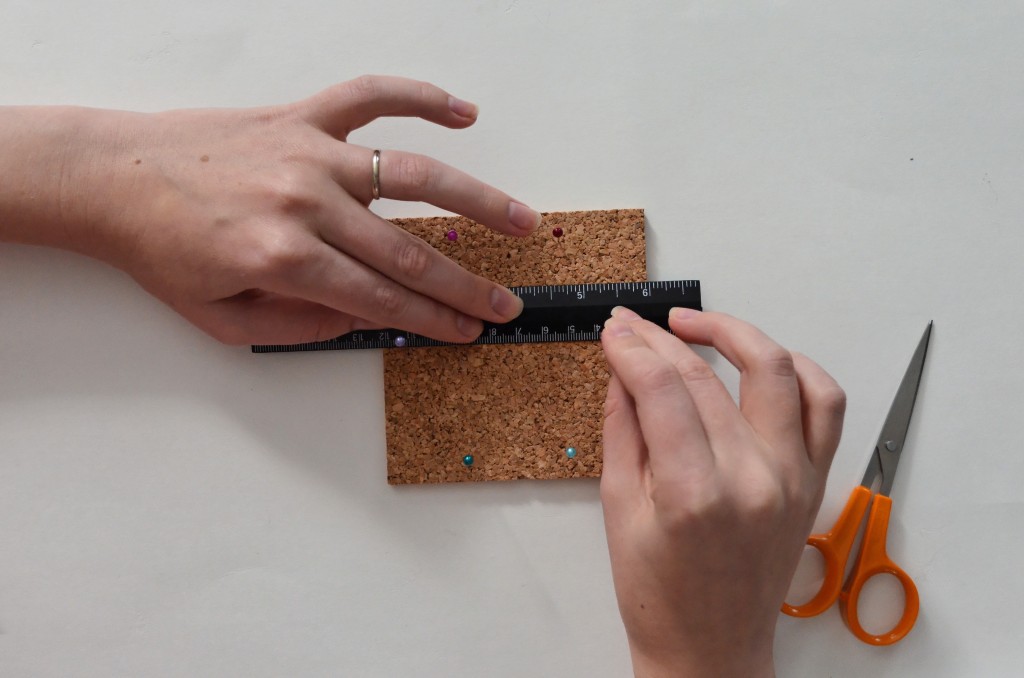
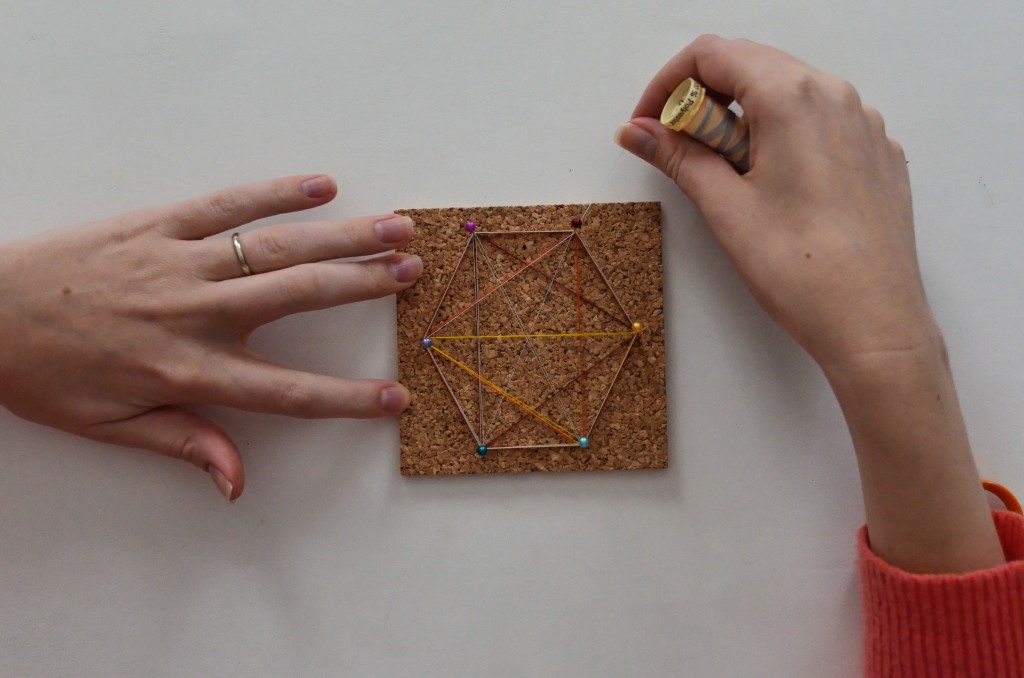
Start by forming a geometric shape with the pins in the cork tile. When you like the shape, use a ruler to measure all of your points to make sure they are equal and symmetrical. I placed my pins 1 cm in from the edge of the tile.

https://www.etsy.com/listing/97601401/cork-coasters-square-4-6-mm-14-natural?ref=favs_view_14

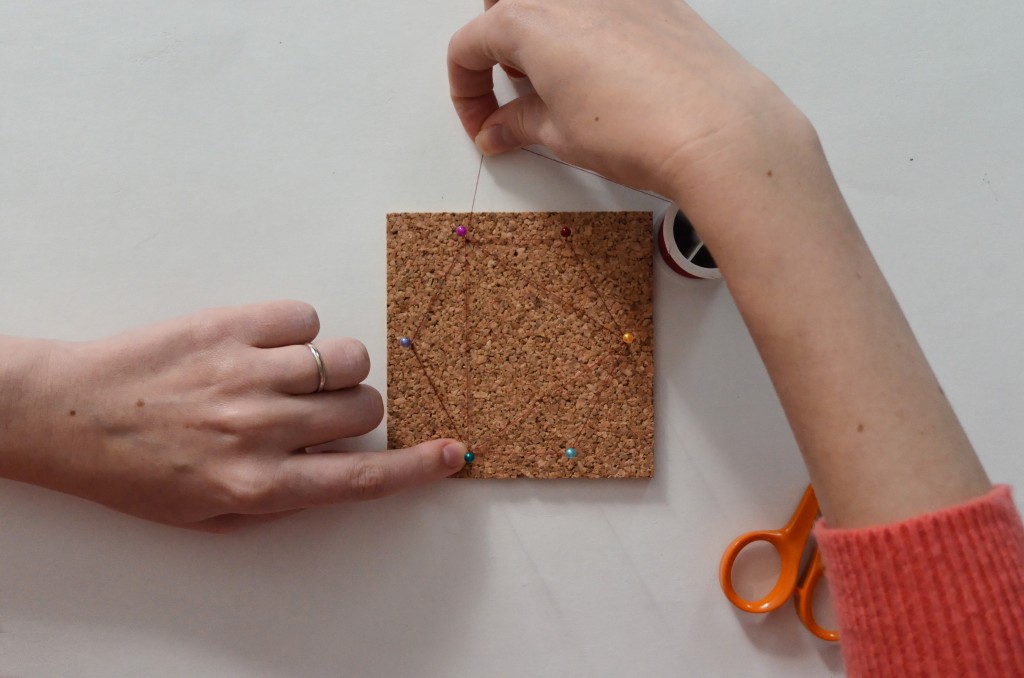
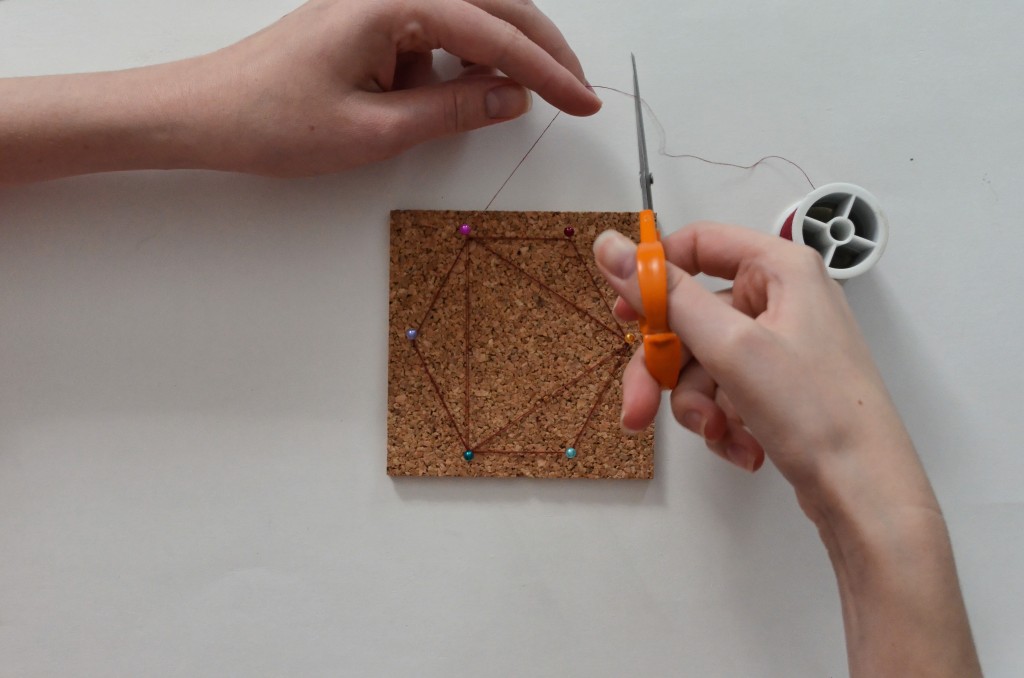
Then choose a starting point and tie the end of the thread around the pin with a double knot. Trim the excess thread. Gently push the knot down the pin until it is touching the cork tile. Now you can start wrapping the thread around the pins, doing a loop around each pin you pass, to form geometric shapes as you go. I find that wrapping the thread around the outside of the shape once before crossing through the inside works best. When you have encircled the outside and made one shape in the middle, repeat your steps so that each line you made is doubled. You should finish at the same pin as you started. Tie the thread around that pin in another double knot and trim the end.

Thread and Pin Art DIY \\ Sophster-Toaster Blog Thread and Pin Art DIY \\ Sophster-Toaster Blog

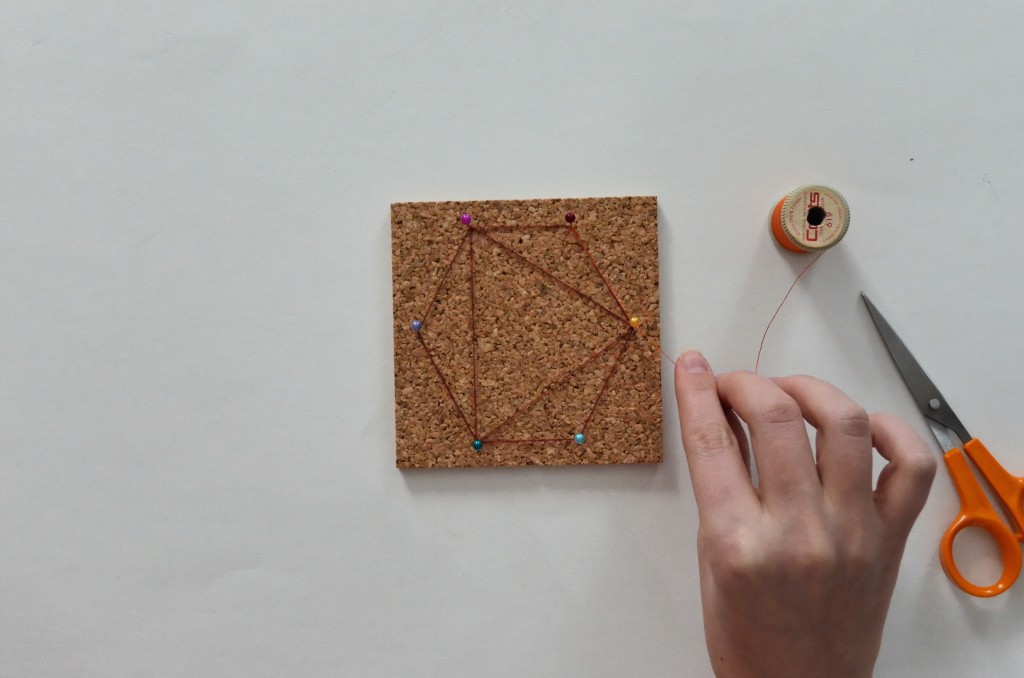
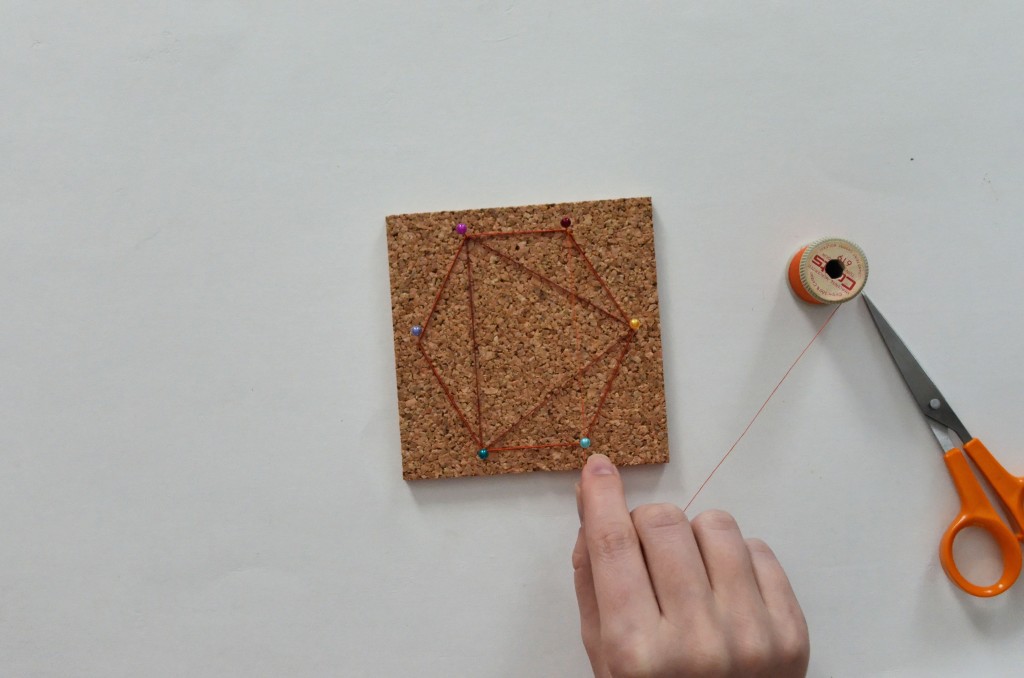
Next, choose a different colour of thread and start at the next pin over. You can make the same shape you did the first time or try a different one. I like to keep making the same shape until the lines start repeating. Some shapes will be redundant after two or three iterations and others can make it all the way around the shape before they lap over each other – memories of elementary school geometry will come flooding back.

Thread and Pin Art DIY \\ Sophster-Toaster Blog Thread and Pin Art DIY \\ Sophster-Toaster Blog

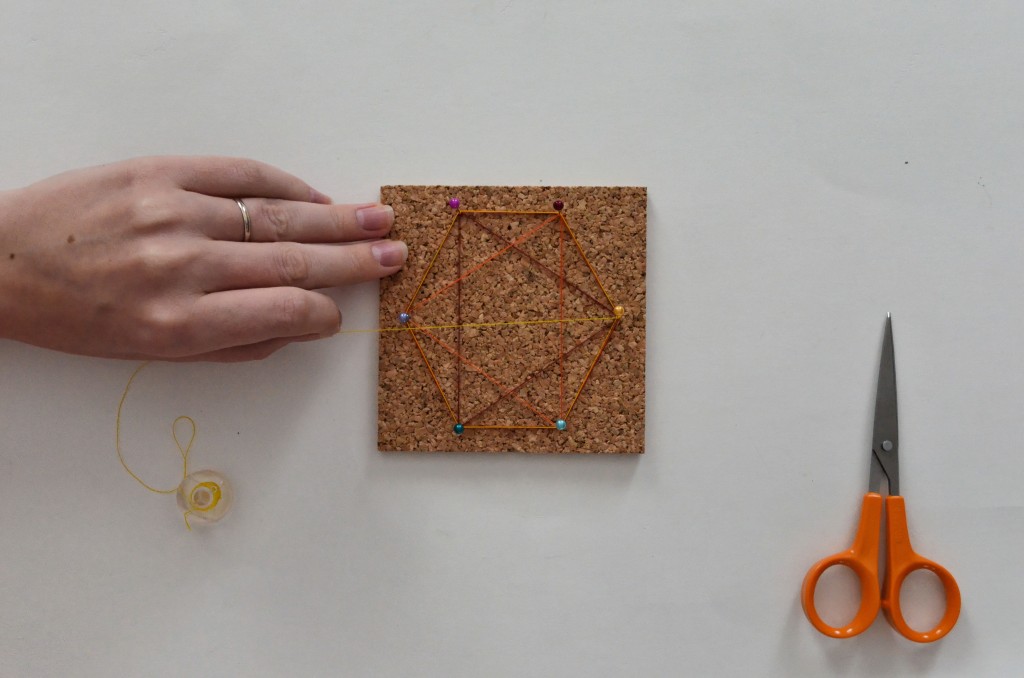
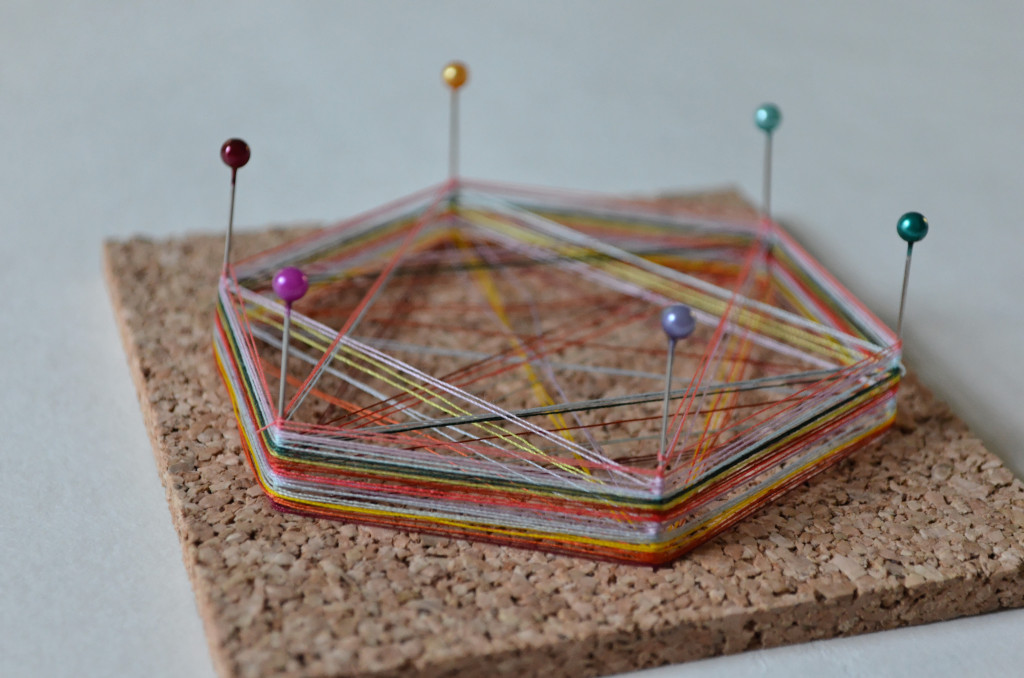
Keep repeating this process until you’ve made it back to your starting pin a few times and you are happy with your shapes and colours.

Thread and Pin Art DIY \\ Sophster-Toaster Blog Thread and Pin Art DIY \\ Sophster-Toaster Blog

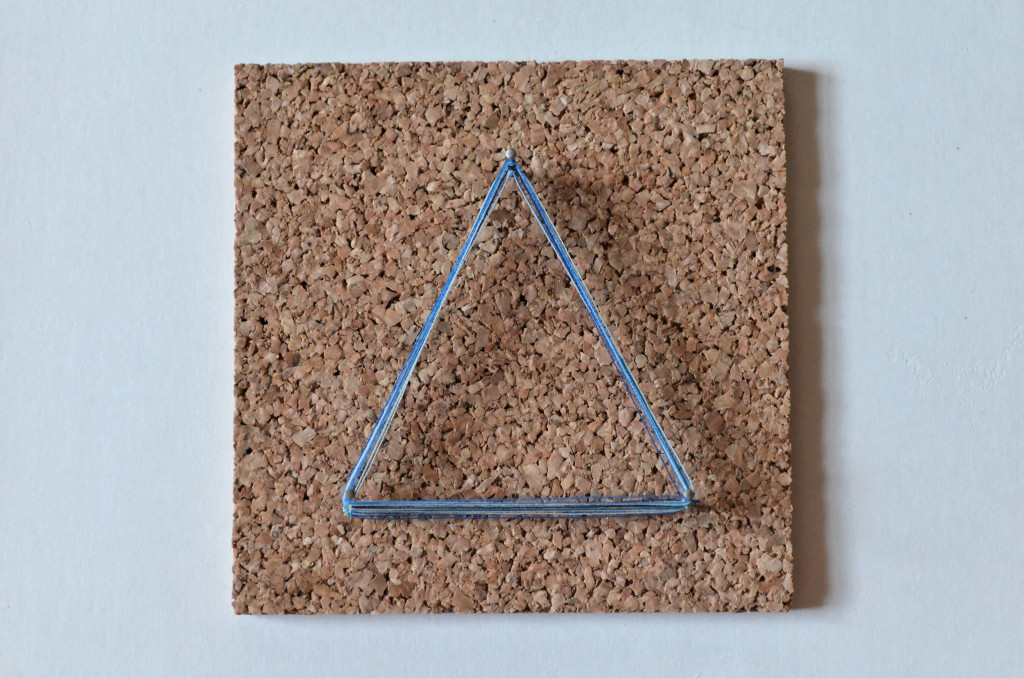
When you’re done, you’ll have something that looks like this:

Thread and Pin Art DIY \\ Sophster-Toaster Blog Thread and Pin Art DIY \\ Sophster-Toaster Blog Thread and Pin Art DIY \\ Sophster-Toaster Blog

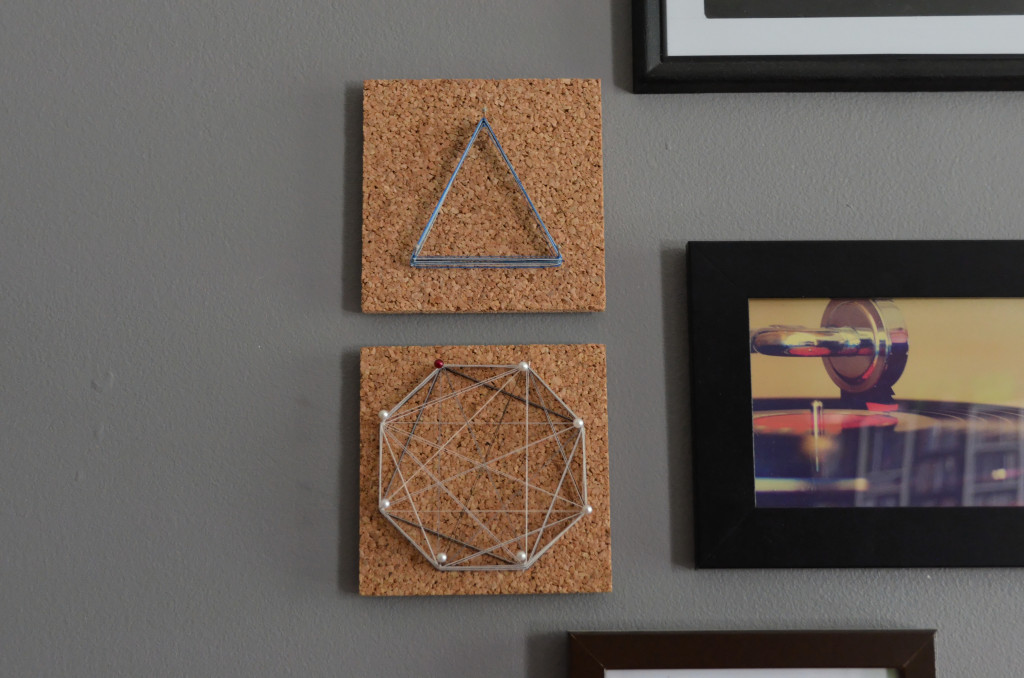
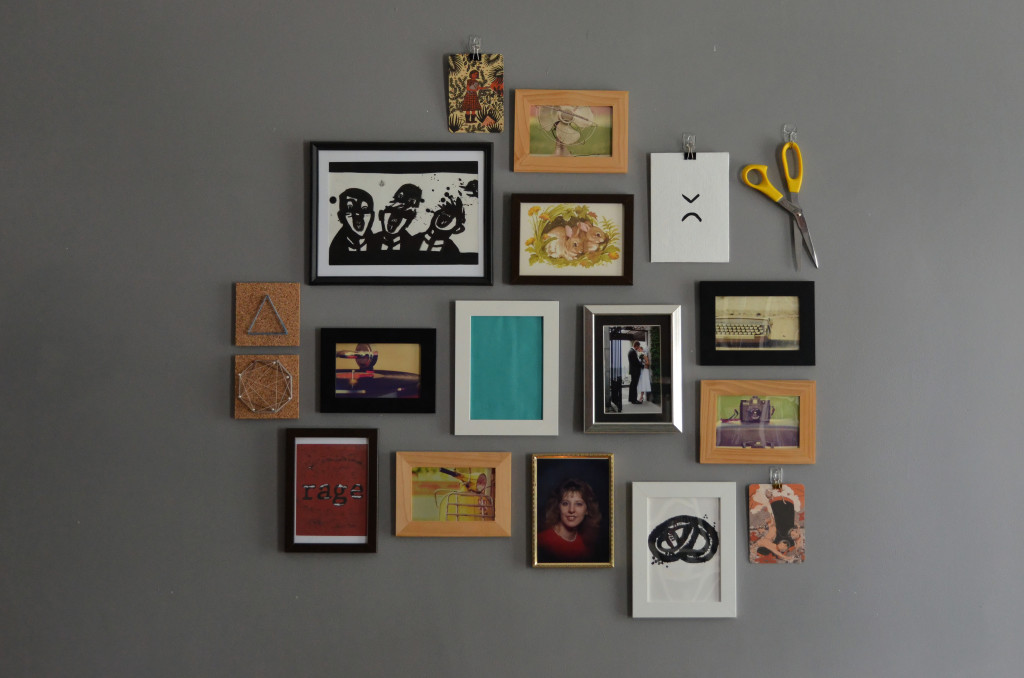
Then you can give them to friends are hang them on your wall with Command Strips.

Thread and Pin Art DIY \\ Sophster-Toaster BlogThread and Pin Art DIY \\ Sophster-Toaster Blog

All photos by me.

DIY Bounce Board

The defining challenge that separates the novice photographer from the skilled hobbyist or professional lies in making the switch from flash to natural light. Anyone can invest in expensive equipment but that fancy camera body or editing software can only take you so far before you learn the limitations and exploitable facets of natural light sources.

I find that photographing in natural, diffused daylight is especially important when it comes to Etsy listing photos. The colour, texture and three-dimensional shape of your hand-crafted items need to be accurately represented in every photo – nobody likes surprises when it comes to shopping online. Most new Etsians seem to go through the same learning curve when they take their first leaps into product photography. They start like I did, photographing things in an unused corner of a tiny apartment; the lighting isn’t great and the space and budget are limited so they use the on-board flash to light the tightly cropped scene, resulting in a brightly coloured but visually unappealing image. Next, they think they can solve every problem by moving to the exact opposite end of the lighting spectrum and taking things outdoors… into direct, harsh sunlight. Now they’ve got an image with high contrast where everything is a weird, warm yellowy-orange, casts a dark black shadow and makes your colour correction software cry. Eventually all serious Etsy sellers will figure out which lighting conditions work best, when and where they occur during the course of the day and year, and then, someday, how to tweak and tinker with the light to take full advantage of everything it’s got.

I am at the tweaking and tinkering phase. The budget is still low, as I’m sure it is with most people who are trying to get a small business off the ground, so I don’t have a sticky wad of cash to through at every photography tool that I decide I need. I’d rather save that for the important things like lenses and a sturdy tripod that won’t fall over and break those shiny new lenses. This is where DIYs come in.

I recently made a quick and cheap DIY bounce board to solve a problem I’d been frequently coming up against: my apartment, though it has many floor to ceiling windows, only has windows on one side of each room, and the rooms that I photograph in most, the kitchen and my office/studio, only have one skinny window each. I found it was hard to adequately light a scene without one side being washed out by being closer to the single light source. I wasn’t ready to invest in an professional quality artificial light source, so I needed something to help bounce the light around the room. This DIY bounce board did the trick and now I don’t take a single shot without it. Here’s how I made it:

Photography Bounce Board DIYFoam Board Foam Board

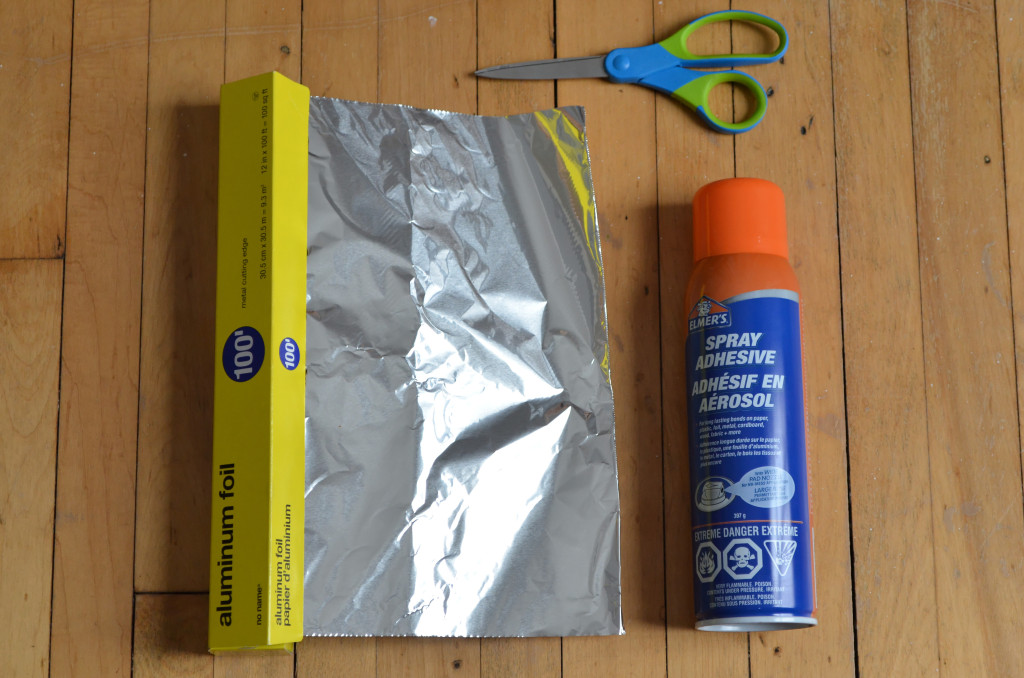
Materials

  1. aluminum foil
  2. spray adhesive
  3. scissors
  4. foam board (white)

Photography Bounce Board DIY

How to

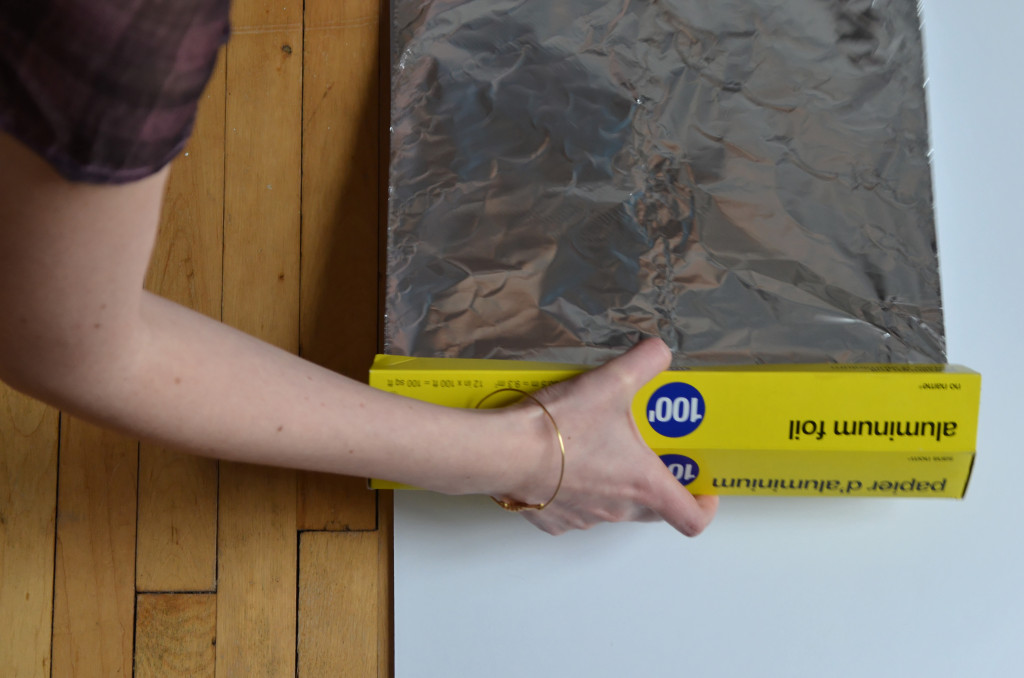
Measure and cut the lengths of aluminum foil needed to cover one side of the foam board – we’ll leave the other side white so we can have a double sided bounce board to better control the light intensity.

Spray one side of the foam board with spray adhesive, following the manufacturers instructions.

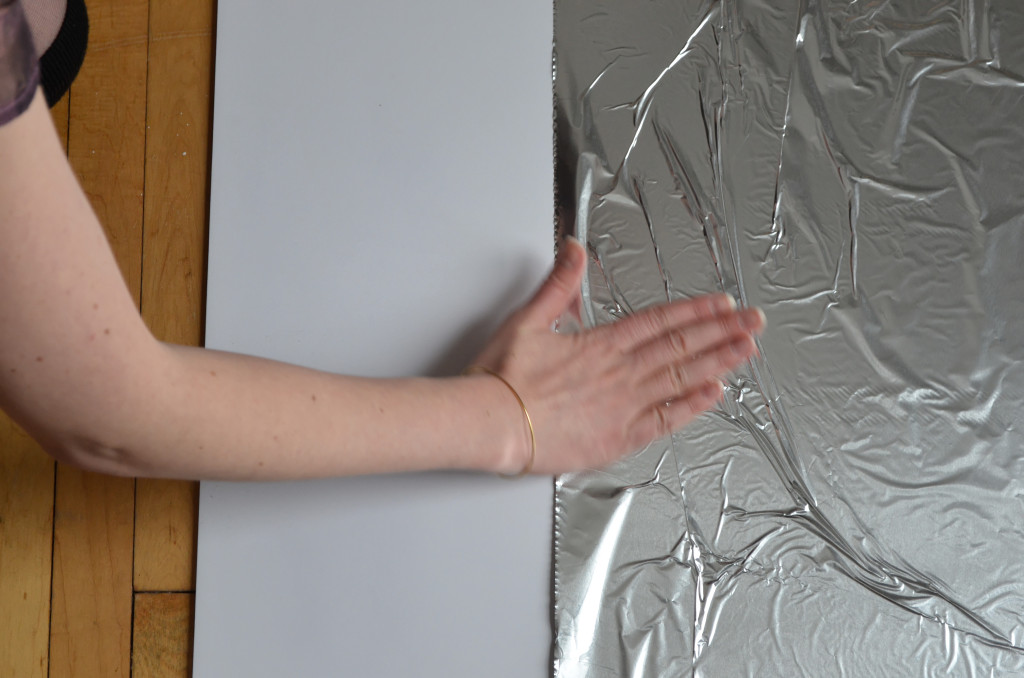
Carefully smooth the sheets of aluminum foil over the tacky (glue) side of the foam board. Trim the excess.

Photography Bounce Board DIY

Then just set up where ever you can best catch the light. I’ve been propping it up on chairs, leaning it against my tripod and wedging it in closet doorways.

Photography Bounce Board DIY